Quick Links
AWS handles firewall configuration using Security Groups. Every EC2 instance or other service with an Elastic Network Interface (ENI) uses your security group configuration to decide which packets to drop and what type of traffic should be allowed.
Security Groups Are AWS's Firewall System
Essentially, a Security Group is a firewall configuration for your services. It defines what ports on the machine are open to incoming traffic, which directly controls the functionality available from it as well as the security of the machine.
By default, every port is closed. Many firewall systems will have "DENY" rules; AWS instead blocks everything unless there is a rule specifically allowing it to go through. This means that any packet that doesn't match any rules will be dropped instantly. So, if you want to run a web server on your EC2 or ECS instance, you'll need to create a security group allowing port 80 and port 443 through the firewall.
Most instances will come with a new default security group out of the box, which you can edit individually, but if you want to, you can also create your own security groups and apply them to multiple instances. Then when you edit one group, it'll open or close ports on all the instances.
How Do Security Groups Work?
Because AWS's firewall system happens in their network, you don't have to worry about configuring
ufw
or
iptables
with commands on each server. It's handled on the Elastic Network Interface itself, which connects your instance to the network. ENIs handle traffic for EC2 and other services that use instances, like ECS and EKS. Instances can also have multiple ENIs for different network connections, which means they can also have multiple security groups for each one.
Instances can also have multiple security groups for each interface. Since AWS doesn't deny traffic, each security group will be compounded, allowing access if any of the security groups match for a specific packet.
By default, security groups allow all outbound traffic from your instance. This means it has full internet access, which is usually what you want, but in case you don't, you can deny outgoing traffic as well by removing that rule and manually specifying what kind of traffic you want to let out.
Security groups are also stateful. If you send a request going out from your instance, whatever traffic comes back from that request is allowed to come back in regardless of inbound security rules, and vice versa for requests coming in and responses going out.
Best Practices For Security Groups
Since security groups are mostly just firewalls, regular best practices for Linux servers apply here. You shouldn't create security groups with large port ranges, since it's unnecessary and just opens up more ports to attack. You should keep most ports blocked, such as FTP and CIFS ports. You should consider whitelisting SSH access to specific administrative IPs, or setting up an OpenVPN server and whitelisting access to that.
Since you can apply security groups to multiple instances, you should do so wherever possible. Using discrete groups for each individual instance can lead to misconfiguration or mismanagement. For example, you may need to close a port after an application update. If you have multiple servers with different groups, you may forget to close the port on one of them.
And, in general, you should not allow access to
0.0.0.0/0
, or "All IP Addresses", unless absolutely necessary. For many things, like databases, you should leave these closed down to the specific instances that need them.
Working With Security Groups From The AWS Console
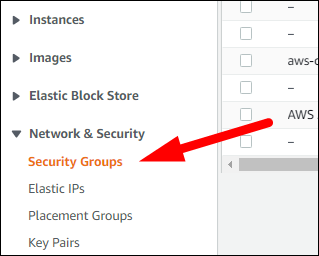
Security Group configuration is handled in the AWS EC2 Management Console. Head over to the EC2 Console and find "Security Groups" under "Networking & Security" in the sidebar.
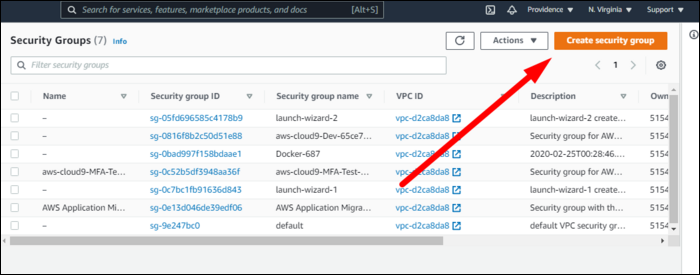
You should see a list of all the security groups currently in use by your instances. You can edit the existing ones, or create a new one:
The main configuration is simply setting Inbound and Outbound rules, mostly enabling specific inbound traffic since all outbound is enabled by default.
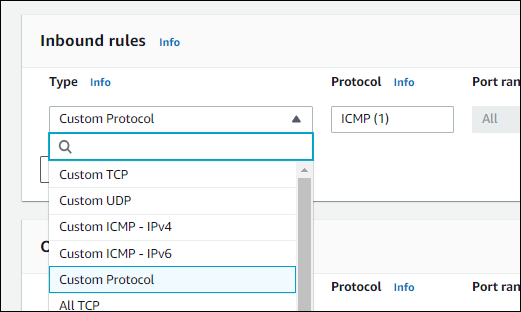
First, you'll need to configure the protocol. You can specify custom TCP/UDP ports, but there are also preset options for things like HTTP and certain databases. You can also specify ICMP or entirely custom protocols.
Then, you'll need to allow access from a specific source. You can choose "Anywhere" which will leave it open, or "My IP" which will whitelist your current machine. You can also specify custom CIDR notation for specific subnets.
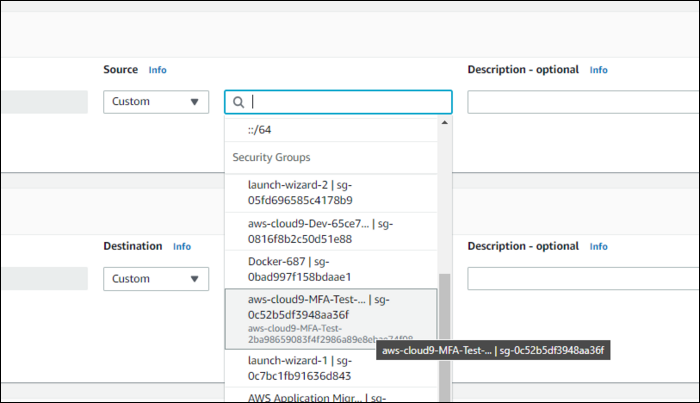
One very useful feature of the console is whitelisting access to other security groups. This takes the pain out of configuring CIDR blocks or manually adding IP addresses; any instance using the specified security group will be allowed by the rule.
Beyond that, you'll need to give it a name, and optionally a description and tag.
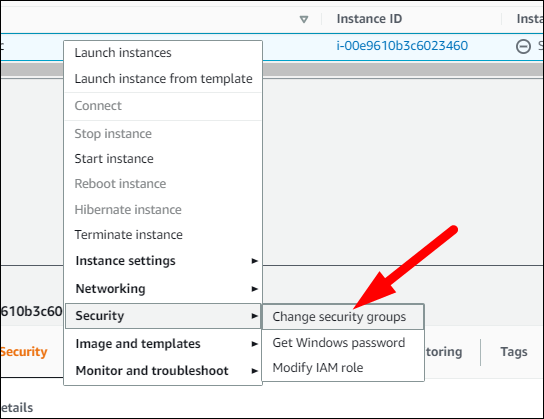
Then, you can swap your instances or services over to the new security group. For EC2 instances, you can do this from the console by right-clicking and selecting "Security > Change Security Groups."


