Quick Links
Cloudflare Workers have shown themselves to be a unique and powerful solution to serverless computing. With the new addition of CRON jobs, you can now run Cloudflare Workers on a schedule without relying on an external trigger. In this article, we explore how to set up a new script, deploy that script to Cloudflare, and ultimately trigger that script with a CRON job.
Getting Started with Wrangler
Before we can deploy a new script to Cloudflare, we need to get the Wrangler command-line tool installed and configured to deploy our new worker script.
Installing the Wrangler Command-Line Tool
To create a site deployment, Cloudflare has created the Wrangler command-line tool. Wrangler requires installation via either NPM (NodeJS package manager) or Cargo (Rust language package manager).
NPM Installation
npm i @cloudflare/wrangler -g
Cargo
cargo install wrangler
cargo install wrangler --features sys-openssl
Wrangler Login and Site Creation
First, we are going to login to Cloudflare using Wrangler. To do this we use the new wrangler login feature. This will prompt for a webpage to open, and if you are already authenticated in Cloudflare, the authentication will happen very quickly. Otherwise, log in and Wrangler will configure the API token automatically.
wrangler login
As you can see from the configuration location, there is a .toml file that now contains your API token to make all subsequent operations seamless. This file is contained in the user's home directory and stored in the sub-directory .wrangler\config\default.toml.
Creating a Cloudflare Worker Script to Query WordPress CRON
In this article, we are going to create a simple Cloudflare Worker that will merely query the wp-cron.php file on a schedule. The way that WordPress works is that on a page request it will attempt to run any internal CRON jobs that are defined. This means that jobs are run only on occasion with a low volume site, and can be detrimental to a high-volume site. This may not always be feasible on some hosting, so you can define the same setting but externally trigger the WordPress CRON system.
We need to disable the default WordPress CRON setup by using the following configuration in wp-config.php. This takes effect the moment that the file is saved.
define('DISABLE_WP_CRON', true);
Typically, worker scripts are only triggered when they are called. In this case, we will be scheduling a CRON trigger to run this every five minutes.
Cloudflare Workers scheduled by CRON triggers will run on underutilized machines to make the most efficient use of resources.
Creating the CRON Trigger Configuration
Cloudflare Worker CRON triggers use the familiar Unix CRON syntax. This makes it immediately familiar and with a wealth of learning resources behind it. You can even define multiple CRON triggers for a single worker script, up to a current limit of three. The configuration syntax looks like the below code that shows a trigger running every 5th minute.
[triggers]crons = ["*/5 * * * *"]
Now that we have our trigger configuration how do we put everything together to deploy our script to the Cloudflare environment?
Deploying the WordPress CRON Script and Scheduling the CRON Job
To create all the necessary files and set up a simple javascript worker, we can use the built-in generate command that wrangler has. This will create a directory named, wordpress-cron that contains everything needed to deploy a javascript based worker.
        # Generate simple javascript Cloudflare Worker scaffold
wrangler generate wordpress-cron
Next, modify the index.js file that is generated. Within the script, we will simply call the wp-cron.php file with the parameter of doing_wp_cron. When this is called, any CRON jobs that need to be run will be.
        addEventListener("fetch", event => {
  return event.respondWith(
    fetch("<https://mysite.com/wp-cron.php?doing_wp_cron>")
  )
})
Finally, you will need to update your wrangler.toml file to include the necessary information. Update the configuration file to include your acccount_id and zone_id. To get these values, locate the main dashboard of your site and scroll down to find the API section. Both the account ID and zone ID will be located there.
        name = "wordpress-cron"
type = "javascript"
account_id = "account_id"
workers_dev = false
route = "*mysite.com/wordpress-cron*"
zone_id = "zone_id"
[triggers]
crons = ["*/5 * * * *"]
This route will match any protocol, http or https, and any additional parameters or paths beyond the wordpress-cron section. Feel free to make this whatever you would like. In reality, this allows you to manually trigger the script, but the CRON trigger will handle it most of the time.
Finally, we need to deploy this worker, which you can do so using the publish command as shown below.
wrangler publish
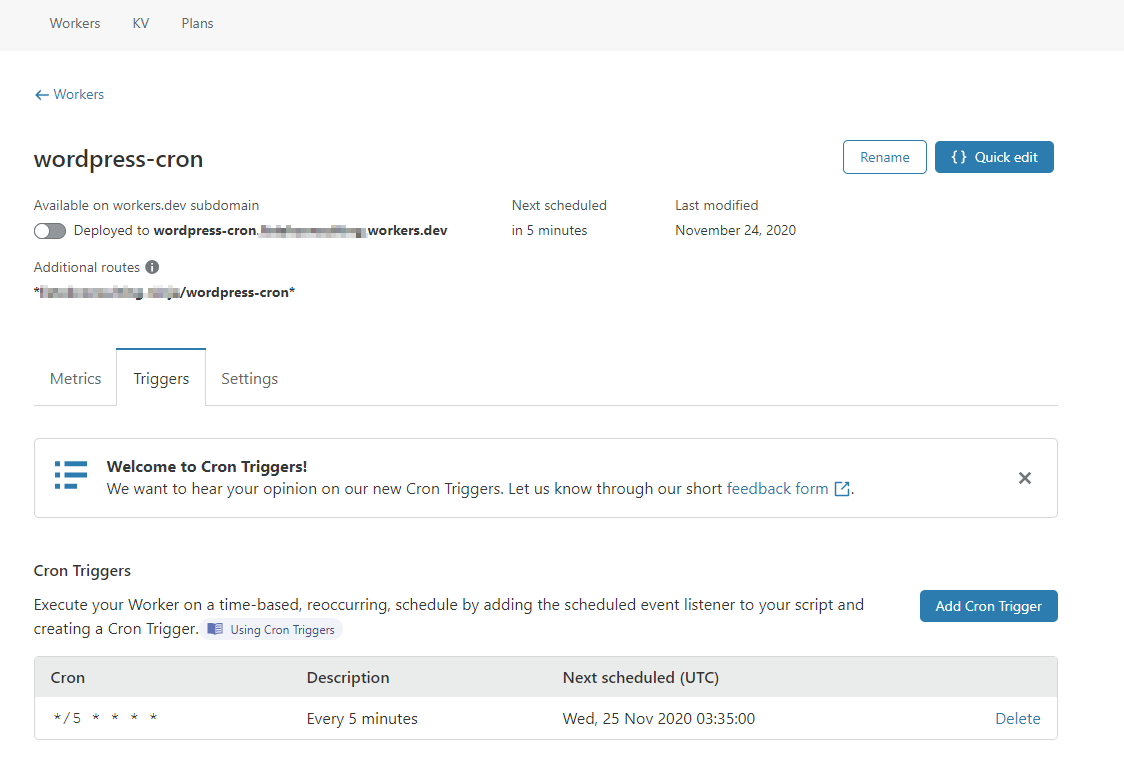
Once the script has been deployed and had its first run, you can see statistics and information on the Cloudflare Workers dashboard page.
Conclusion
This simple example of using CRON triggers with Cloudflare Workers is merely scratching the surface of the possibilities. Start exploring Cloudflare Workers and how this serverless technology can fit into your workflow today!


