Quick Links
Flutter is a Google development platform that lets you write cross-platform mobile apps using one codebase. Apps are developed in Dart, a typed and object-oriented language that compiles to either native code or JavaScript. This means you can target Android, iOS, desktop operating systems, and the web with a single Flutter project.
Flutter comes packaged with a React-like framework for declaratively defining interfaces. It also ships with built-in Material Design and iOS-like components that let you quickly layer up a new interface. Developer ease-of-use is further enhanced by robust integrations with IDEs, live debugging tools, and testing libraries.
Flutter's popularity has rapidly grown over the past few years as more developers have been tempted by its unified approach. Here's how to start your own Flutter development environment with Android Studio on a Linux machine.
Downloading Android Studio
Begin by downloading and installing the Android Studio IDE. Android Studio is based on JetBrains' IntelliJ IDEA and is the official development environment for the Android platform. When augmented with the Flutter plugin, it also provides a first-class development experience for Flutter apps.
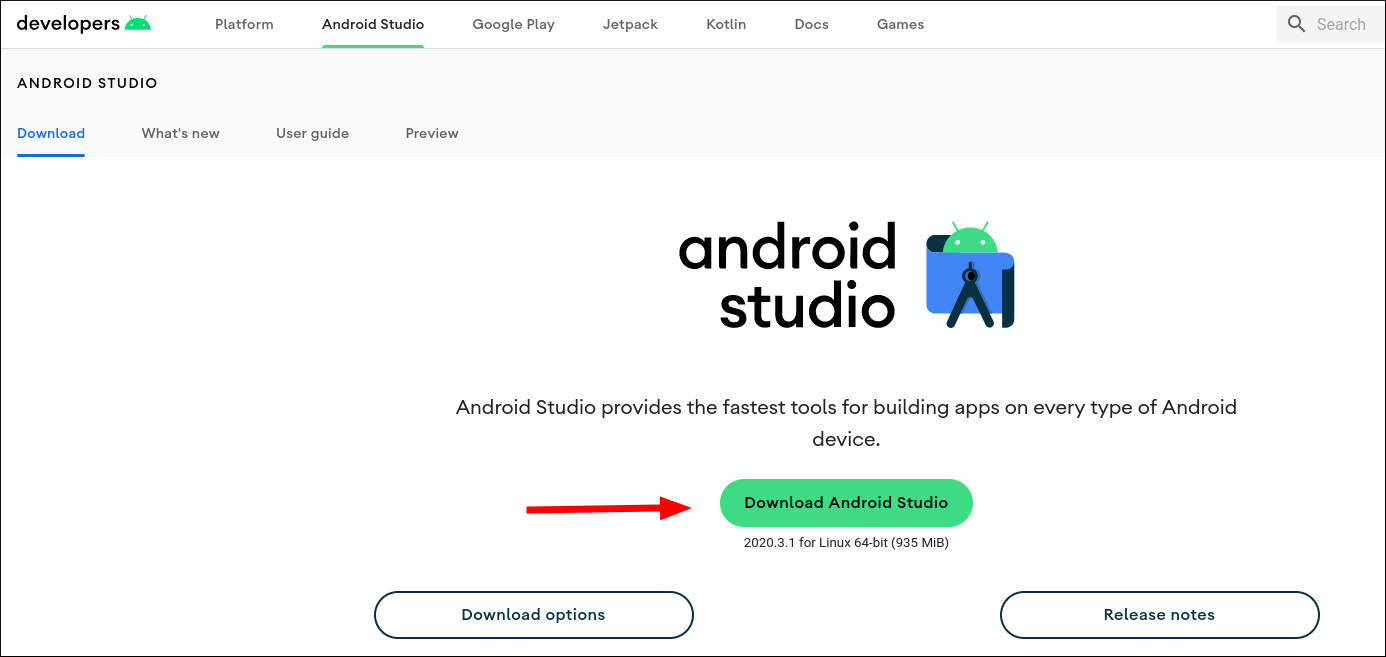
Head to the downloads page and grab the latest Studio release for Linux. You'll be prompted to accept a license agreement before the download begins.
Extract the archive once the download's complete. The unpacked directory tree contains everything needed to run Android Studio - there's no separate installation script. For this reason, it's often best to extract to a directory that's commonly used to store applications.
        tar -xf android-studio-* -C /opt/android-studio
chown -R $USER:$USER /opt/android-studio
To launch Android Studio, run the studio.sh script inside the bin directory. Add this directory to your path if you'll be using the IDE regularly. Otherwise you'll need to specify the full path on every launch:
/opt/android-studio/bin/studio.sh &
The trailing ampersand means you'll be able to close your shell and keep using Android Studio.
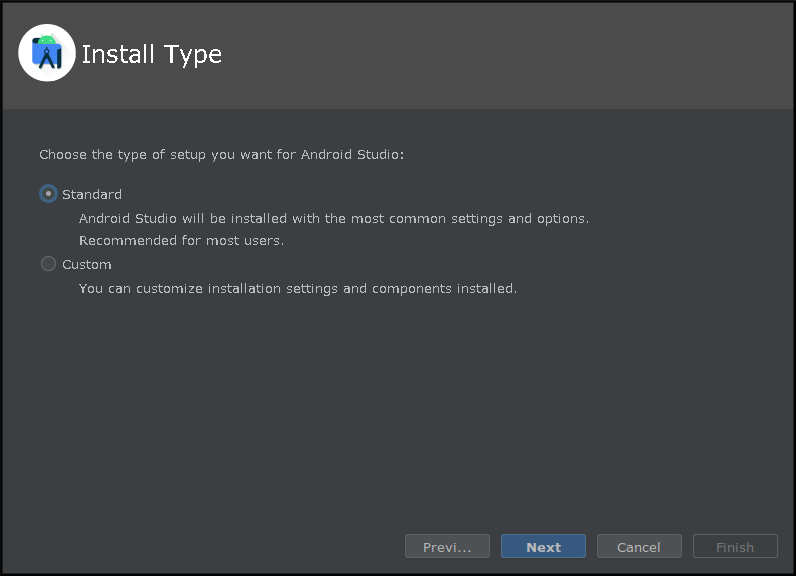
Follow the first run setup wizard to configure your IDE. For the purposes of this tutorial, you can accept the defaults and create a "Standard" installation. This will automatically download a recent Android Emulator release and the Android build tools. These will be useful later when it comes to debugging Flutter apps.
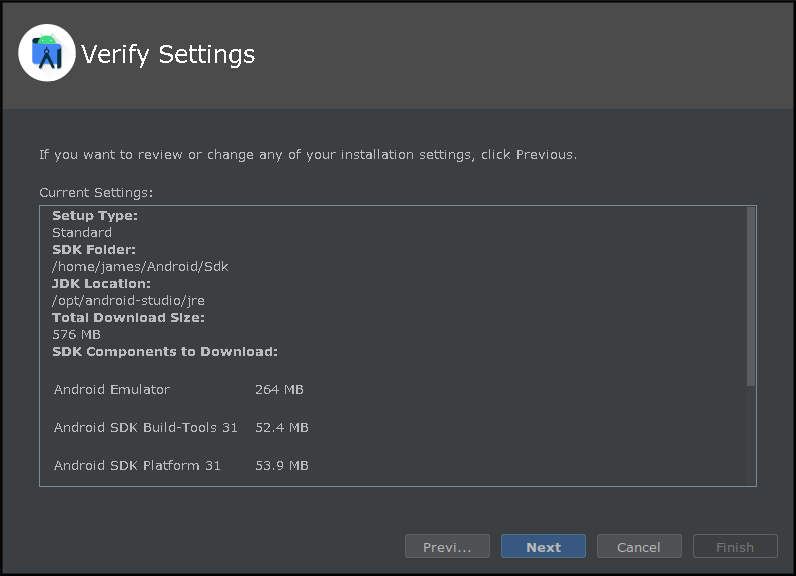
Once you reach the "Verify Settings" screen, confirm that Android Studio is going to install the SDK, JDK, Emulator, Build Tools, and Platform Tools. If everything looks good, click the "Next" button to begin the download. This may take a while depending on the quality of your internet connection. Once it's done, Android Studio will launch.
Downloading Flutter
The Flutter SDK should be added to your system outside of Android Studio. As a Linux user, it's easiest to get the SDK directly from the Git repository. You can switch between versions by checking out to different branches.
Choose where to locate the SDK on your system, then use Git to download the latest stable release:
        mkdir ~/.flutter-sdk
cd ~/.flutter-sdk
git clone https://github.com/flutter/flutter.git -b stable
Add the bin directory within the SDK to your path. This will let you use the flutter command in your terminal. Run flutter now to complete the SDK setup. The command will download the full Dart and Flutter SDKs and then build the main CLI utility. It may take a few minutes to complete.
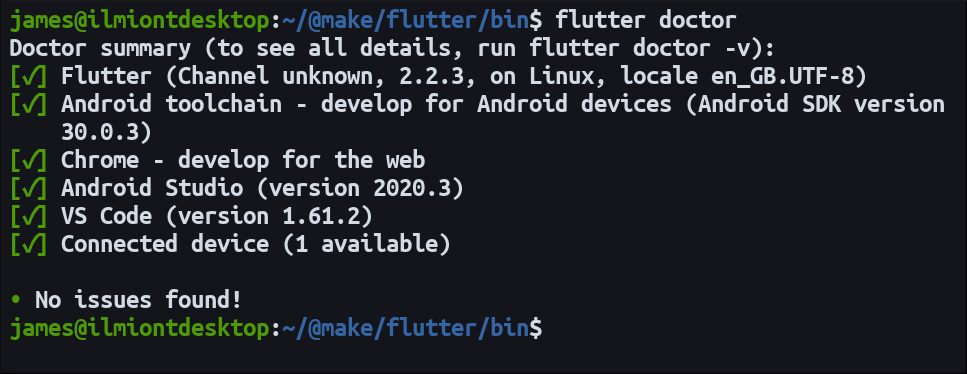
Next run flutter doctor to check the SDK's ready to use. This command will confirm you've got the Android SDK installed so you can build and deploy your Flutter apps. If any of the checks fails, use the provided URLs to debug what's wrong. One common warning is "Android license status unknown" - this can be rectified by running flutter doctor --android-licenses to accept the SDK's license terms.
Once flutter doctor shows that "Flutter" and "Android Toolchain" are working, you're ready to move back to Android Studio. An optional step beforehand is running flutter precache which can accelerate future builds. This downloads platform-specific binaries for iOS and Android ahead of time, reducing the compile duration of your first build.
Adding Flutter Support to Android Studio
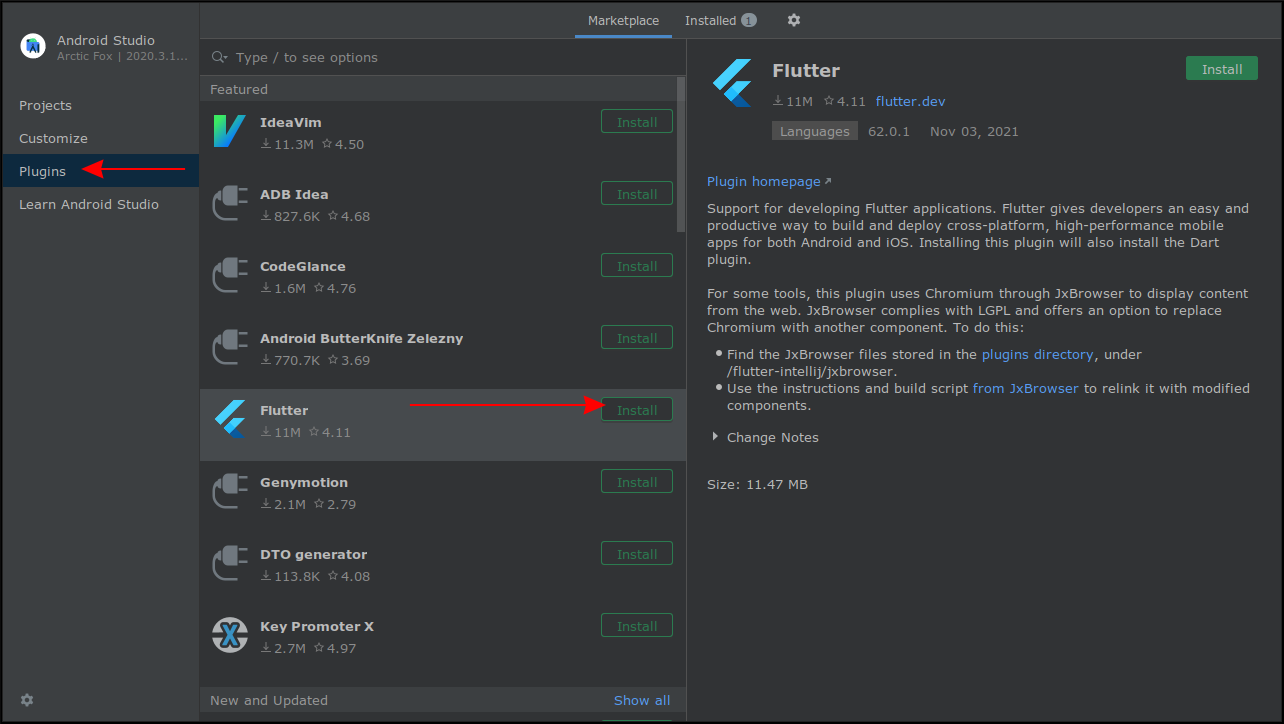
It's time to get Flutter working with Android Studio. On the Android Studio homescreen, click the Plugins link in the left menu. The Flutter plugin is usually visible near the top of the Featured list. Try using the searchbar if you don't see it.
Click the green "Install" button next to the plugin's name. You'll be prompted to also install the Dart plugin. This adds editor support for the Dart programming language. Acknowledge the prompt and add both plugins to Android Studio. Wait while the download completes, then press the green "Restart IDE" button to apply your changes.
Creating a Flutter App
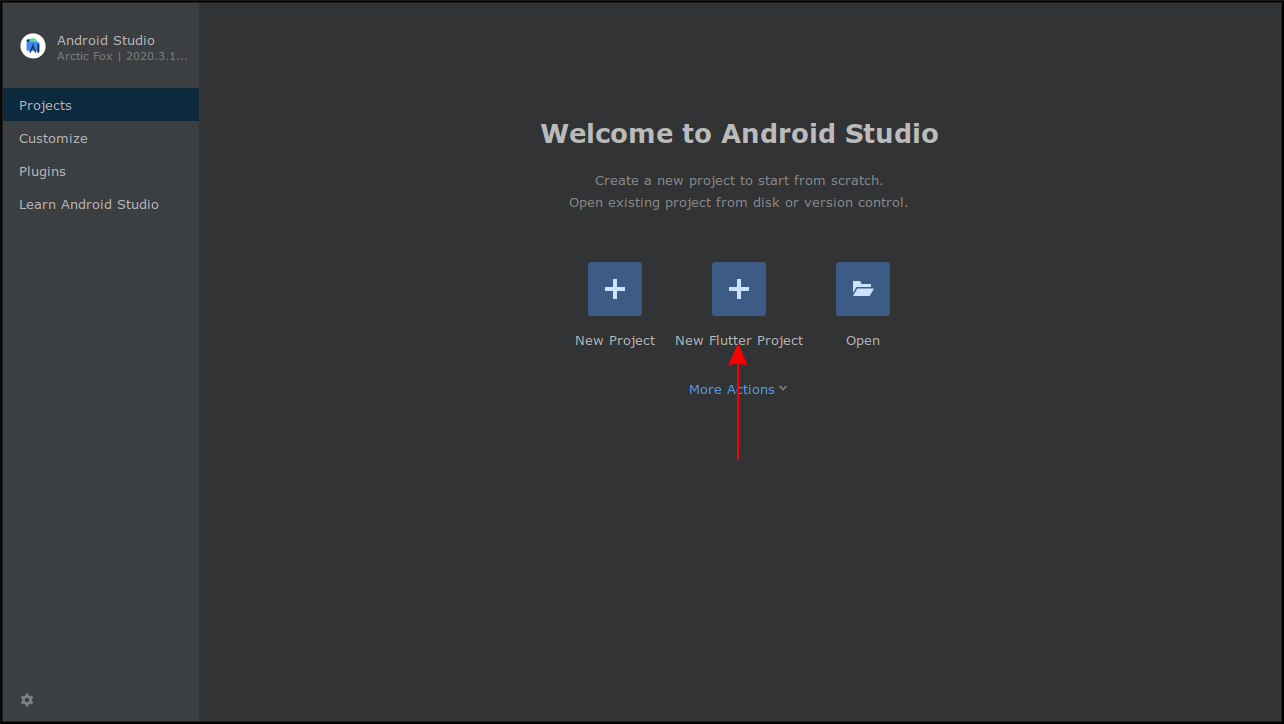
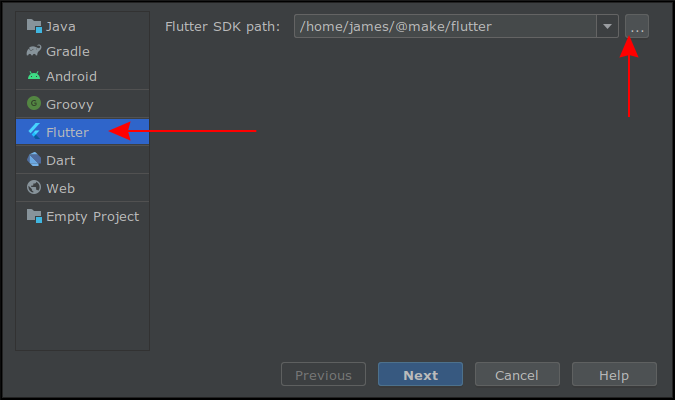
The Flutter plugin modifies the Android Studio homescreen with an extra "New Flutter Project" button. Click this now to start your first Flutter app. Although this shortcut is meant to default to working with Flutter, sometimes the following popup dialog ends up on the wrong tab. Make sure "Flutter" is selected in the left sidebar.
On the right side of the popup dialog, use the file-picker to supply the Flutter SDK path. This is the directory created by the git clone command earlier. You can change it later by opening your project, then navigating to the Android Studio settings and choosing Languages & Frameworks > Flutter.
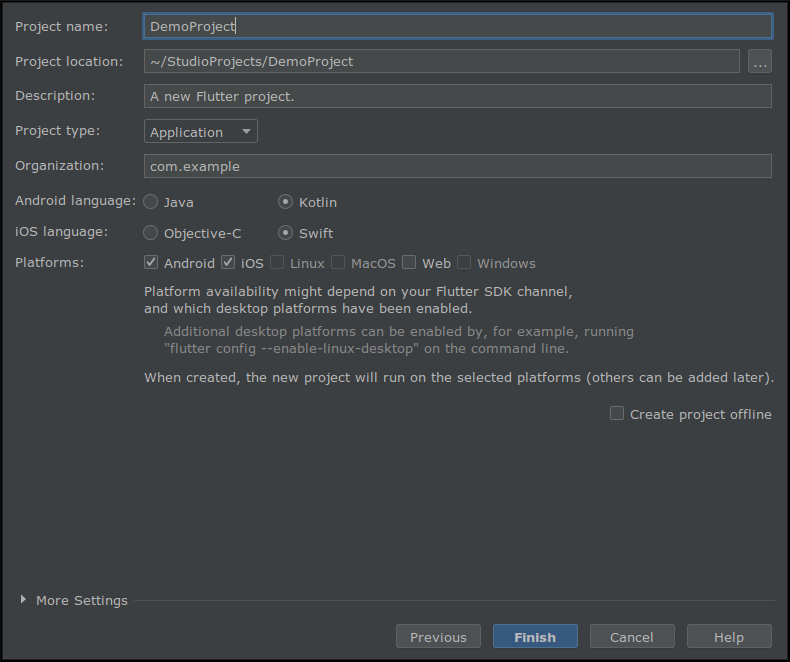
Name your project and choose a storage location on the next page. The project name must consist of alphanumeric lowercase characters and underscores. Under Organization, supply a reverse DNS-notated namespace for your app, such as com.example.myapp.
You can usually leave the Android and iOS languages at their defaults of Kotlin and Swift respectively. These define the languages you'll use to write platform-specific native components. You should only change this if you already know you need to.
Finally use the "Platforms" checkbox to select the operating systems you want to target. At this stage, only iOS, Android, and Web will be available. Windows and macOS are not supported when you're developing on Linux. You can enable Linux desktop support by running the flutter config --enable-linux-desktop command in your terminal and restarting Android Studio.
Once you're done configuring your project, click the "Finish" button to create it. The creation process may take a few seconds while Android Studio prepares the project, downloads any extra dependencies, and indexes the initial source to discover code symbols.
Running Your Project
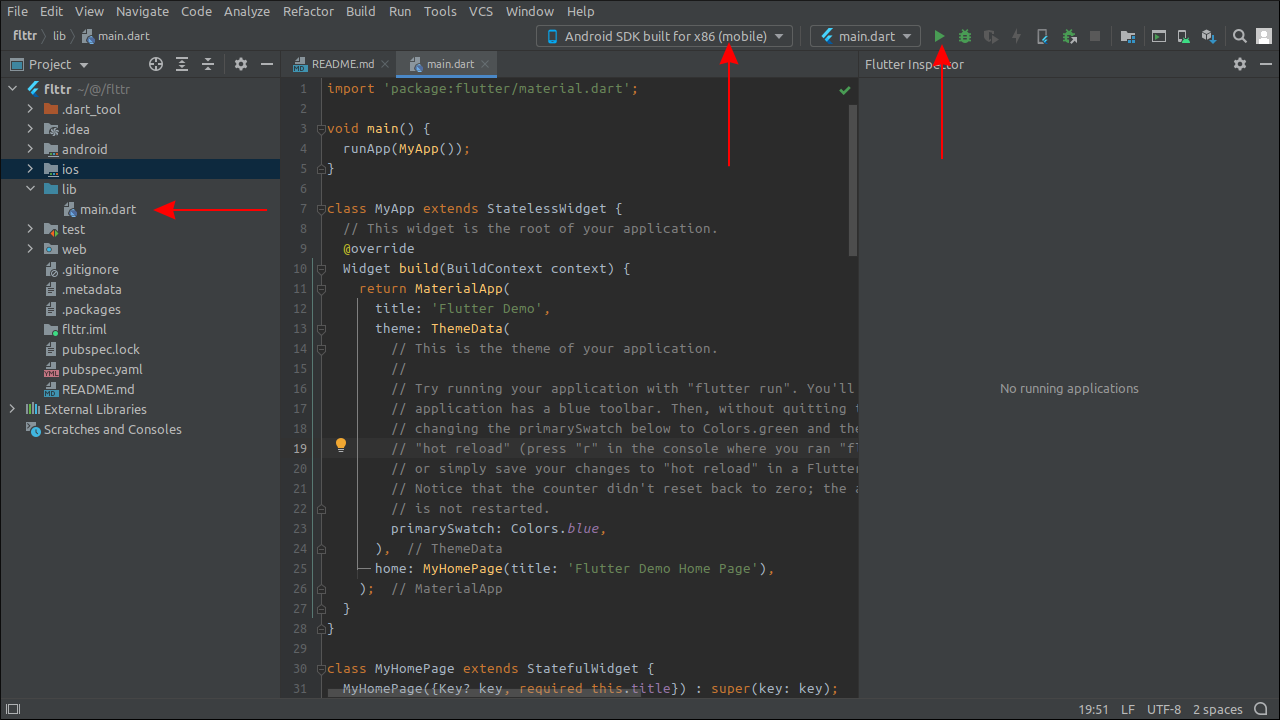
The IDE will open toREADME.md. You can find the default Flutter sample app's source file in lib/main.dart. The android, ios and web directories in your project folder store platform-specific content such as manifest files, icons, and toolchain configurations.
Run your application by pressing the green play button in the toolbar or using the Shift+F10 keyboard shortcut. This will default to running the web version of your project in Chrome. If you've got an Android device to hand, connect it to your machine with USB debugging mode enabled to activate Android Studio's on-device debugging. Select your device from the dropdown menu in the toolbar, just across from the play button.
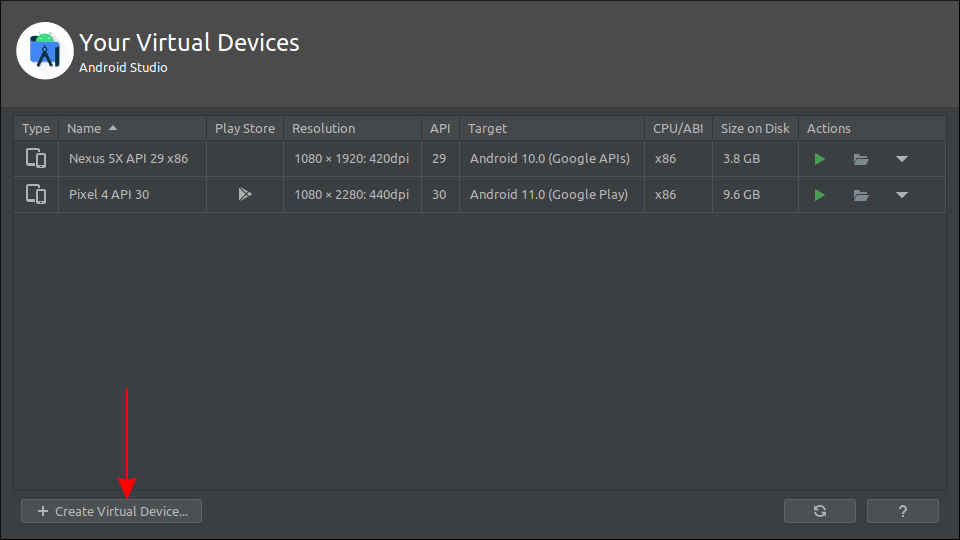
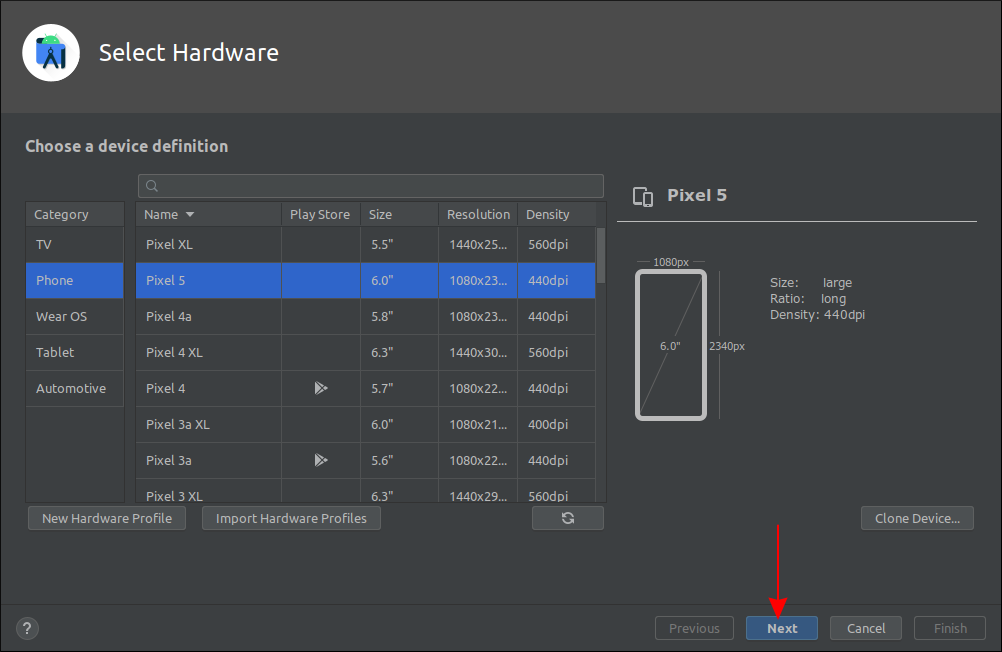
To use an emulated device, head to Tools > AVD Manager in the top menu bar and press "Create Virtual Device" in the bottom left. Follow the prompts to configure your new device with hardware properties and an Android release.
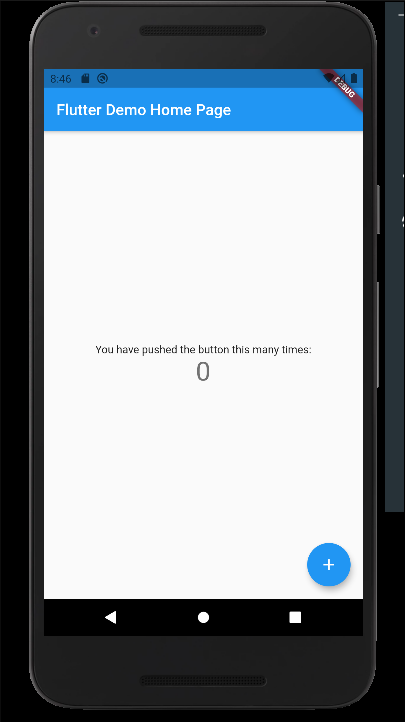
Once you've finished the process, your device should show up in the dropdown in the build toolbar. Now you're ready to develop your app using Android Studio with either a physical or emulated Android phone.
Summary
While Flutter is simplifying cross-platform app development, the getting started experience is still relatively involved. Using Flutter on Linux requires a multi-step process of installing Android Studio, downloading the Flutter SDK, and then linking the two together. You also need the full Android SDK and a functioning Android emulator image.
Following the procedure in the correct order will result in a functioning environment but don't underestimate the impact that your device and network can have. You'll have multiple gigabytes of data to download and several SDKs to extract and compile, which can be time-consuming on older hardware or a slow Internet connection.
Once your IDE's operational, the Flutter docs are your best reference for writing your app and creating production builds. Beware that it's not possible to compile your iOS release on Linux - you'll need to have access to a Mac, either via physical hardware, a virtual machine, or a cloud-hosted CI building solution.

