Quick Links
The nmcli command lets you tap into the power of the Linux NetworkManager straight from the command line, making it perfect for servers with no desktop environment and remote SSH shell administration.
The nmcli Command
The nmcli command isn't new, it was released in 2010. Together with the ip command, it replaces the venerable---but deprecated---
ifconfig
. Old habits die hard, and many sysadmins still use
ifconfig
. They already know how to use it, there's no learning curve, and they just need to get the job done. So why learn yet another tool?
Well, eventually,
ifconfig
will be dropped by the distributions so it's a change that is coming, like it or not. But nmcli has some neat tricks all of its own that make it worthwhile finding out what it can offer.
The ncmli Concepts and Syntax
Like all CLI commands, nmcli accepts command line parameters. The parameters are grouped into three categories.
-
Options: These modify
nmcli's behavior -
Sections: These tell
nmcliwhich set of actions you are invoking. Think of sections as collections of commands. -
Actions: These tell
nmcliwhat you want it to do. Think of them as commands.
The general syntax format is:
nmcli <options> <sections> <action>
But note that you don't always need all three sets of parameters for every command. The nmcli sections are:
-
Help: Provides short help texts on the
ncmclicommands - General: Retrieves the status and configuration of NetworkManager
- Networking: Queries, enables, or disables network connections
- Radio: Queries, enables, or disables Wi-Fi network connections
- Monitor: Monitors NetworkManager and status changes of network connections
- Connection: Directly manipulates network interfaces, including enabling and disabling them, adding new connections, and removing existing connections
- Device: Modifies network device parameters and connects or disconnects a device from an existing connection
-
Secret: Registers
nmclias a NetworkManager secret agent. Becausenmclidoes this automatically, this is very rarely used.
First Steps with nmcli
Let's make sure NetworkManager is installed, running, and we can connect to it with nmcli. We'll use the status action from the general section.
nmcli general status
Actually, status is the default action for general, so we could have left that word off the command. But we've verified that nmcli ---and therefore NetworkManager---is installed and operational. Let's find out a bit more about this computer.
We can list all of the in-memory and on-disk network connection profiles using the show action from the connection section:
nmcli connection show
The output is wider than the terminal window. Our results were:
NAME UUID TYPE DEVICE Wired connection 1 d2864443-9cee-31ec-ab2e-55e9ebddd53e ethernet enp0s3 ethernet-enp0s8 9aad8efa-3427-4a5c-bef5-270340cd33d0 ethernet enp0s8 ethernet-enp0s9 5bc49cef-bc3d-4832-9073-460b408932b6 ethernet enp0s9
The test machine used for this article is running a pre-launch version of Ubuntu 21.10. It has three network adaptors installed in it, named enp0s3, enp0s8, and enp0s9.
Understanding the Plumbing
A network connection allows your computer to communicate over a network to another device. Internally, nmcli holds all the information regarding a network connection in a data object it calls a connection.
An nmcli connection encapsulates all of the information related to that connection, including data link layer and IP addressing information. You can think of nmcli's connections as the configuration details for real-world network connections.
To reach the outside world a connection must use a networking interface device, such as a network card. A connection is bound to a device. When a device is active and able to receive or transmit data, the connection is said to be active or up. The corresponding inactive state is called, unsurprisingly, inactive or down.
Adding Network Connections
With nmcli you can create a network connection and set some of its configuration options with a single command. On this test computer, there is no connection on enp0s8 , the name for our wired connection (ethernet) number 2. We'll add a connection to enp0s8. Because we're making system changes, you'll need to use sudo:
sudo nmcli connection add type ethernet ifname enp0s8
This command uses the add action from the connection section. We used the type option to request an ethernet connection, and the ifname (interface name) option to specify the network interface device we want this connection to use.
Let's check what's happened:
nmcli connection show
NAME UUID TYPE DEVICE Wired connection 1 d2864443-9cee-31ec-ab2e-55e9ebddd53e ethernet enp0s3 ethernet-enp0s8 9aad8efa-3427-4a5c-bef5-270340cd33d0 ethernet enp0s8 ethernet-enp0s9 5bc49cef-bc3d-4832-9073-460b408932b6 ethernet enp0s9 ethernet-enp0s8-1 b874aa09-3a25-4f52-b20b-1b95d9741be9 ethernet --
Our new connection, ethernet-enp0s8-1 , has been created. Its universally unique identifier (UUID) has been assigned, and the connection type is ethernet. We can now make it active with the up command. The up command must be followed by the connection name or its UUID:
nmcli connection up ethernet-enp0s8-1
Let's check our active connections once more:
nmcli connection show --active
NAME UUID TYPE DEVICE Wired connection 1 d2864443-9cee-31ec-ab2e-55e9ebddd53e ethernet enp0s3 ethernet-enp0s8-1 b874aa09-3a25-4f52-b20b-1b95d9741be9 ethernet enp0s8 ethernet-enp0s9 5bc49cef-bc3d-4832-9073-460b408932b6 ethernet enp0s9
Our new connection, ethernet-enp0s8-1, is now active and bound to the enp0s8 network interface device.
Adjusting Connections
Of course, ncmli lets you change the parameters of existing connections too. Suppose we want to switch a network interface from Dynamic Host Configuration Protocol (DHCP) to using a static IP address. To match our network, we need a fixed IP address of 192.168.1.40 for our new connection.
To achieve that, you need to issue two commands. One to set the IP address, and one to set the connection's method of obtaining an IP address to manual:
nmcli connection modify ethernet-enp0s8-1 ipv4.address 192.168.1.40/24
nmcli connection modify ethernet-enp0s8-1 ipv4.method manual
The "/24" we're providing with the IP address is the subnet mask in Classless Inter-Domain Routing (CIDR). In this context "/24" means "255.255.255.0."
The changes won't take effect until the connection is "bounced." That is, disabled and brought back online. The first command takes the connection down and the second brings it back up.
nmcli connection down ethernet-enp0s8-1
nmcli connection up ethernet-enp0s8-1
If you want to reverse the change and move from a static IP address to a DHCP IP Address, use the auto option instead of manual.
nmcli connection modify ethernet-enp0s8-1 ipv4.method auto
Device Management
The nmcli device section contains actions (commands) that let you manage the network interfaces installed on your computer. To see the status of all the network interfaces on your computer use:
nmcli device status
Showing Device Details
To examine the details of a network interface, we use the show action from the device section. If you do not provide a device name, the details of all devices are retrieved and displayed. You can scroll and page up and down to review them.
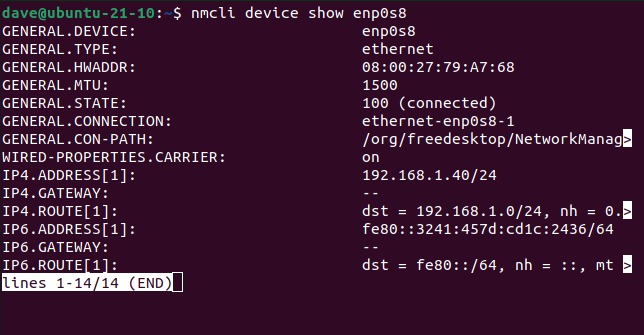
Let's take a look at enp0s8, the device our new connection is using. We can verify that the IP address in use is the address that we previously requested.
nmcli device show enp0s8
GENERAL.DEVICE: enp0s8GENERAL.TYPE: ethernetGENERAL.HWADDR: 08:00:27:79:A7:68GENERAL.MTU: 1500GENERAL.STATE: 100 (connected)GENERAL.CONNECTION: ethernet-enp0s8-1GENERAL.CON-PATH: /org/freedesktop/NetworkManager/ActiveConnection/8WIRED-PROPERTIES.CARRIER: onIP4.ADDRESS[1]: 192.168.1.40/24IP4.GATEWAY: --IP4.ROUTE[1]: dst = 192.168.1.0/24, nh = 0.0.0.0, mt = 102IP6.ADDRESS[1]: fe80::3241:457d:cd1c:2436/64IP6.GATEWAY: --IP6.ROUTE[1]: dst = fe80::/64, nh = ::, mt = 102
A screenful of information is returned by nmcli . Some of the commonly useful items are:
- DEVICE: The name of the device we're examining.
- TYPE: The type of connection using this device.
- HWADDR: The MAC address of the interface card.
- STATE: Whether this device has a live connection on it.
- IP4.ADDRESS[1]: The IP address and subnet mask for this device.
- CONNECTION: The name of the connection using this device.
The nmcli Interactive Editor
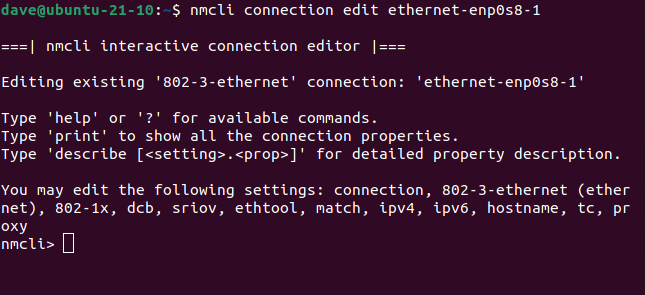
Although nmcli is a command-line tool it does have an elementary interactive editor. The edit action in the connection section opens the interactive editor on the connection you pass on the command line:
nmcli connection edit ethernet-enp0s8-1
Some help text is printed to the screen, and you're presented with the "nmcli>" command prompt.
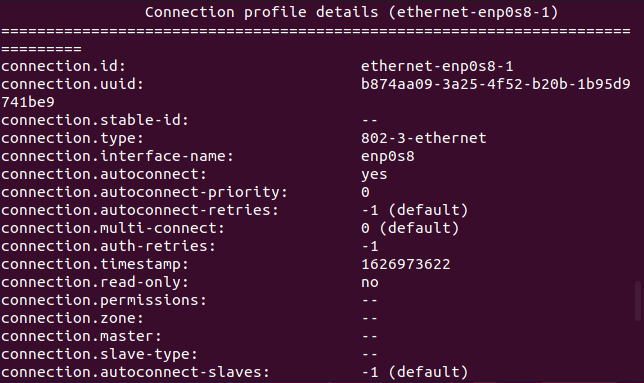
if you type print and hit "Enter", nmcli lists all the properties associated with the connection. There are lots of them. You can scroll through them to review them.
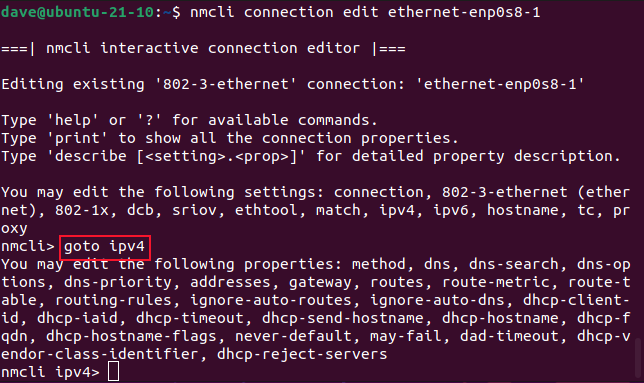
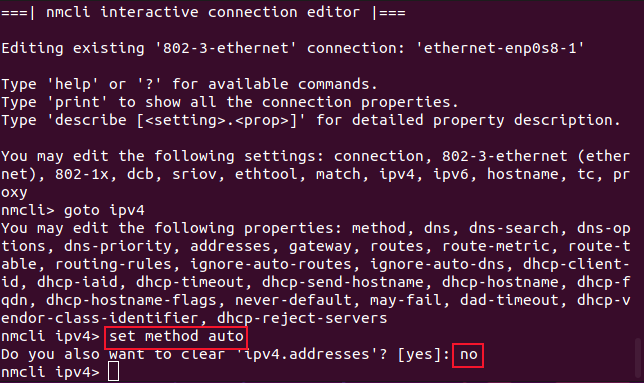
Let's change our connection back to using DHCP. We'll use the "ipv4" settings. To do that, we need to "go" to the IPv4 settings.
goto ipv4
The property we want to change is method. We want to set it to automatic.
set method auto
You'll see the following prompt:
Do you also want to clear 'ipv4.addresses'? [yes]:
If you don't clear the IP address, the next time you set this connection to use a static IP address it'll use the one that was previously set. If you do clear it, you'll need to set a new IP address if you ever change this connection back to using a static IP address. Type "yes" or just hit "Enter" to clear it. Type "no" and hit "Enter" to keep it.
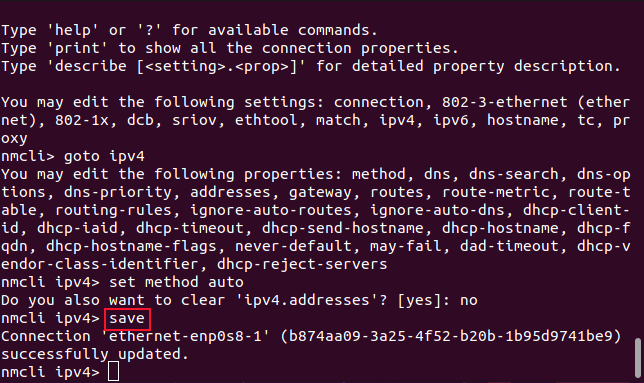
We need to save our changes:
save
Type "quit" to exit the interactive editor. If you don't want to quit, type "back" to go back to the main level, and carry on using the editor.
There's Much More in man
The nmcli command can do much more. It has a great many command-line parameters and options. So many in fact, that its man page runs to over 1200 lines. Review them to see what else nmcli can do for you.
And of course, if you're remotely administering network connections, don't disable the connection you've connected in on. That's never fun.


