Quick Links
SSH, which stands for Secure Shell, isn't very secure by default, opting for basic password authentication with no other limits. If you really want to lock down your server, you'll need to do more configuring.
Don't Allow Password Logins---Use SSH Keys
The first thing to do is get rid of password authentication completely and switch to using SSH keys. SSH keys are a form of public key encryption; you have a public key that acts like your username, and a private key that acts like your password (except this password is 2,048 characters long). Your private key is stored on your disk, but is encrypted with a passphrase and ssh-agent. When you go to SSH into a server, instead of asking for your password, the ssh-agent connects to the server using your keys.
Even if you're already using SSH keys, you'll still want to ensure that your password logins are turned off, as the two aren't mutually exclusive.
Generate SSH Keys
You can generate a new SSH key using the ssh-keygen utility, installed by default on most Unix systems.
ssh-keygen
This will ask you for a passphrase to encrypt the local key file with. It isn't used for authentication with the server, but should still be kept secret.
ssh-keygen will save your private key in ~/.ssh/id_rsa, and will also save your public key in ~/.ssh/id_rsa.pub. The private key stays on your hard drive, but the public key must be uploaded to the server so that the server can verify your identity, and verify that you have permission to access that server.
The server keeps a list of authorized users, usually stored in ~/.ssh/authorized_keys. You can add your key file manually to this file, or you can use the ssh-copy-id utility:
ssh-copy-id -i ~/.ssh/id_rsa.pub user@host
Replace user@host with your own username and server hostname. You'll be asked to sign in with your old password once more, after which you shouldn't be prompted for it again, and can disable password sign-in.
Disable SSH Password Login
Now that you can access the server with your keys, you can turn off password authentication altogether. Make sure that key-based authentication is working, or you'll be locked out of your server.
On the server, open up /etc/ssh/sshd_config in your favorite text editor, and search for the line that starts with:
#PasswordAuthentication
You'll want to uncomment this (remove the hashtag) and change "yes" to "no":
PasswordAuthentication no
Then, restart sshd with:
systemctl restart sshd
You should be forced to reconnect, and if your key file is wrong, you won't be prompted for a password.
If you'd like, you can also force public key-based authentication, which will block all other authentication methods. Add the following lines to /etc/ssh/sshd_config:
AuthenticationMethods publickey

            PubkeyAuthentication yes
and restart sshd.
Lock Out Attackers with denyhosts
denyhosts is a utility for preventing repeated failed login attempts over SSH, similar to how your phone locks you out after too many tries. It's not installed by default, so you'll have to install it from your distro's package manager. For Debian based systems like Ubuntu, that would be:
sudo apt-get install denyhosts -y
Once it's installed, enable it with:
sudo systemctl enable denyhosts
denyhosts should run automatically now, but you'll want to whitelist your IP address in case you get locked out. You could always try again from a different IP address, but this will save you some hassle.
Open up /etc/hosts.allow, and at the bottom of the file add:
sshd: your-ip-address
replacing your-ip-address with your IP address.
By default, denyhosts will lock out after one failed attempt for root users and five failed attempts for other users. You can change this behaviour by editing /etc/denyhosts.conf.
If you've accidentally locked yourself out, you'll need to stop denyhosts and remove your IP address from a few places:
-
/etc/hosts.deny -
/var/lib/denyhosts/hosts -
/var/lib/denyhosts/hosts-restricted -
/var/lib/denyhosts/hosts-root -
/var/lib/denyhosts/hosts-valid -
/var/lib/denyhosts/users-hosts
Restart denyhosts and you should be able to connect again.
Whitelist SSH Access
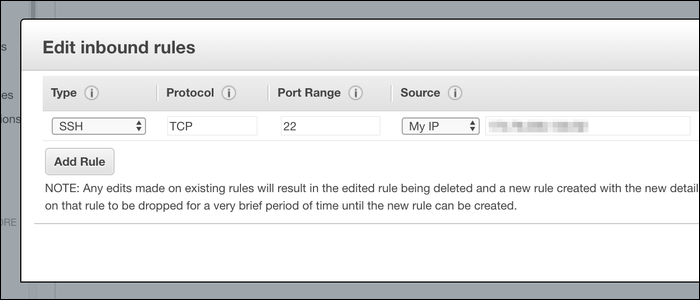
Although forcing SSH keys with denyhosts is probably enough security, you can whitelist specific IP addresses. Most server providers will provide tools to do this from a web interface. If that's an option, you'll want to whitelist from there rather than from the SSH server, as you'll always be able to change the whitelisted IP in case you get locked out.
If it's not an option, you'll need to manually configure /etc/hosts.deny to block all traffic from unauthorized hosts.
An important note: If you're whitelisting your house, your ISP might not give you a static IP address, and your IP address may change at any time. You'll want to make sure that won't happen before blacklisting all other IP addresses, or adding multiple addresses as backup, or just skipping this step altogether.
Open up /etc/hosts.allow and make sure your IP address is in the file:
sshd: your-ip-address
If it is, you can go ahead and deny all other connections:
echo 'sshd: ALL' >> /etc/hosts.deny
Restart sshd and you should see your changes.
Alternatively, Set Up a Proxy in Front of Your SSH Server
If you don't want to expose your SSH server to the internet but need to access it from multiple IP addresses, you can set up a proxy in front of it to handle the connection. This could be another cloud server or even a box running in your house.
The SSH server should be configured to only accept connections from the proxy server, and the proxy server should accept connections from anywhere. You can set up the proxy server however you'd like, but even a simple netcat connection will work. Keep in mind that this proxy server will be the only access point for your SSH server, so if the proxy goes down, you'll be locked out unless you have a backup address.
Don't Allow Root Login
Instead, make a new user and give that user sudo privilege. This effectively is the same thing but has one major difference: potential attackers will need to know your user account name to even begin attacking your server, because it won't be as simple as root@yourserver.
Aside from security, it's generally good Unix policy to not be logged in as root all the time, because root doesn't create logs and doesn't prompt when accessing protected resources.
Create a new user on your SSH server:
adduser myfancyusername
and set a password for that user:
passwd myfancyusername
You won't be logging in with this password because you'll still be using SSH keys, but it is required. Ideally, make this different from your root password.
Add this user to /etc/sudoers to give admin permissions:
echo 'myfancyusername ALL=(ALL) ALL' >> /etc/sudoers
Switch to that user with su myfancyusername, and verify that you can switch back to the root user with sudo su (which doesn't require root's password). If you can, you have sudo access.
Now you'll want to block root login. In /etc/ssh/sshd_config, you'll want to change:
#PermitRootLogin yes
Remove the hastag and change "yes" to "no":
PermitRootLogin no
Restart sshd and your server should block all requests to log on as root.
Set Up Two Factor Authentication
This is certainly overkill, but if you're paranoid about someone nabbing your private SSH keys, you can configure your SSH server to use 2FA.
The easiest way to do this is to use Google Authenticator with an Android or iOS device, though SSH supports many two factor methods. With Google Authenticator, you'll be given a QR code which you can scan from the Google Authenticator mobile app to link your phone to the server, and you'll also be given a few backup codes for recover in the event your phone is lost. Don't store these codes on your main machine, otherwise it's not really two factor.


