Quick Links
ASP.NET is a platform for building web APIs with C# and .NET. It's commonly used for app backends, and can automatically serialize classes to JSON. We'll walk through setting up a service that talks to a database and stores a list of objects.
Creating a Project
We'll be using Visual Studio, as it provides great .NET support out of the box. Create a new project using the "ASP.NET Core Web Application" template:

Give it a name, and select "API," as we're not building a ASP.NET frontend here.

This will initialize your solution with all the boilerplate needed to get a basic API up and running. If you click the run button (labelled IIS Express, which starts an IIS web server), you'll see the API displaying some dummy data about the weather.


We'll use this base to set up a simple API that will connect to a database and read and write custom objects. In this case, it's a collection of user data, but the API will largely work the same for more complicated entity models.
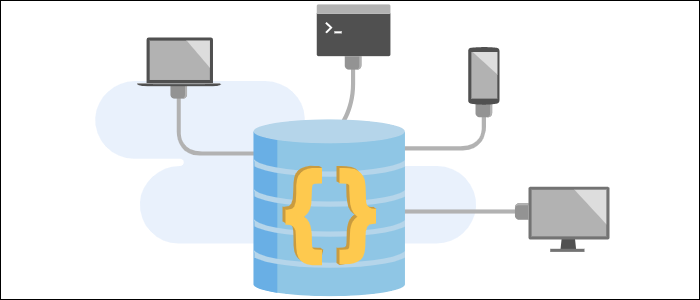
Connecting a Database
It's a good idea to split up the logic of handling requests and the logic of handling talking to the database. We'll create a database service with some functions for reading and writing, then an a API controller that will respond to requests by talking to the database service. The first thing to do, though, is get ASP.NET talking to a database in the first place.
We'll need to install some packages for working with a database. Click on Tools > NuGet Package Manager, and select "Manage NuGet Packages For Solution."

If you're using a SQL database, the database connection is handled with specific plugin packages that implement EntityFrameworkCore for the underlying database. This is a framework that maps C# objects to a relational database, and allows you to use LINQ queries and other native tools to interact with it. You can find a full list of database providers here for most popular relational databases.
We'll be going with MongoDB here, because NoSQL document databases translate to a
List<Object>
pretty seamlessly, and the MongoDB driver supports LINQ queries much like EF Core.
Install the MongoDB.Driver package:

Create a new folder at the root of your project called "Models." In it, create an entity model called
User.cs
, which will be the schema for the collection that gets stored in the database. You can use the
[BsonId]
and
[BsonRepresentation(BsonType.ObjectId)]
attributes to tell the MongoDB driver that this ID string should be interpreted as the collection ID, and can be passed as type
string
even though Mongo internally wants type
ObjectId
.
using MongoDB.Bson;

            using MongoDB.Bson.Serialization.Attributes;

            using System;

            namespace ExampleService.Models

            {

             public class User

             {

             [BsonId]

             [BsonRepresentation(BsonType.ObjectId)]

             public string Id { get; set; }

             [BsonElement("Name")]

             public string Name { get; set; }

             public string Email { get; set; }

             // etc...

             }

            }
In this same folder, create a file called DatabaseSettings.cs, which will store a class and interface for the database settings.
namespace ExampleService.Models

            {

             public class ExampleDatabaseSettings : IExampleDatabaseSettings

             {

             public string ExampleCollectionName { get; set; }

             public string ConnectionString { get; set; }

             public string DatabaseName { get; set; }

             }

             public interface IExampleDatabaseSettings

             {

             string ExampleCollectionName { get; set; }

             string ConnectionString { get; set; }

             string DatabaseName { get; set; }

             }

            }
We can populate these property values in appsettings.json, by adding the following configuration:
"ExampleDatabaseSettings": {

             "ExampleCollectionName": "Users",

             "ConnectionString": "mongodb://localhost:27017",

             "DatabaseName": "Example"

            }
You will, of course, need to create or rename the Example database, as well as create the Users collection in it.
Finally, we will add some code in Startup.cs in the ConfigureServices method, which will fetch the settings from the appsettings.json file, and register the interface through Dependency Injection:
public void ConfigureServices(IServiceCollection services)

            {

             services.Configure<ExampleDatabaseSettings>(

             Configuration.GetSection(nameof(ExampleDatabaseSettings)));

             services.AddSingleton<IExampleDatabaseSettings>(sp =>

             sp.GetRequiredService<IOptions<ExampleDatabaseSettings>>().Value);

             services.AddControllers();

            }
You will need to add a directive at the top using your Models namespace.
Writing a CRUD Database Service
Once the database is connected, you can add the service that will do the talking. The following class contains an IMongoCollection that represents the MongoDB collection in a format with which C# can easily interact. Reads, writes, updates and deletes will directly affect the underlying collection.
The constructor method takes the database settings, starts up a new client, fetches the database, then initializes the _users collection.
using ExampleService.Models;

            using MongoDB.Driver;

            using System.Collections.Generic;

            using System.Linq;

            namespace ExampleService.Services

            {

             public class ExampleService

             {

             private readonly IMongoCollection<User> _users;

             public UserService(IExampleDatabaseSettings settings)

             {

             var client = new MongoClient(settings.ConnectionString);

             var database = client.GetDatabase(settings.DatabaseName);

             _users = database.GetCollection<User>(settings.ExampleCollectionName);

             }

             public List<User> Get() =>

             _users.Find(user => true).ToList();

             public User Get(string id) =>

             _users.Find<User>(user => user.Id == id).FirstOrDefault();

             public User Create(User user)

             {

             _users.InsertOne(user);

             return user;

             }

             public void Update(string id, User userIn) =>

             _users.ReplaceOne(user=> user.Id == id, userIn);

             public void Remove(User userIn) =>

             _users.DeleteOne(user => user.Id == userIn.Id);

             public void Remove(string id) =>

             _users.DeleteOne(user=> user.Id == id);

             }

            }
The rest of the class is simply a set of CRUD operations for interacting with the database. Feel free to implement any custom logic here.
Back in Startup.cs, you'll want to add this as a service on startup:
public void ConfigureServices(IServiceCollection services)

            {

             services.Configure<ExampleDatabaseSettings>(

             Configuration.GetSection(nameof(ExampleDatabaseSettings)));

             services.AddSingleton<IExampleDatabaseSettings>(sp =>

             sp.GetRequiredService<IOptions<ExampleDatabaseSettings>>().Value);

             services.AddSingleton<ExampleService>();

             services.AddControllers();

            }
You'll again need another using directive, this time for ExampleService.Services.
Setting Up an API Controller
Next, you'll need a controller to handle API actions. Luckily Visual Studio makes this easy; you can right-click on "Controllers" to add a new controller, with read/write actions. This will create a new controller with some basic methods.

The route is defined at the top. By default, this is set to /api/controller, where controller is the controller name (minus the "Controller" part). You can change this if you'd like, but this is a good pattern for most people.
[Route("api/[controller]")]
You'll want to add a reference to your database service at the top of the class, and populate it in the constructor:
private readonly ExampleService _exampleService;

            public ExampleController(ExampleService exampleService)

            {

             _exampleService = exampleService;

            }
You'll want to change the HttpGet method to return an ActionResult<List<T>> of the schema you're storing. (You will need to add a reference to your Models namespace, of course.) ActionResult is a dynamic type that wraps either the TValue inside of it, or an HTTP response result.
[HttpGet]

            public ActionResult<List<User>> Get()

            {

             return _exampleService.Get();

            }
If you want to add another Get method, but on a different route, you can pass it as a parameter in the attribute:
[HttpGet("otherroute")]

            public ActionResult<List<User>> GetSomeThingElse()

            {

             return _exampleService.GetSomeThingElse();

            }
Then for the HttpPost method, call the Create method of your database service, and return CreatedAtRoute, which will send a 201 response to the client informing them that the object creation was successful.
[HttpPost]

            public ActionResult<User> Create(User userIn)

            {

             _exampleService.Create(userIn);

             return CreatedAtRoute("GetUser", new { id = userIn.Id.ToString() }, userIn);

            }
For the other routes, you can configure them how you'd like. The general idea is to handle the user input, perform any validations you need to, and call the proper database actions, returning the user a something useful or a status code telling them what happened.
At this point though, you should be able to hit the IIS Express run button at the top, and test the API. This will default the route to be the weather services API that came with the boilerplate, so rather than typing it out every time, you can change the debug route under Project > Properties > Debug and changing the Launch Browser option.

Once you want to test on a remote server, you can create a production build from Build > Publish Service. Select file output, and edit the configuration to suit your needs. For example, you can choose to build as self-contained, which will package all the .NET dependencies with the build, and also to publish as a single executable. You can change the target runtime here as well.

If you want to publish to Linux, you'll need to add a runtime identifier to your .csproj file.
<RuntimeIdentifier>linux-x64</RuntimeIdentifier>
Of course, the API featured here is unsecured. ASP.NET has a great authentication system, offering support for JWT based tokens, and can be configured to work with OAuth providers like Google and Facebook.