Google Cloud Platform's Compute Engine works very similarly to AWS's EC2 platform, allowing you to launch and run cloud servers very quickly. We'll show how to get started and get a server up and running if you're new to the platform.
Launching a Server
Google has a wide variety of compute-related services, ranging from container orchestration platforms with managed Kubernetes to serverless functions using Google Cloud Functions. However, if you just want to run a basic Linux or Windows server, you can do that from Compute Engine, which is their general purpose compute platform.
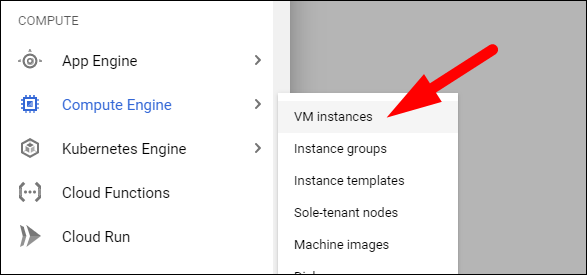
From the Google Cloud Platform Console, select Compute Engine > VM Instances:
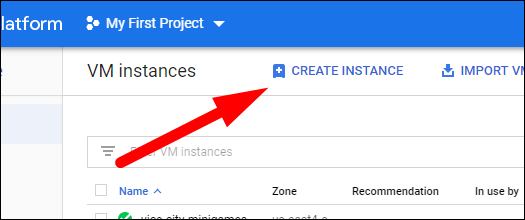
From here, you can select "Create Instance" to launch a new one.
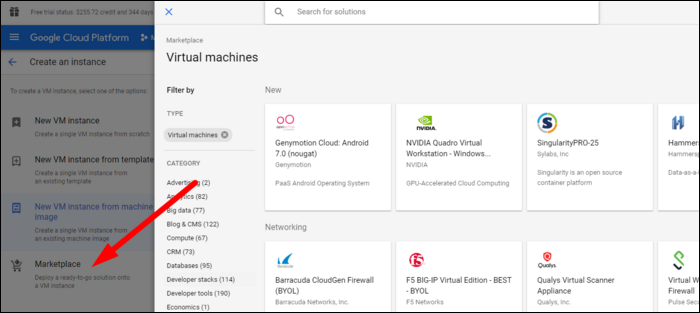
You have a few options for launching here. You can launch a blank image (the default), launch an image using an existing template or machine image you've created, or launch an image from the marketplace using images with preinstalled software. It's worth taking a look at the marketplace to see if there's an image for the application you're trying to run.
If you choose to use a marketplace VM, many of the following fields will be preconfigured for you. Otherwise, you'll have to select them yourself.
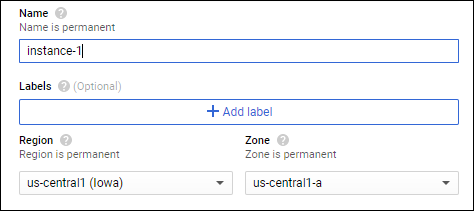
First off, give the instance a name, and select which region and zone you wish to launch in. Regions denote geographic regions, and zones denote physically separate datacenters.
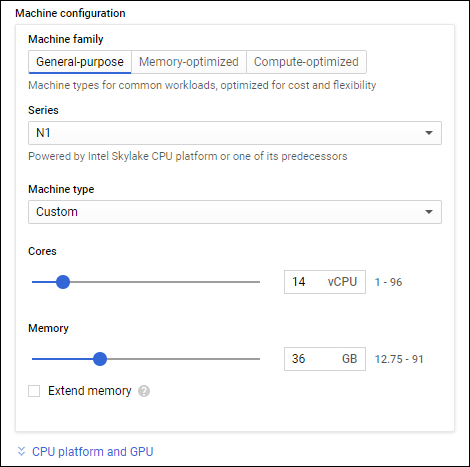
Up next, Google has a great configurator for instance sizes. Rather than providing tons of different instance families and tiers, like AWS does, GCP simply allows you to select a generation and configure it with the amount of cores and memory you need. Of course, you can select the prebuilt templates if you'd like, as well as memory and compute optimized versions in the other tabs.
This is always expandable in the future with an instance restart, so you don't need to make a final decision right away.
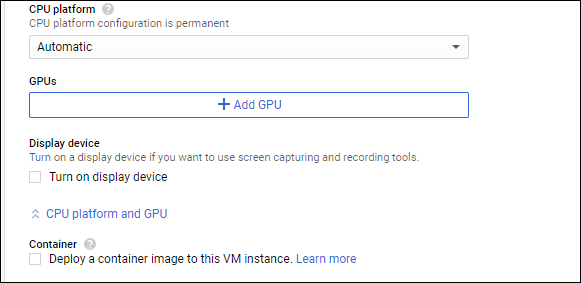
If you want to add a GPU, you can do so below under "CPU Platform and GPU." If you're deploying a Windows Server, you'll likely want to enable "Turn On Display Device," so you can connect over RDP.
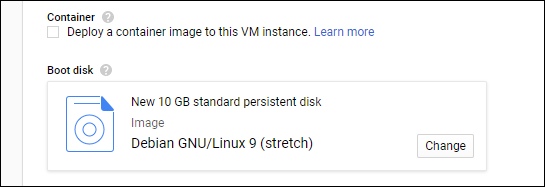
Next, you'll configure storage for the instance. By default, it's set to a 10 GB hard drive with Debian preinstalled. You can change the OS and also switch to an SSD from the "Change" dialog. You also have the nice option of deploying a container image to the root of the instance.
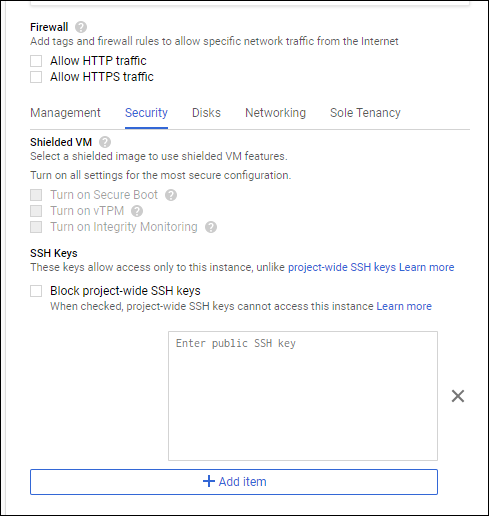
Under "Management, Security, Disks" dropdown, there are a few more settings to configure. Most notably, you should add your personal SSH key under the "Security" tab to make connecting to the instance easier.
Of course, if you have a few minutes, you should definitely set up OS Login and add project-wide SSH keys to your user account, which is the preferred method of handling SSH logins on GCP, and allows you to access any newly created instance without manually adding your SSH keys. You can read our guide on setting it up to learn more.
Connecting to Your Instance
Head back to the VM Instances console once your instance is launched. It will take a minute or so to start up, and then show up as running in the console.
You can press the "SSH" button to open a new dialog with a web-based terminal, but if you manually added your SSH key during setup or set up OS Login, you can simply connect to it from your preferred terminal.
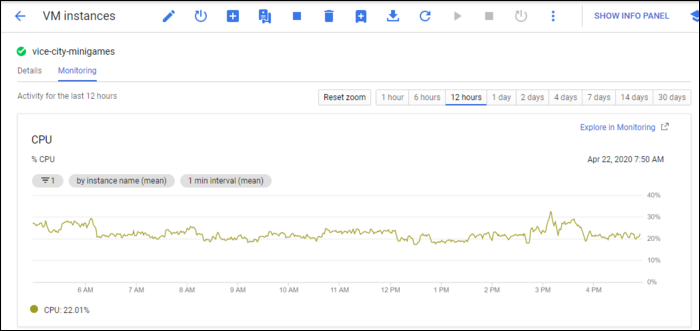
If you click on the instance to open up the settings, you'll find a "Monitoring" tab with some useful graphs that show you how your instance is doing, including CPU usage over time, disk IO, and network in/out.
This page is just a preview of Google's full Monitoring platform, which you can use to keep track of all of your servers.


