Quick Links
The Microsoft Azure environment has many features and with them the need to be able to explore and manage the underlying storage infrastructure. There are many ways to do this, but a free tool made available by Microsoft is the Azure Storage Explorer (ASE).
Available for Windows, Mac, and Linux, this GUI tool allows for the exploration and management of Azure blobs, files, queues, and tables. Additionally, it is possible to manage Azure Cosmos DB and Azure Data Lake Storage entities. In this article, we explore how to use the Azure Storage Explorer!
Azure Storage Explorer Installation
Download the installation file from the Microsoft download site and run the installer. After accepting the license agreement, destination location, and start menu location you will be able to launch. This makes it a very quick and easy to install.
Connecting to Azure Storage
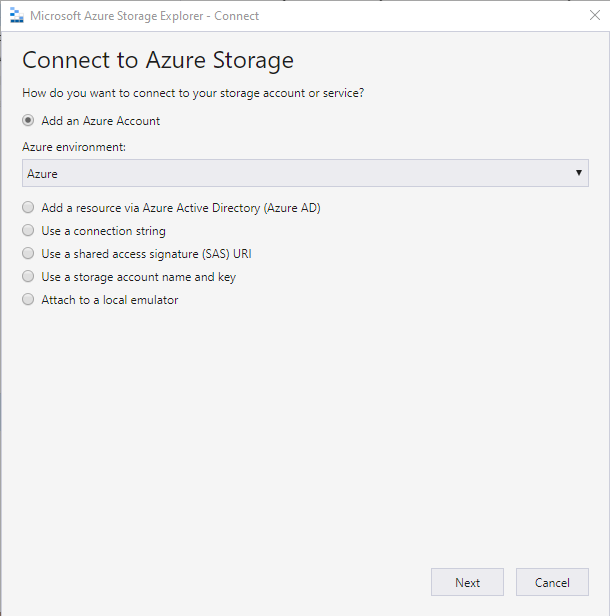
Once installed, the first step will be to connect to your existing Azure Storage. In this example, we are using an Azure Account and the default Azure environment.
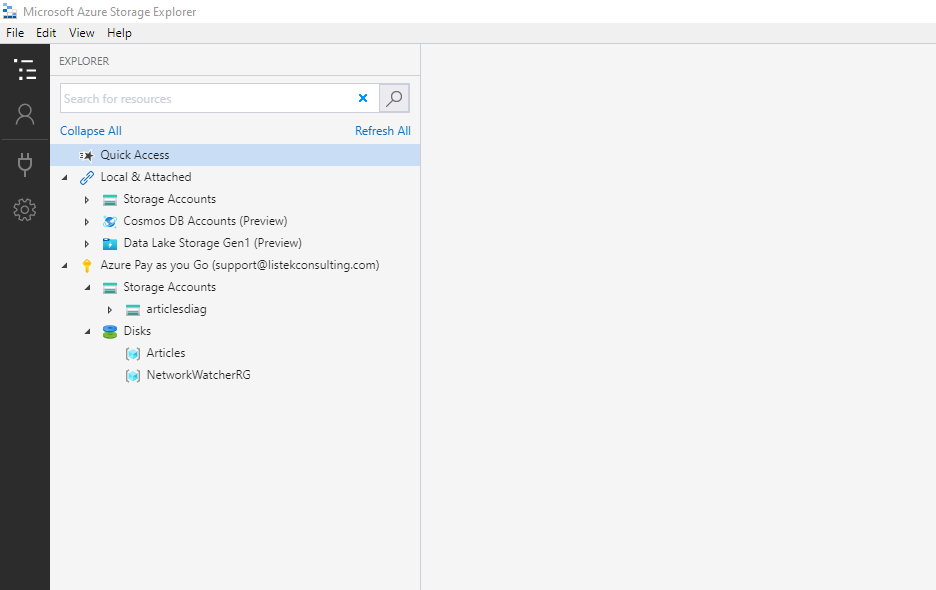
Once Next is clicked, there will be a prompt for your credentials and then the storage will be populated on the Explorer screen as shown below.
In this example, there are two available resources, Storage Accounts, and Disks. Storage Accounts are the generic containers for blogs and files. The Disks are the underlying volumes that are attached to running virtual machines. Within the explorer, you are able to interact with both types very easily.
Creating a File Share
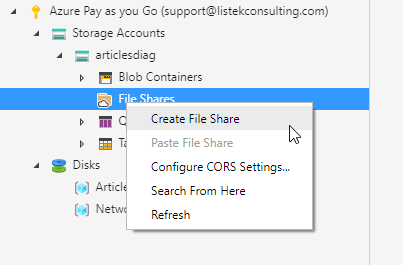
Navigate to a Storage Account and after expanding the container, right-click on File Shares, and choose Create File Share. You will be prompted to give a name and then it will be created immediately.
As you can see, the File Share,
demo-share
was created and you are able to navigate the folder, upload files, delete files, and inspect the information.
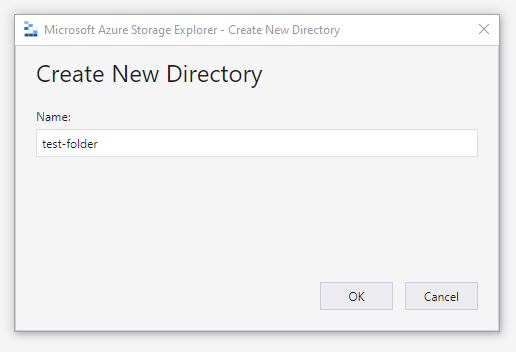
Let's create a new directory, by using the New Folder command. Once clicked, you will be prompted to give the folder a name.
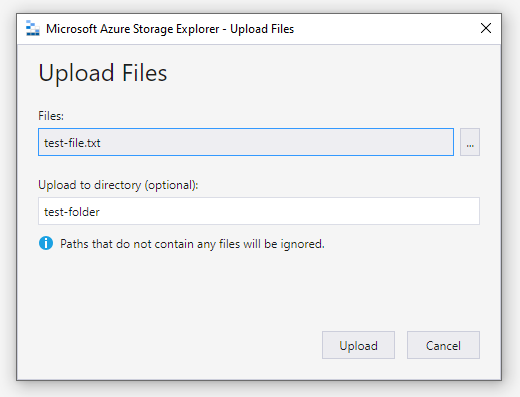
After creating the directory, double-click on the newly created directory to navigate within. Locate a file to upload from your local disk and click on Upload Files. Click the
...
icon to locate the file to upload and your new directory will be pre-populated. Click on Upload to add the file to the directory.
Retrieve Shared Access Signature
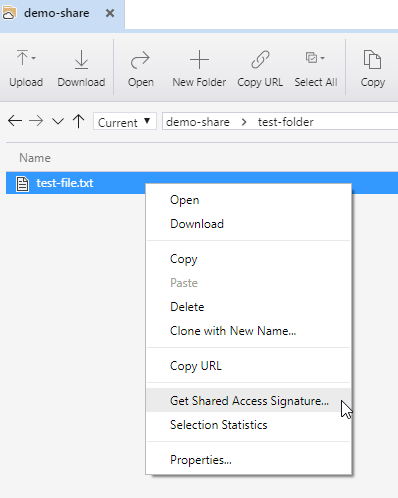
A common task is creating a Shared Access Signature (SAS) link. This type of link allows you to give a time and access limited link for use by an individual or program. Using the Azure Storage Explorer, creating these links is very easy. On the newly uploaded file, right-click and choose Get Shared Access Signature.
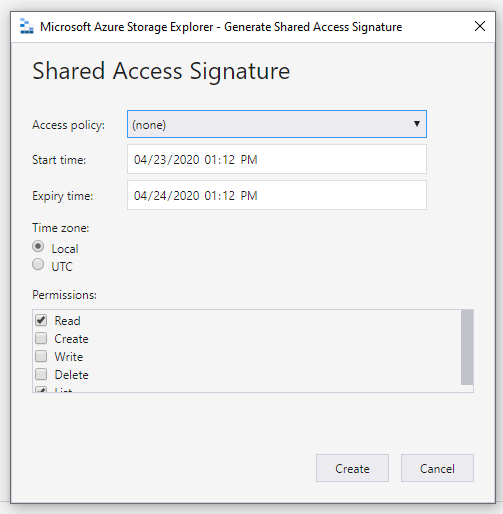
You will be prompted with a dialog box asking for the Access Policy, allowed access times, and permissions to be assigned to this link.
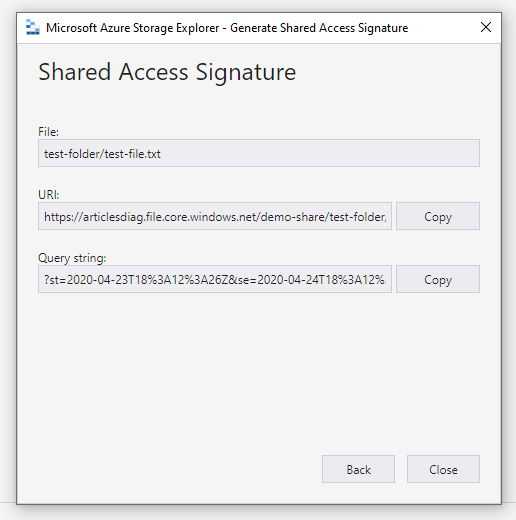
After clicking on Create, you will be given the URI and Query String. Copying the URI will give you both the URI and Query String together.
An example of this type of link is shown below.
<https://articlesdiag.file.core.windows.net/demo-share/test-folder/test-file.txt?st=2020-04-23T18%3A12%3A26Z&se=2020-04-24T18%3A12%3A26Z&sp=rl&sv=2018-03-28&sr=f&sig=%2FL7LWWOCNliwuh9ebYnzb2yEUDjGe%2ByBQg%2FKn%2FryETU%3D>
If the time has expired, you will see an error like below, rather than being able to access the file itself.
Configuring CORS (Cross-Origin Resource Sharing) Rules
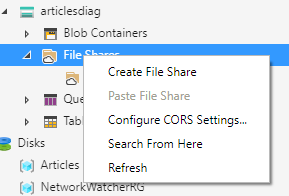
If you need to specify CORS rules, you can do so on File Shares, Blob Containers, Queues, and Tables quickly and easily. To do so, right-click on File Shares (for example) and choose Configure CORS Settings.
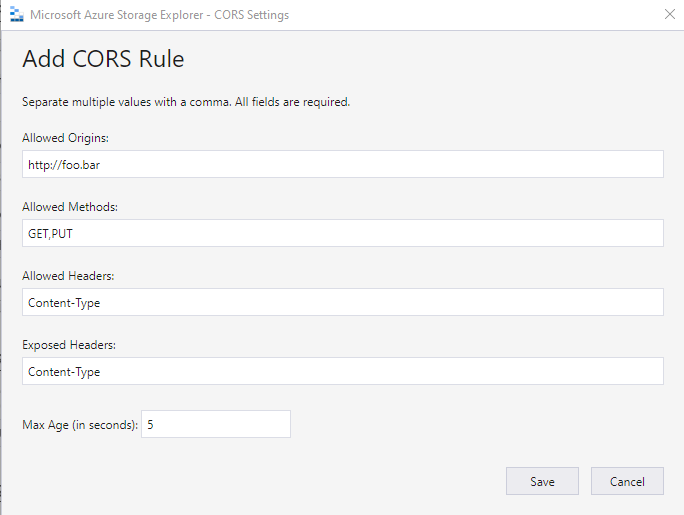
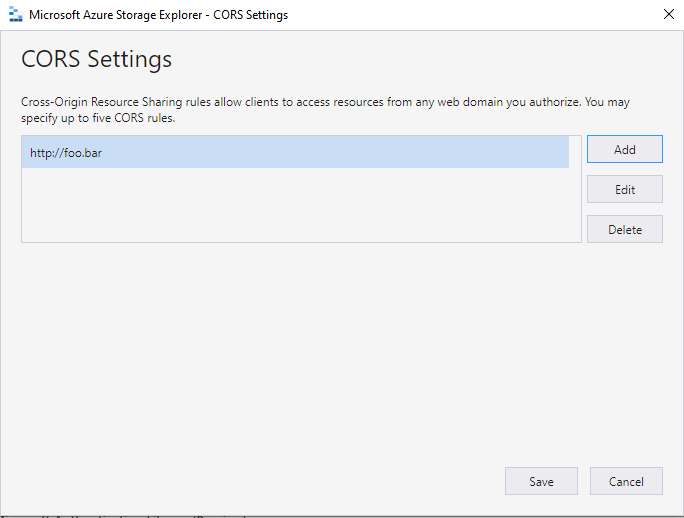
You will be presented with a dialog box that allows entering up to five (5) CORS rules. An example of adding a CORS rule is below.
As you can see the CORS rules are specific to the allowed origins.
Tables
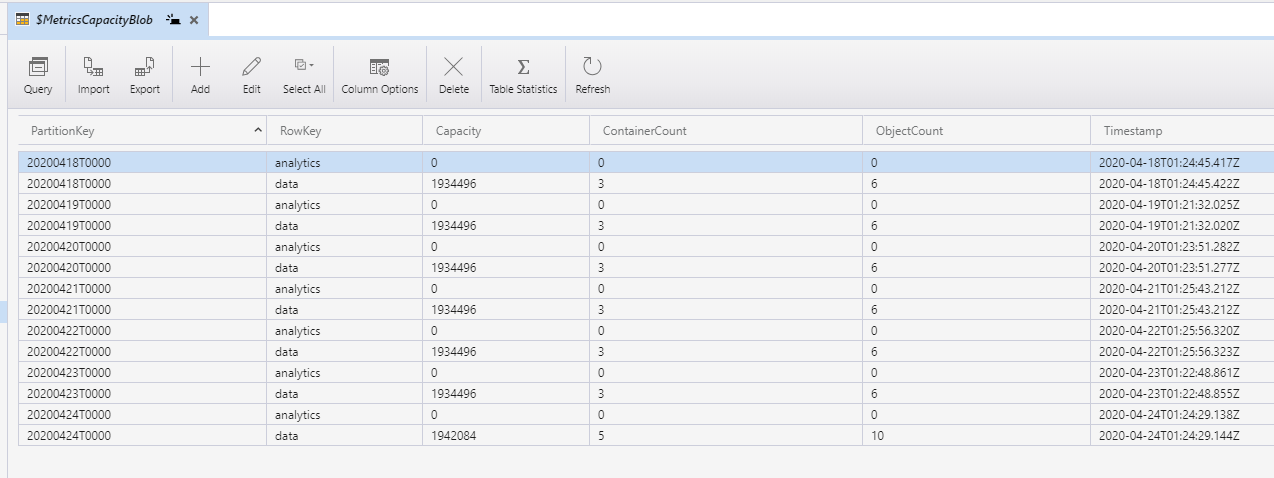
If you need to work with Tables within Azure Storage Explorer, this is very easy to do. Navigate to a Storage Account and the Tables section. Locate a Table or create a new one. Within a table, you have a number of options to manipulate the table with.
- Query
- Import / Export
- Add / Edit / Delete
- Table Statistics (recomputing)
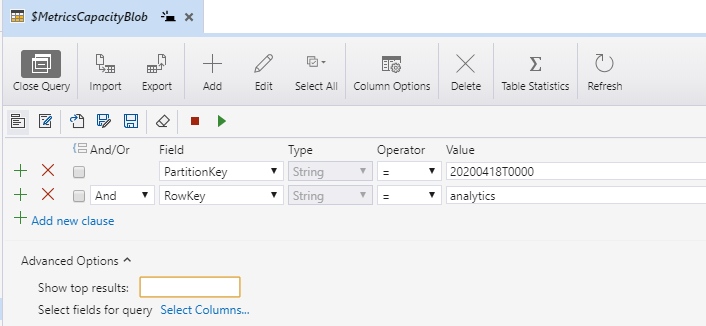
Using the Add command you are able to add both a row (entity) to the table or property itself. To enable more advanced queries, click on the Query button to create a filter to find just what you are looking for.
As you can see, you are able to define complicated query conditions, save and replay those queries as necessary.
Settings
Finally, there are a few settings that are useful to be aware of. Though not all are touched upon here, there is a handful that will help with connecting to Azure.
Proxy
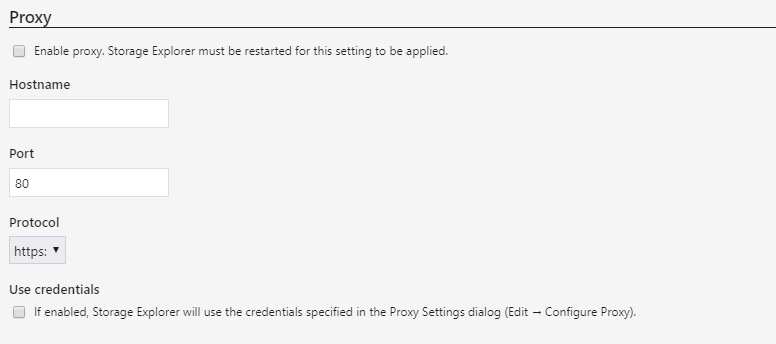
Contained on the Application settings page is the proxy options. This is useful if you need to route your traffic through a corporate proxy.
Sign-In
Also on the Application settings page is the sign-in options. Though the Microsoft Authentication Library (MSAL) is in preview, this is still a useful property that you may need to enable. Since this library enables the use of enhanced single sign-on and multi-factor authentication, you may find that this is necessary.
AzCopy
Finally on the Transfers screen, are the AzCopy options. These options control defaults used by the AzCopy command. This is important as depending on how big of files and what kind of files you are transferring this is useful to be able to control those settings.
Conclusion
Using the Azure Storage Explorer allows easy access to Azure storage resources. Without relying on the online portal interface you are able to quickly use a cross-platform GUI solution to quickly manage storage resources which includes uploading, downloading, and creating resources.


