AWS Amplify is a framework designed to make building web and native applications a lot easier. It focuses on having a fully built backend out of the box---running an API and database with authentication is all handled for you.
What Is AWS Amplify?
Amplify doesn't take the place of a framework like React---you're free to use whatever frontend you want (though React, React Native, Vue, Android, and iOS are best supported with specific libraries). Amplify will handle the backend, things such as running an API server, managing the database for it, and authenticating clients.
When you create an Amplify project, the backend resources will be provisioned automatically using CloudFormation. When you add an API, you'll simply be asked to define the schema, and a DynamoDB table will be created for you, with the handler methods for subscribing, querying, and updating entries being generated as well. If you want to wrap a third-party state management tool like Redux around Amplify's backend, you can do that as well.
For authentication, Amplify can be connected to Amazon Cognito, a versatile identity management service. Cognito can handle MFA, user sign in and sign up, directory services, and federate logins to social providers (Google, Facebook), or even your own Active Directory server over SAML.
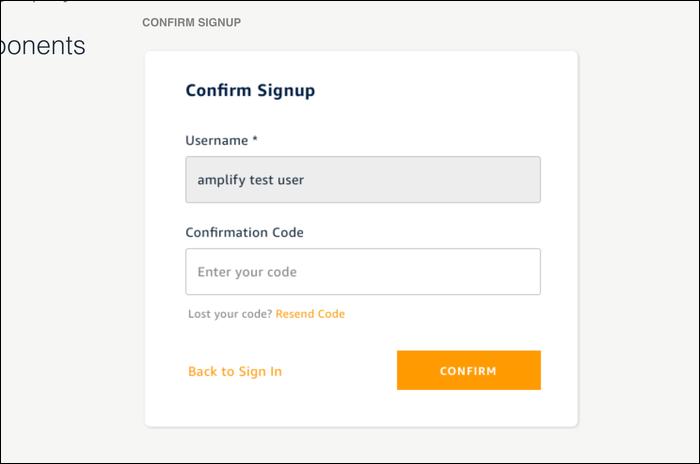
Amplify also contains a UI library full of useful components, similar to Bootstrap. However, Amplify's UI library is focused on functional flows, such as user sign up and sign in, file and photo upload, and AWS Lex-powered chatbots. Using the authentication component, for example, will make connecting your app to Amplify's auth backend (Cognito) much easier.
You can, of course, extend these with your own code and colors, if you're not a fan of AWS's iconic orange.
Getting Started
If you'd like to hop in and play around with Amplify, setup is pretty simple. Install the Amplify CLI globally from npm:
npm install -g @aws-amplify/cli
For the actual application, we'll bootstrap a basic React app using React's own create-react-app starter template:
npx create-react-app amplify
cd to this new folder, and install Amplify as an npm dependency:
npm install @aws-amplify/api @aws-amplify/pubsub
Run npm start, and you should see the spinning React logo open in your browser.
If you want to make use of Amplify's optional UI library, that is available as a separate package for React:
npm install aws-amplify-react
Once everything is installed client side, you can set up your Amplify project using the CLI:
amplify init
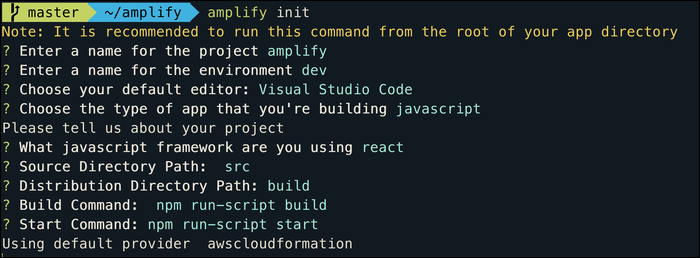
This will ask you for a bit of information, such as the name of the environment (dev, prod, etc.), the type of app you're building (JavaScript, React Native), and the source and build configuration. Enter in everything as needed, and Amplify will take a second to set up your backend.
This will hook up Amplify to the AWS Console, but you'll have to do some more setup to get the API up and running.
Adding An API
To set up Amplify's API backend, run:
amplify add api
This will ask you a few questions, the first being your API type. If you want to use a GraphQL or Rest API, you'll have to make that choice here. We'll go with GraphQL.
You'll also have to choose an authentication scheme---if you're just testing things out, you can choose API key to authenticate in development. In production though, you'll likely want to set up AWS Cognito for user management and link it to Amplify, which is the recommended auth scheme for Amplify apps.
You'll be asked to define the schema for your API, which will open up in your default text editor. Amplify will use this to configure DynamoDB.
Once that's set up, run amplify push to send the changes to the cloud. Amplify will ask you if you'd like it to create the GraphQL functions for interacting with your API, which will automatically generate the methods for queries, subscriptions, and mutations.
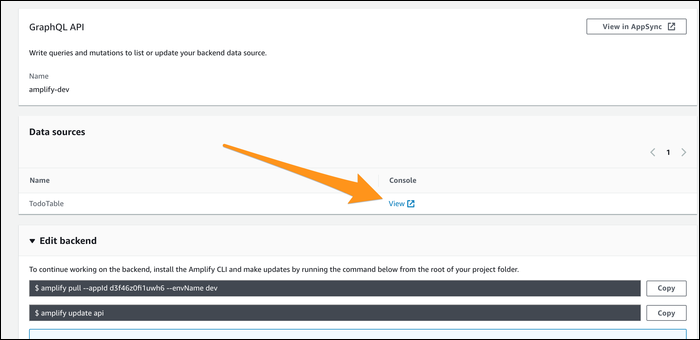
The first time you push, a DynamoDB table will be provisioned and configured automatically. You can view the table itself from the Amplify console:
But if you want to make changes to the schema, you'll have to do that through the console. Amplify's backend configuration is stored in:
project/amplify/backend/
with the API configuration being stored in api/amplify. If you make changes, and run amplify push again, it will make modifications to the CloudFormation stack.
To use your API, you can import PubSub from Amplify, and configure it to use the configuration that Amplify placed in src/aws-exports.js
import API, { graphqlOperation } from '@aws-amplify/api';

            import PubSub from '@aws-amplify/pubsub';

            import awsconfig from './aws-exports';

            // Configure Amplify

            API.configure(awsconfig);

            PubSub.configure(awsconfig);
You can then use the API object to make connections. For example, if you're using GraphQL, you can import the mutation methods and call one of them using API.graphql(method):
import { createTodo } from './graphql/mutations';

            async function createNewTodo() {

             const todo = { name: "new-item" , description: "Hello Amplify!" };

             await API.graphql(graphqlOperation(createTodo, { input: todo }));

            }
Publishing Your Amplify App
You're free to distribute your Amplify app however you see fit, but if you're publishing a web app, Amplify includes some built-in functions to automatically deploy your app to S3. The default option is for a dev environment with no HTTPS, but it can be configured to use CloudFront as well. An alternative to this would be to set up an automated S3 deployment pipeline from CodePipeline, or to simply host it on an existing web server instead.
If you want to deploy to S3, simply add the web hosting feature from the CLI:
amplify add hosting
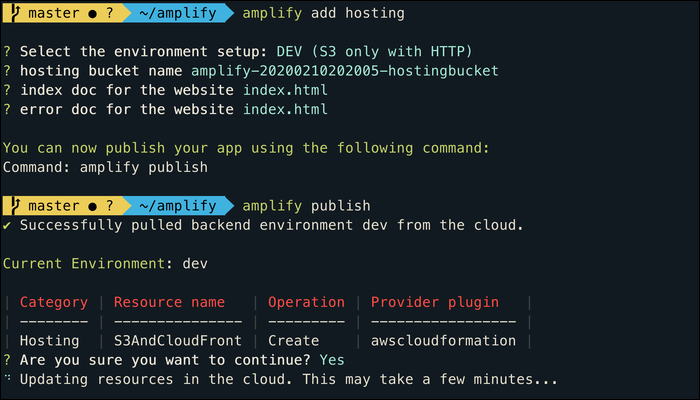
This will ask whether you're deploying to dev or prod, and ask for the index and error documents for your site. Once that's configured, run amplify publish to push a new CloudFormation stack.
Your browser will open the new endpoint for your app, which you can add to your DNS with a CNAME record or a Route 53 bucket Alias.


