Quick Links
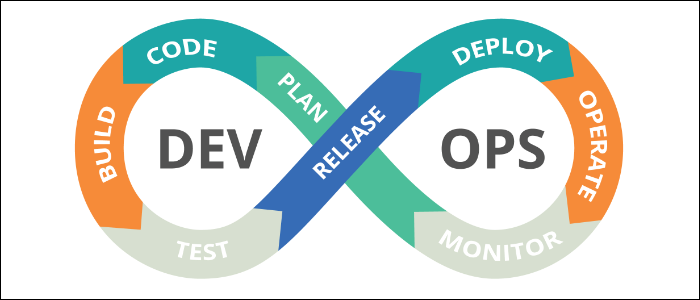
Continuous Integration/Continuous Delivery (CI/CD) is the process of automating application updates, from changes in source control, to automated builds, to automated deployments to your servers. AWS provides a service for this, called CodePipeline, which can be configured to work with containers.
Continuous Delivery in Containers
Containers are a bit more complicated than traditional applications. Many containerized applications will actually make use of two container images. The first, called the base image, is essentially a custom AMI preloaded with dependencies and other applications. This is done to speed up build times, because if you're just updating your application code, you don't need to go reinstalling NGINX and every other bit of software on the container. The second image is the actual application image, which extends the base image and contains your own code.
As such, the CI/CD pipeline that we will set up will actually be two pipelines. The first will watch for changes in the base image and trigger a rebuild and update to ECR when it happens. The second pipeline will contain two source stages---one that watches for changes in the base image's ECR repository, and one that listens for updates in the application image source code. This way, if you're just updating the application image, the base image doesn't need rebuilding.
With two pipelines, CodePipeline will trigger application updates in one of two ways:
- Changes to the application image will trigger a rebuild of the application image, using the latest base image, which doesn't need to be rebuilt. The update will be pushed to ECR, with optional deployment to ECS or another container service.
- Changes to the base image will trigger a rebuild of the base image, which will deploy the updates to ECR. This will, in turn, trigger a rebuild of the application image, which will be pushed to ECR and then to ECS.
However, this dual-pipeline setup may not be needed by all applications, and if you're just using a prebuilt base OS image like Ubuntu, you'll only need one pipeline to handle everything.
IAM Role Setup
First, you'll have to set up a service role to give CodeBuild the necessary permissions to interact with other AWS services (like ECR) on your behalf. Open up the IAM Management Console, then create a new role under "Roles." Choose "AWS Service," and select CodeBuild in the list.

For the policies, you'll want to create a new policy with the following permissions:
{

             "Version": "2012-10-17",

             "Statement": [

             {

             "Sid": "CloudWatchLogsPolicy",

             "Effect": "Allow",

             "Action": [

             "logs:CreateLogGroup",

             "logs:CreateLogStream",

             "logs:PutLogEvents"

             ],

             "Resource": [

             "*"

             ]

             },

             {

             "Sid": "CodeCommitPolicy",

             "Effect": "Allow",

             "Action": [

             "codecommit:GitPull"

             ],

             "Resource": [

             "*"

             ]

             },

             {

             "Sid": "S3GetObjectPolicy",

             "Effect": "Allow",

             "Action": [

             "s3:GetObject",

             "s3:GetObjectVersion"

             ],

             "Resource": [

             "*"

             ]

             },

             {

             "Sid": "S3PutObjectPolicy",

             "Effect": "Allow",

             "Action": [

             "s3:PutObject"

             ],

             "Resource": [

             "*"

             ]

             },

             {

             "Sid": "ECRPullPolicy",

             "Effect": "Allow",

             "Action": [

             "ecr:BatchCheckLayerAvailability",

             "ecr:GetDownloadUrlForLayer",

             "ecr:BatchGetImage"

             ],

             "Resource": [

             "*"

             ]

             },

             {

             "Sid": "ECRAuthPolicy",

             "Effect": "Allow",

             "Action": [

             "ecr:GetAuthorizationToken"

             ],

             "Resource": [

             "*"

             ]

             },

             {

             "Sid": "S3BucketIdentity",

             "Effect": "Allow",

             "Action": [

             "s3:GetBucketAcl",

             "s3:GetBucketLocation"

             ],

             "Resource":

             "*"

             }

             ]

            }
Paste this in under the JSON tab in the policy editor. Give it a name, and attach it to the role. You'll also want to attach the premade policy, AmazonEC2ContainerRegistryPowerUser.

Once these two policies are attached, give the role a name and click create.
Configuring Source Control and CodeBuild
CodePipeline supports pulling code updates from GitHub, BitBucket, and AWS's own CodeCommit source control. You'll have the best experience using CodeCommit as a secondary release repository, but GitHub will work just fine. If you're using GitLab or another provider, you'll need to use CodeCommit to push updates.
For this step, you'll want to have two different repositories---one for your base image, and one for your application image. If you're not using a custom base image, you can skip the configuration for it.
For the base image, you'll want to create a buildspec file, essentially a list of commands that CodeBuild will execute when building your image. You can enter this in manually when setting up CodeBuild, but it's better to save it as a file called buildspec.yml in the root of your repository.
Your exact configuration may vary depending on your application requirements, but it should look something like this:
version: 0.2

            phases:

             pre_build:

             commands:

             - echo Logging in to Amazon ECR...

             - aws --version

             - $(aws ecr get-login --region $AWS_DEFAULT_REGION --no-include-email)

             - REPOSITORY_URI=012345678910.dkr.ecr.us-east-1.amazonaws.com/base-image

             - COMMIT_HASH=$(echo $CODEBUILD_RESOLVED_SOURCE_VERSION | cut -c 1-7)

             - IMAGE_TAG=${COMMIT_HASH:=latest}

             build:

             commands:

             - echo Build started on `date`

             - echo Building the Docker image...

             - docker build -t $REPOSITORY_URI:latest .

             - docker tag $REPOSITORY_URI:latest $REPOSITORY_URI:$IMAGE_TAG

             post_build:

             commands:

             - echo Build completed on `date`

             - echo Pushing the Docker images...

             - docker push $REPOSITORY_URI:latest

             - docker push $REPOSITORY_URI:$IMAGE_TAG
This example will log into ECR, set the image tag to the CodeBuild build ID, build the Docker image, then push the changes to your ECR repository. You'll want to change the REPOSITORY_URI variable declaration to be the URI of your target ECR repository.
Save this as buildspec.yml, and place it in the root of both your base image repository and application image repository. You can test your buildspec by manually initiating a build from the CodeBuild console, or just proceed to the pipeline setup and fix any errors that may arise.
Setting Up the Pipeline
Once you've got your buildspec in order, open up the CodePipeline Console, and create a new pipeline for the base image. Give it a name, and let it create a new service role. For the source control stage, choose the type you're using, and select a repository and branch. If you'd like, you can set up an additional branch to track releases, and CodePipeline will ignore changes to master.
For the build stage, select "Create Project." This will bring up a dialog where you can configure CodeBuild.

Normally, you'd have to link CodeBuild to your source control, but that is handled automatically by the pipeline when creating a new project this way. You'll have to configure the environment your build runs in---you can choose a custom Docker image, loaded with all the required programs for building, or you can install them manually in the prebuild phase of your buildspec.yml. If you don't need anything special, you can select Amazon Linux 2 and the default runtime, which comes with most programming language runtimes as well as Docker preinstalled.

You'll also want to select the service role you created earlier:

Lastly, you can manually change the name of the buildspec file, if you don't want it in the root directory of your source or have multiple files you need to differentiate between. You can also insert build commands manually here, but we advise tracking it as a file on git.

For the deploy stage, you'll want to skip it for the base image. The buildspec file will build and push changes to ECR, which is all you need for this step. You can test the pipeline by pushing changes to your base image repository.
Setting Up the Application Image Pipeline
Next, you'll set up an additional pipeline for your application image. Create a new pipeline from the console, and select "ECR" as the source. Select your base image repository, and leave the image tag blank, which will default it to latest.

For the build stage, you'll want to configure CodeBuild in much the same way as the base image stage---create a new build project, select the default environment, and enter in the service role you created earlier.
The deployment stage is optional. Without it, changes to the base image or application image will simply trigger the application image to rebuild and push changes to ECR. However, if you're using ECS for deployment, you can add another stage that will take your built image and update your servers.

Either way, click create to make the pipeline. Some changes are necessary before it will work though, so click "Edit" on the pipeline, then "Edit Stage" for the source control stage:

As it stands, the source control stage simply pulls from ECR for the base image. This is necessary, but it also needs the application code to do anything useful and also respond to changes in the application code (not just the base image).
Click "Add Action:"

Choose CodeCommit (or other source control) as the action type, and select your repository and branch. For "Output Artifacts," you'll want to enter in SourceArtifact to denote that this is the application's source code.
You'll also want to edit the ECR stage to specify that the output artifact is a Base Image.

This should be all that CodeBuild needs to run, and once you update your pipeline, it should run again, hopefully without errors.

If you do run into errors, it's likely that your buildspec for CodeBuild isn't working properly. You can view the build logs from the CodeBuild console, or consult AWS's Build Specification Reference for more info on how it all works.