If you’re moving from Vista to Windows 7, you might be wondering what happened to Windows Photo Gallery, or in XP you might have used another photo manager. Today we take a look at using Windows Live Photo Gallery from the Windows Live Essentials suite.
Windows Live Photo Gallery
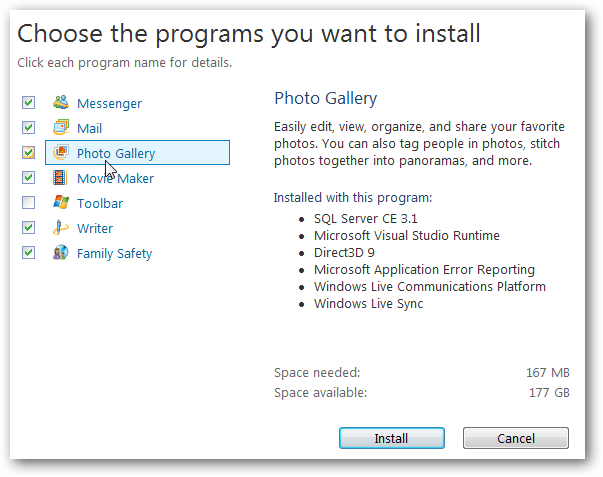
Windows Photo Gallery was included in Vista and did an adequate job handling your photo needs. If you’ve moved to Windows 7, or are just looking for a new photo management tool, Windows Live Photo Gallery is certainly worth a look. Download the Live Essentials installer and select Photo Gallery and any other app from the list of you want to use.
Note: Keep in mind you don’t have to install them all…only the ones you want.
In the You’re almost done! screen, make sure to uncheck the boxes to set your search provider and homepage if you don’t want them changed.

After installation, to start using Live Photo Gallery click on Start and go to Windows Live \ Windows Live Photo Gallery.

The first time you launch it you’ll be prompted to sign in with your Windows Live account.

You might also want to use Live Photo Gallery to open TIF and BMP files.

Now you can start to view and manage your photos. If you hover the pointer over a thumbnail, you’ll get a larger view of it.

On the left side you’re able to browse through your picture directories, sort by date taken, and people or descriptive tags.

Click on an image to tag the photo with your own information or find out other photo data. It allows you to zoom in on an image, rotate them, rate a photo, start a slid show and more.

Another nice built in feature is being able to resize your photos. Right-click on an image in the gallery and select Resize. Now you can select between predefined sizes or your own custom size.

There is the ability to easily import your pictures from a camera or scanner using an easy to follow wizard.

You can include any folder into the gallery and monitors those folders for any new additions.

In Windows Live Photo Gallery Options you can specify different default actions it uses when importing pictures from different devices and media.

Also, you can determine how images will be tagged, so if you have several images from a few different trips for example, they can be easily found and organized.

Personalize your computer by adding your Photo Gallery in as your Screen Saver.

You can go in and do some basic edits to photos like adjusting color effects, fixing red eye, crop and straighten photos.

You can make blog posts, CDs, DVDs and more with your photos from Live Photo Gallery and other Live or Windows tools.

Live Photo Gallery allows you to publish photos to your SkyDrive, print them out, and share them with others via email.

It also includes the ability to save and share your images on flickr.

You can also find other plug-ins for it that will let you easily share your photos to other social sites like Facebook, Drupal, SmugMug, Picasa, and more.

Conclusion
Windows Live Photo Gallery offers a lot of features and is much enhanced over Photo Gallery included in Vista. This should get you started using Windows Live Photo Gallery to organize, edit and share your photos in Windows 7. Of course Live Photo Gallery is not only for Windows 7 users. It will run on XP (32-bit only), Vista and Windows 7 (32 & 64 bit versions). If you’re looking for an easy to use picture manager that offers several organization and sharing features for Windows 7, Windows Live Photo Gallery does a great job.
Download Windows Live Photo Gallery