Quick Links
Key Takeaways
To fix a "Class Not Registered" error on Windows, force close and reopen File Explorer, re-register all your DLL files, reset Windows' default apps, re-register your Microsoft Store apps, repair or reinstall Microsoft Visual C++ Redistributable packages, run SFC, or roll back your PC to a restore point.
Getting a "Class Not Registered" error while launching File Explorer or another app on your Windows 10 or Windows 11 PC? It's a vague and frustrating error message, but we have several fixes you can try that will solve the problem.
What Is the "Class Not Registered" Error?
Windows' "Class Not Registered" error appears when you try to launch an app on your PC. The error doesn't let you get past the message screen, preventing you from using your app.
This problem can have several possible causes. Some of those reasons are File Explorer experiencing a glitch, broken system files, unregistered DLL files, corrupt Microsoft Visual C++ Redistributable packages, and more.
How to Resolve the "Class Not Registered" Error?
Since it's unclear what's causing the problem, you'll have to try a few potential fixes to resolve your problem. The following methods fix the underlying items that may be causing your "Class Not Registered" error, so follow these methods from top to bottom, and your issue should likely be resolved.
Force Close and Reopen File Explorer
One way to fix your issue is to force close File Explorer and then reopen it. Doing so can fix many minor glitches with this file manager, and it's super easy to do this.
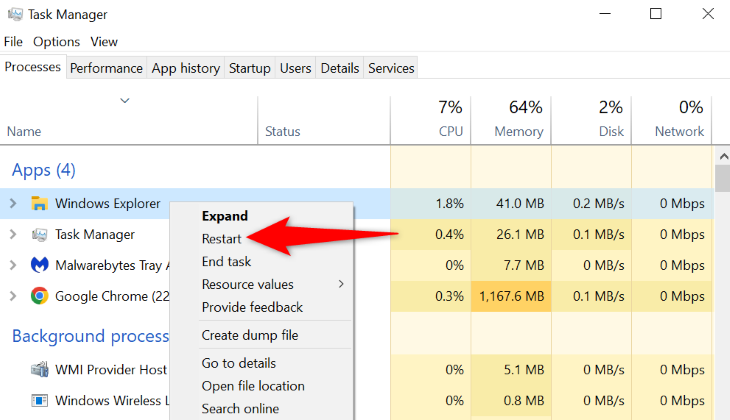
To start, right-click your "Start" menu icon and choose "Task Manager." On the Task Manager window, right-click "Windows Explorer" and select "Restart."
File Explorer will close and then immediately reopen.
Re-Register All Your DLL Files
Your app may want to use a DLL file that isn't registered in your system. In this case, re-register all the DLL files stored on your PC to potentially resolve your issue.
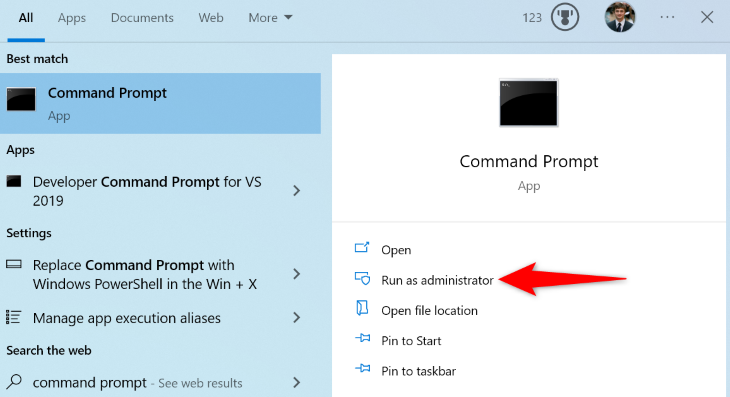
To do that, first, open the "Start" menu and find "Command Prompt". On the right, select "Run as Administrator." Then, in the "User Account Control" prompt, choose "Yes."
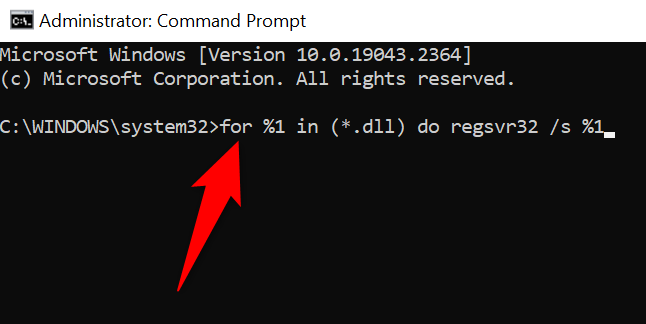
On the Command Prompt window, type the following command and press Enter:
for %1 in (*.dll) do regsvr32 /s %1
Allow Command Prompt to re-register all your DLL files. You're then ready to launch your app.
Reset Windows' Default Apps
If the "Class Not Registered" error appears when you launch File Explorer, one or more of your default apps may be causing the problem. In this case, reset all your default apps, and your issue will likely be fixed.
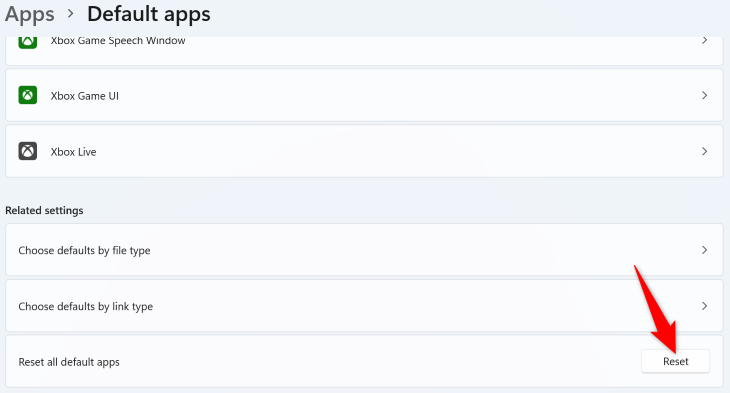
To reset default apps on Windows 11, head into Settings > Apps > Default Apps. Next to "Reset All Default Apps," click "Reset," then choose "OK" in the prompt.
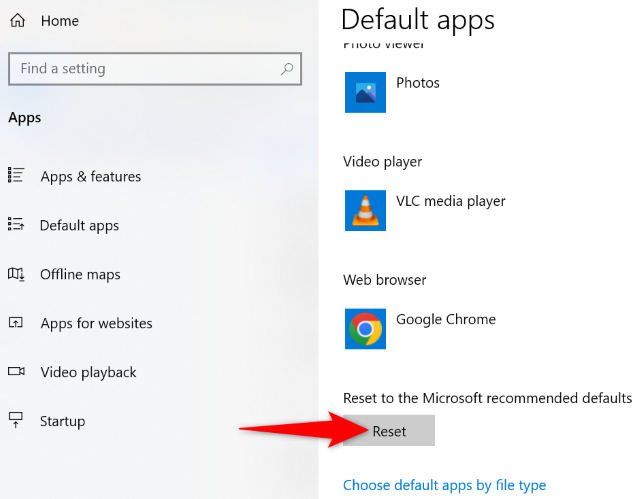
On Windows 10, go to Settings > Apps > Default Apps. Here, under the "Reset to the Microsoft Recommended Defaults" section, click "Reset."
Try to launch File Explorer (using Windows+E), and it should work.
Re-Register Your Microsoft Store Apps
If you're getting a "Class Not Registered" error while opening a Microsoft Store app, reinstall and re-register your Store apps to fix your problem. Doing this helps fix many issues with your Store apps.
To do that, open the "Start" menu, find "PowerShell", and select "Run as Administrator." In the "User Account Control" prompt, choose "Yes."
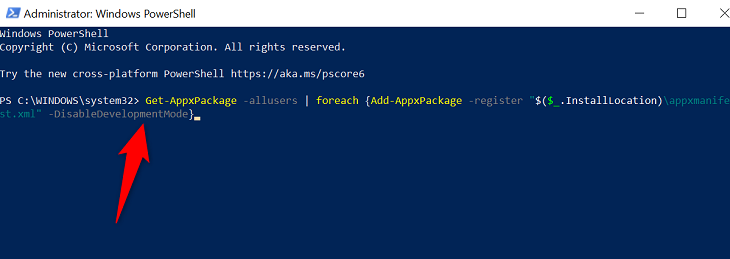
In PowerShell, type the following command and press Enter. This command re-registers all your Store apps for all users on your PC.
Get-AppxPackage -allusers | foreach {Add-AppxPackage -register "$($_.InstallLocation)\appxmanifest.xml" -DisableDevelopmentMode}
When your apps are re-registered, restart your PC, and then launch your desired Store app.
Repair or Reinstall Microsoft Visual C++ Redistributable
Microsoft's Visual C++ Redistributable packages are responsible for ensuring you can launch and use your apps. It's possible one or more of these packages have gone corrupt on your system, preventing you from launching your apps.
In this case, try to repair those packages. And if that doesn't work, uninstall and reinstall the packages, which will fix your problem.
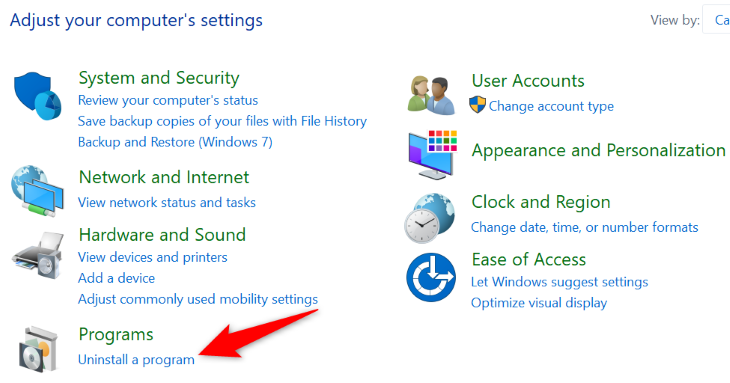
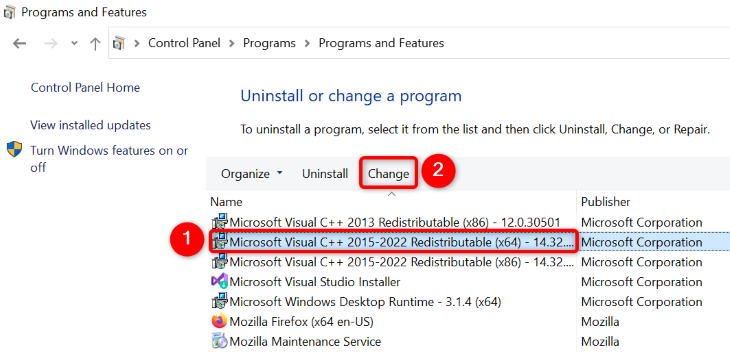
To do that, open Control Panel on your PC and select "Uninstall a Program."
Find and select a Microsoft Visual C++ Redistributable package on the list. Then, at the top, click "Change."
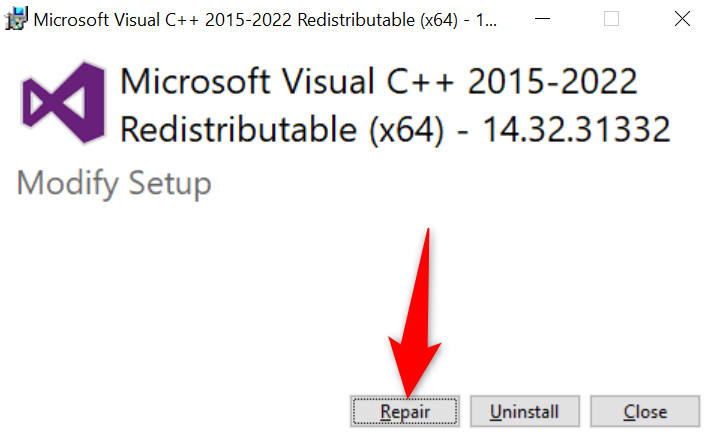
On the open window, select "Repair."
Follow the instructions displayed on your screen to repair your package. You'll have to do this for each package on the list. Once this is done, try to launch your app.
If your app continues to display the same error, then on the window where you selected "Repair," choose "Uninstall" to uninstall your package. Do this for all the packages on the list. Then, head to the Microsoft Visual C++ Redistributable site and download and install the fresh new packages.
Fix Windows' Corrupted Files
Windows' core files might be corrupted, causing your PC to malfunction. Many problems, like viruses and malicious apps, can cause these files to go corrupt.
In this case, use your PC's built-in SFC (System File Checker) tool to find and fix all corrupt files. This tool runs from a Command Prompt window, and it automatically detects and fixes all the broken system files.
To use it, first, open the "Start" menu, find "Command Prompt", and select "Run as Administrator." In the "User Account Control" prompt, choose "Yes."
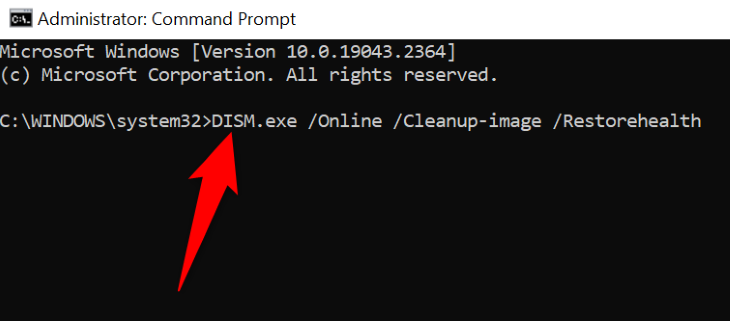
On the Command Prompt window, enter the following command and press Enter. This command downloads the required files to fix your broken files.
DISM.exe /Online /Cleanup-image /Restorehealth
When the above command has finished running, type the following command and press Enter to start fixing your corrupt files:
sfc /scannow
When your corrupt files are fixed, reboot your PC, and then launch your app.
Use System Restore
Windows' System Restore utility allows you to undo the changes you've made to your PC, fixing any problems caused by those changes. This tool basically restores your PC to a point in the past, undoing any modifications you may have done to your computer.
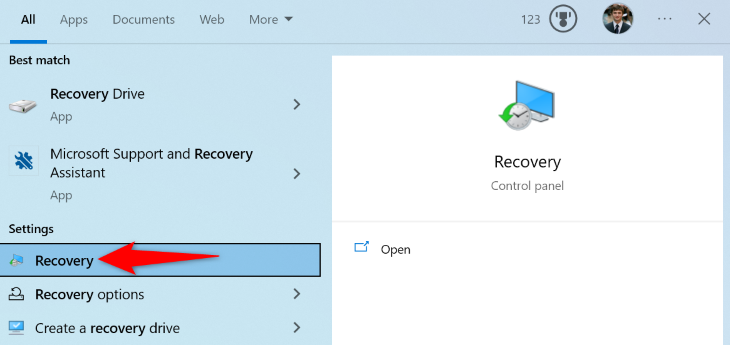
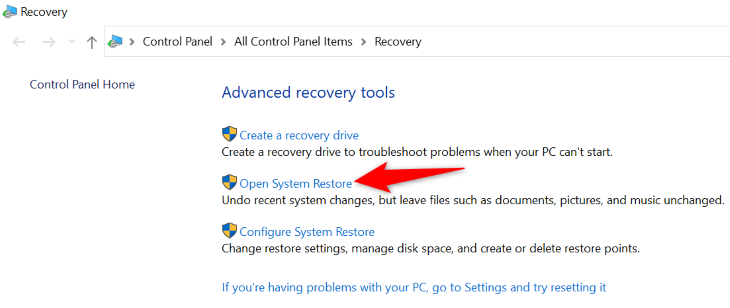
To use it, open the "Start" menu, find "Recovery", and select it.
On the following page, select "Open System Restore."
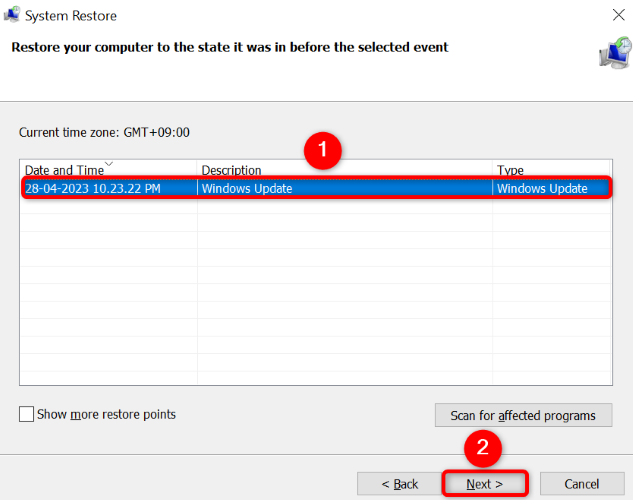
On System Restore's first page, select "Next." On the following screen, choose the most recent restore point on the list, then select "Next."
Choose "Finish," and Windows will begin restoring your PC. When that's done, launch your desired app, and your issue will likely be fixed.
And that's how you get around a "Class Not Registered" error on your Windows PC. Enjoy using your favorite apps again!

