Quick Links
Key Takeaways
If you trust your file and its source, then an easy way to fix an "operation did not complete" virus error is by temporarily disabling your real-time antivirus protection. Go to Windows Security > Virus & Threat Protection > Manage Settings and turn off "Real-Time Protection."
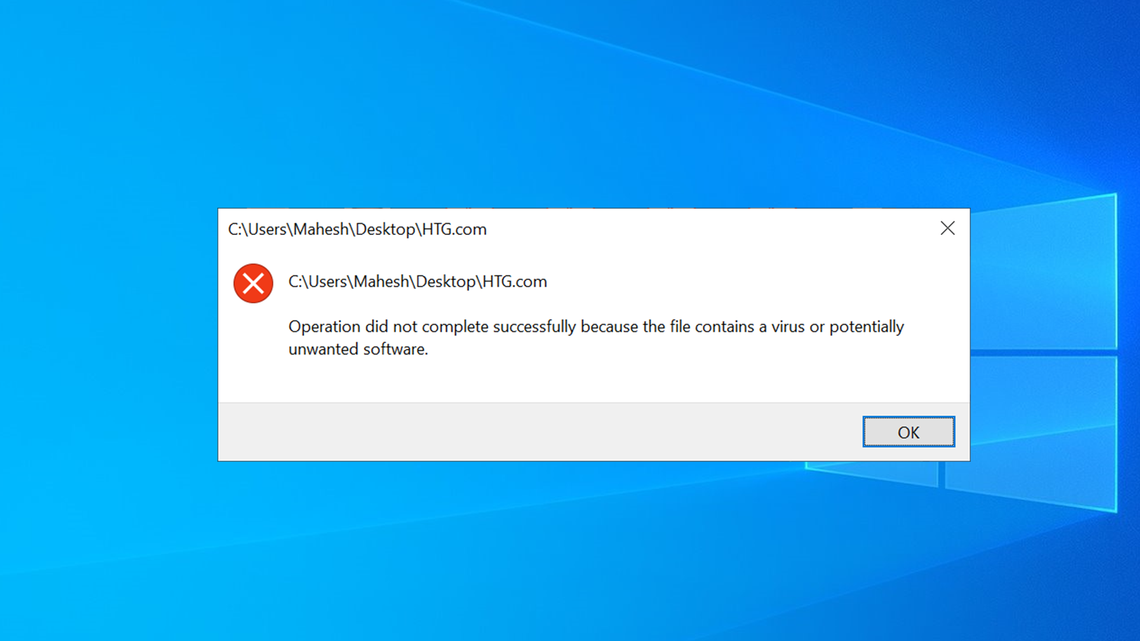
Frustrated by Windows error that reads, "Operation did not complete successfully because the file contains a virus or potentially unwanted software"? Unfortunately, the error will keep popping up until you apply a fix and resolve it. We'll show you what to do.
What Is the Operation Did Not Complete Error?
Windows displays an operation did not complete virus error when you launch a file that your antivirus thinks is a potential threat. Your file may be infected with a virus, triggering your antivirus to block your access.
Sometimes, your antivirus may produce a false-positive, blocking your access to the file even if the file is completely safe to use. However, there's no foolproof way to know an alert is a false positive, so we strongly recommend you err on the side of caution and assume it is infected.
How to Resolve the Operation Did Not Complete Virus Error
Depending on whether your file is actually infected with a virus, or your antivirus is displaying a false-positive result, use the appropriate methods below to fix your problem and launch your file successfully.
Redownload Your File From Another Source
If Windows displays the above error for a file that you've downloaded from the internet, try downloading the file from another source and see if the error persists.
It's possible the web host from where you've downloaded the file is compromised, causing your file to be infected as well. In this case, if yours is a popular app or file, you should be able to find its copy on another site.
If yours is an email attachment, ask the sender to re-send you the file using another email account. However, you should be extremely careful with files sent via email because email addresses can be spoofed. Even if you trust the sender, it could be someone posing as that person to convince you to download malware.
Temporarily Disable Your Antivirus Protection
If you trust your file and its source, and you think your antivirus has mistakenly recognized it as a potential threat, turn off your antivirus protection to access your file.
You should only do this if you know what you're doing and trust the file 100%. Otherwise, if your file indeed contains a virus, you'll end up with an infected PC, causing numerous other problems.
With that said, to turn off your antivirus protection, open your antivirus app and select the on/off toggle. How you do this varies by the app you use, but it should be easy to do in most apps.
If you're a Microsoft Defender Antivirus user, to turn off your real-time protection, open your Windows Security app. In the app, select "Virus & Threat Protection."

In the "Virus & Threat Protection Settings" section, click "Manage Settings."

Turn off the "Real-Time Protection" toggle to disable your antivirus protection.
When you're ready to real-time protection, turn on the toggle again.

In the "User Account Control" prompt that opens, select "Yes."
Now that your antivirus protection is disabled, launch your file, and you'll find that it opens without any error messages. You should then enable real-time protection again as soon as possible.
Solution 3. Add Your File to Your Antivirus' Exclusion List
If you've verified your file is not harmful, add it to your antivirus' whitelist so your future access to the file isn't blocked. This way, you can keep your antivirus enabled while still keeping your access to the file open.
To do that in Microsoft Defender Antivirus, launch your Windows Security app and click "Virus & Threat Protection." Then, in the "Virus & Threat Protection Settings" section, select "Manage Settings."
To add your file to the whitelist, you'll have to first disable your antivirus protection. Do that by toggling off the "Real-Time Protection" option. Then, in the "User Account Control" prompt, select "Yes."
After doing that, scroll down the page to the "Exclusions" section. Here, click "Add or Remove Exclusions."

In the "User Account Control" prompt, select "Yes."
Then, click Add an Exclusion > File.

In the "Open" window, navigate to the folder where your file is located. Double-click the file to add it to your antivirus' whitelist.

You can now turn on your antivirus protection, and your access to the file will be retained.
Solution 4. Repair File Explorer
If you still get an operation did not complete virus error, your File Explorer utility may have issues. In this case, use Windows' SFC (System File Checker) utility to find and fix corrupt files with your file manager.
Do that by opening an elevated Command Prompt window. You can do this by launching the "Start" menu, finding "Command Prompt", and selecting "Run as Administrator."

In the "User Account Control" prompt, select "Yes."
In Command Prompt, type the following command and press Enter. This command checks if File Explorer's executable file is corrupt.
sfc /SCANFILE=C:\Windows\explorer.exe

When the above command has finished running, use the following command:
sfc /SCANFILE=C:\Windows\SysWow64\explorer.exe
SFC will find and fix issues with your File Explorer utility. You can then launch your file, and it will open without any issues.
And that's how you get around the Windows error that prevents you from opening your files. We hope the guide helps you out.