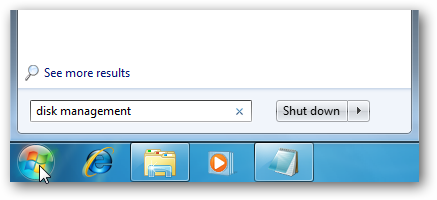
You have just received a new computer with Windows 7 pre-installed on it, but you might still be fond of Vista and want to create a dual boot system. Today we take you through the process of creating a Windows 7 / Vista dual boot system without using any third party software. Assign Drive Letters If you have extra drives like media card and optical disc drives, you might want to do a bit of renaming to keep them straight. Type Disk Management into the search box in the Start menu. Then right-click on the drive you want to change and select Change Drive Letter and Paths.

In this example we're renaming the DVD drive to (E:) this way we can keep our main 2 partitions as (C:) for Windows 7 and (D:) for Vista.

Create a New Partition Now with Disk Management still open we need to right-click on the C: drive and select Shrink Volume.

A window pops up showing the drive is being queried for available space.

After it finishes, you want to enter the amount of space to shrink the volume by. Remember that the size you select is in MB so, like in this example. 40,000MB is equal to 40GB. The minimum to go with on a Vista install should be 20GB. Before choosing a size, you'll want to plan ahead and think about how much data you'll be adding to the Vista partition. You'll also want to plan for how much space you want on the Windows 7 partition as well. Here we know we're not going to be putting a whole lot of data on the Vista partition so it's sized accordingly. When you have the amount of space entered in, click the Shrink button.

It will take a moment for the process to complete when it does you'll see the new Unallocated space. Right-click on the Unallocated space select New Simple Volume.

That starts up the New Simple Volume Wizard that is a straight forward process. When you get to the following window the drive letter D will be selected by default if you changed the drive letters in the steps above.

Then in the Format Partition screen you can leave the default settings how they are. One thing you might want to change though, is the Volume label. In this example we renamed it Vista Volume so it's easier to identify when we start the Vista installation.

After its complete you'll see the volume listed in Disk Management and if AutoPlay is enabled, it will pop up too.

You will also see it listed in My Computer. Now everything looks good to go. The Windows 7 disk is label as (C:), The new Vista Volume as (D:), and the DVD drive as (E:).

Install Vista on the New Partition Now that we have our new partition it's time to install Vista on it. You want to boot from the Vista disc that you have. Most computers will let you choose the boot option by hitting the F8 or F12 key during startup. Each computer varies so you might want to refer to the computer manual or watch the boot screen (it usually says which key to press to get the boot option). You can also go into the computer BIOS setting and select your CD/DVD drive as the first boot device.

And kick off the installation as if you were doing a clean install of Vista.

When you come to the screen to select where you want to install Vista, select the partition we created earlier.

After the first time Vista reboots during the install process you'll notice both Vista and Windows 7 in the Windows Boot Manager screen. It will still be there after the Vista installation is complete so you can chose either one at startup.

If you want to set up one or the other as the default OS, go into Advanced System Settings as explained in The Geek's Article.

Conclusion Creating a Windows 7 / Vista dual boot system is a bit easier than Windows 7 / XP because Vista won't overwrite the bootloader so you save a couple of steps. Of course you might want to use a third party utility to create your partitions, but with Windows 7, the functionality is already included and works well. If you want to create a Windows 7 / XP dual boot system we have a guide for that too.