Quick Links
When it comes to network-attached storage (NAS) devices, the AmberPro by LatticeWork is an excellent investment. With its ancillary cloud features, router, and remote-access capabilities, even Google Drive and Dropbox diehards will have a hard time saying no to this private backup server.
I had the honor of taking the AmberPro system for an upload-download journey for the ages, and even though I ran into a couple of troubles along the way, I was pretty impressed by the extensive features and web-friendly design of LatticeWork's flagship storage peripheral.
How-To Geek readers can save 25% on the purchase of an AmberPro or AmberX by using promo code "HTGAMBER25" at checkout.
Unboxing and Setup: Straightforward (And a Little Glitchy)

- Dimensions: 11.4 x 10.2 x 9.4in (29 x 25.9 x 23.88cm)
- Weight: 7.13lbs (3.23kg)
- Connections: 1x Gigabit Ethernet WAN, 2x Gigabit Ethernet LAN, 2x USB 3.0 (1x USB-A, 1x USB-C), 1x HDMI
- Power: 240V PSU
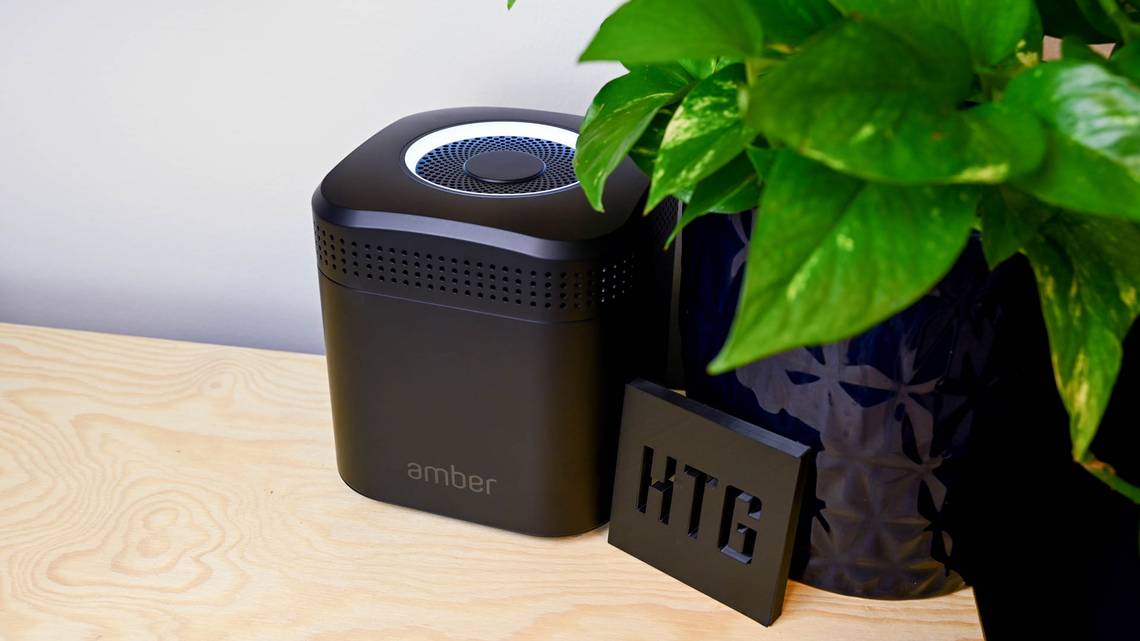
For those not familiar with typical NAS designs, generally speaking, you can expect these types of devices to be moderately-sized plastic cubes that take up the same amount of space as a standalone modem, router, or external hard drive. The AmberPro doesn't stray too far from this footprint, although compared to other NAS gizmos, LatticeWork opts for a slightly more refined approach to the look and feel of its device.
Measuring 11.4 inches wide, 10.2 inches tall, 9.4 inches from front to back, and weighing 7.13 pounds, the AmberPro's matte-black chassis will bode well for most modern homes, fitting in nicely with your other networking and A/V devices. And with plenty of vertically-favored ventilation, my own AmberPro featured little in the way of fan noise and was only ever slightly warmer than whatever the room temperature was.

As far as initial setup goes, I opted to activate my AmberPro using the Amber Manager app for iPhone (which is also available for Android), but you can also get up and running with a browser-friendly desktop wizard.
After downloading and launching Amber Manager, you'll first be prompted to connect your AmberPro to your existing modem or router. And don't worry if your home Wi-Fi runs off one of those modem/router combos that many ISPs provide; a convenient Bridge mode toggle in the Manager app will direct your internet signal directly to the AmberPro.
Once you power up the cube, you'll need to either scan the QR code (located in the quick-start guide and on the bottom of the AmberPro) or hop into your mobile device's network settings to configure the AmberPro with its temporary hotspot. This is displayed in settings as LW005165 (for a 2.4GHz connection) and LW005165_5G (for 5GHz).
At this point, your AmberPro should show up in the app, complete with MAC, router, and IP addresses. Select the device to continue to the next screen, where you'll be prompted to name your LatticeWork AmberPro and key in the storage admin password, which by default is simply "admin1234"---although you can change this later.
If all goes well, you'll finally be taken to the Manager app's main storage screen, which gives a quick-read breakdown of your AmberPro's vital signs, including system health, uptime, OS version, and a meter for seeing how many gigabytes are left to play with. At the bottom of the page, you'll see a router button. Selecting this will take you to the AmberPro's essential network settings, where you'll see an option for "Router Version." This is where I experienced my first little hiccup with the system.
When you select "Router Version," you'll likely be prompted to perform a firmware update, which will take several minutes to complete. But after the update was finished, my AmberPro and Manager app acted like I had performed a full factory reset. I then had to go through and essentially re-complete all the initial setup steps, including logins. Not a huge detriment, but it was definitely annoying.
Built-in Storage and Onboard Processor: The Basics

- Storage: (2x) 1TB Seagate Barracuda SATA drives
- Processor: Intel N4000 dual-core
- RAM: 2GB DDR4
The main idea behind the AmberPro, and similar NAS gear, is to create an easy-to-use backup platform that can be accessed using a range of mobile and desktop applications. Think of it as your own personal version of Google Drive or Dropbox, but instead of relying on remote servers, all of your file backups are stored on physical hard drives that are built into the NAS device itself.
In the case of my AmberPro review unit, there were two 1TB Seagate Barracuda SATA drives working behind the scenes. And even though basic arithmetic would lead one to conclude that two 1TB drives should equal 2TB, what we're actually dealing with is a redundant array of independent disks (RAID) setup. This allows the AmberPro to write the same data to two different hard drives, so if Disk 1 were to fail, your media would still be safe and sound on Disk 2.
I also like the idea that if you're close to maxing out that 1TB, you'll be able to connect an external hard drive to one of the AmberPro's built-in USB ports for additional storage. Alongside the hard disks, the LatticeWork AmberPro is powered by an Intel CPU N4000 dual-core processor and 2GB of DDR4 RAM.
"Great," you may be saying, "but how do gigabytes and RAM translate to backing up photos and documents, and accessing them on the go?" Let's take a look.
Amber iX for Mobile: Built for Photos and Videos
For my AmberPro testing, I used an iPhone 12 running the Amber iX mobile app, and a 2021 MacBook Pro (running Safari) to demo the Amber iX desktop client and browser-based Amber OS dashboard.
Let me just say that if you're thinking of using NAS storage for photos, you'll definitely want to download Amber iX for your phone or tablet (available for iPhone and Android). While functionality is similar between the browser dashboard and mobile app, Amber iX is simply better when it comes to pictures.
On the home screen of the iOS app, one of the first tabs you'll see is something called "Mobile Camera Roll." Selecting "Backup Now" will sync your entire camera roll to the AmberPro, and choosing the "See All" option (bottom-right of the tab) allows you to manually choose your uploads.
Once you've selected a picture or video, you'll be taken to a preview screen that displays the media front and center. At the bottom of the page is a ribbon of options, with "Upload" (an up-arrow with a line underneath) amongst them. After selecting, you'll be asked where you want to store the file--- either on your AmberPro hardware or in AmberCloud. After selecting your destination, the upload process begins.
Now here's where things got a bit weird for me. Traveling back to the home screen, the top of the page shows a file, photo, and video tracker. Even though the file and photo count matched up with the amount of media I uploaded, the content didn't actually appear in the "My Photos" tab (which is found by scrolling down a swipe or two, and is how you'll view pics through the Amber iX app).
So where did the media go? On the AmberPro---it just took a long time to get there.
Frankly, I couldn't understand why it took as long as it did to be able to see my uploaded bytes. And oddly, by tapping the "Notification" tab at the bottom of the page, I was able to view the files by selecting the three-dot menu icon and choosing "Go to File Destination." You'll then be taken to the "Uploads" folder, where you'll see all the content you've added to the AmberPro.
Selecting the three-dot icon on any of the uploads will allow you to rename the files, share via email or another app, or save for offline viewing. You can also cast to a compatible streaming device, as well as move and copy to other Amber devices and external storage hardware.
But this is all to say that it took about two to three minutes for the media to display in the "My Photos" tab, which is where most users are going to be looking after completing an upload. And rest assured: once the app actually catches up, it'll automatically refresh, and pictures and videos will be displayed. It was just surprising that such a simple process took so long to go from start to finish, especially when you consider that the LatticeWork AmberPro was hard-wired with an Ethernet cable to my ISP gear (and not being used as a standalone router).
Amber iX Desktop Client: Kind of Primitive, Kind of Puzzling

The Amber iX Desktop app (for Windows and Mac) is another bear altogether. Scaled back and less photo-and-video-friendly than the mobile version, Amber iX for Mac looked and felt like I was using an archaic piece of software, or at least a tool that was still being tested. And while you can essentially use the desktop client to do all the same things that the mobile client is capable of, creating backups and viewing media is a little trickier. First, though, let's go over some of the UI basics.
When using the desktop client, a left-aligned sidebar will display all of your most important options, which are sorted by "Cloud" and "Local Computer" tiers. Under "Cloud," "My Amber" will populate everything on your AmberPro---whether you uploaded using your desktop or another device. Now stay with me, because the "Local Computer" section is where things get murky.
This sidebar category has four destinations: "This Computer" will show you every folder and file type that your AmberPro has access to on your machine, from pics and vids to documents. "LWDownload" is where you'll go to access content that you've downloaded from your AmberPro device or AmberCloud account. "Sync Pool" will allow you to create a desktop-based folder that you can automatically upload or manually add files to (which can be accessed using any version of the Amber OS), and then there's "Backup Tool."
This last option lets you pick a folder on your computer that will be routinely backed up to your AmberPro.
All of these tools are great! But when you first take a look at the interface, you may not know where to start. I sure didn't. But after creating "Sync Pool" and "Backup Pool" processes that I used to upload music files and a handful of PDF documents, I was able to see how everything came together.
Word to the wise: if you're looking for a quick photo uploader and exporter, use Amber iX for mobile. If you're looking for a complete list of AmberPro tools and customizations, use the browser-based OS (coming up next).
Browser-Based Amber OS: The Real Meat and Potatoes

Whether you're uploading images, videos, or other file types to your AmberPro, or you're a few states away and want to access media on your at-home NAS, the Amber OS dashboard is a great way to upload, view, and export---especially if you don't feel like downloading or using the Amber iX app.
Now, if you plan on getting to your AmberPro through a web browser, accessing the dashboard isn't the quickest process in the world, but it's at least similar to how you would access your modem or router's internal settings.
First, you'll need to launch your web browser of choice, key in "latticenode.local/#finder" as your URL, then hit Search. If you happen to know the IP address of your AmberPro, you can just type that in instead (this will look something like "192.168.1.XX"). After selecting and signing into your AmberPro, you'll then be taken to Amber OS' browser-based dashboard. A left-aligned sidebar will feature a medley of handy tabs.
"File Explorer" is used to upload, access, and export files from your AmberPro, both from the built-in SATA disks and/or whatever external storage you have connected.
"Control Panel" is where you'll be able to monitor the performance and available storage of your AmberPro, create additional users, view a system log, get in touch with customer support, perform a factory reset if you need to, and more.
Similar to "Backup Pool" for the desktop client, "Backup Tool" is where you'll go to create, view, and manage backup solutions. In fact, when it comes to backup controls, I highly recommend the browser version of Amber OS, because it will allow you to create upload routines for the AmberPro using Apple's Time Machine tool and Window's Backup system. There are also options for backing up content to a Rsync-compatible server (a common file-transfer protocol), as well as the ability to turn the AmberPro into a backup server for Rsync hardware.
The "Router" tab will grant you access to all your most pertinent network settings, and the "Amber Finder" tab will search for and list all the available Amber devices connected to your internet.
Considering the scope of options available, and the excellent layout, I almost wish that LatticeWork would have better duplicated the browser-based UI into both versions of the Amber iX app, especially for the desktop client.
Docker and a Few Helpful Resources
Did you know that you can also use LatticeWork's AmberPro to install and operate open-source apps using Docker? This is particularly convenient if you're operating a small business that utilizes third-party programs like Nextcloud and Home Assistant, or simply want access to some extra-intuitive platforms to satisfy some backup and file-sharing musts that your Amber ecosystem doesn't check off.
To do so, you'll need to enable the AmberPRO add-on for Docker and its supported apps. You can find a helpful guide to show you how in Amber's support section.
Also, if you feel like you're hitting a wall at any point with any and all things Amber-related, LatticeWork's support dashboard is nothing short of amazing. Broken up into several explainer categories, you'll have access to everything from user guides and video walkthroughs to warranty info.
Should You Buy the LatticeWork AmberPro?

I won't beat around the bush: LatticeWork's AmberPro isn't cheap. As mentioned, pricing starts at $400 for the 1TB version and $500 for the 2TB model (when on sale). And when you consider the lower cost of competitive NAS hardware like the Synology DS220+ and WD My Cloud EX2 Ultra, it may be hard to wrap your head around those bigger digits.
But when you consider the AmberPro's cross-platform compatibility, myriad of backup options, networking capabilities, and feature-loaded browser dashboard and client apps, $400 starts to seem more approachable. Not to mention that Google's Premium 2TB Drive plan costs $100 per year and limits you to Google-specific tools and backup tech, while Dropbox's 3TB Professional plan is $240 annually.
Sure, at times I wish the AmberPro ran a little faster and was more plug-and-play, but once you get through the learning curve and minor layout puzzles, I think most users will be more than satisfied with the power that a solid NAS device grants you and yours. Just make sure to invest in a good battery-backup peripheral, because no power means no AmberPro access (save for what's uploaded to your AmberCloud account).

AmberPro by LatticeWork
- Straightforward setup
- Plenty of automated backup tools and customizations
- No subscription(s) required
- Option for expandable USB storage
- Includes RAID Disk Protection
- Great networking capabilities
- Expensive
- Upload times were a bit slow
- Desktop app could use some work
- No power means no AmberPro access