Quick Links
Are you making the most of your AirPods? Apple's convenient wireless headphones include some additional features that you might not be aware of until you go hunting for them.
Switch Between Devices Automatically (or Don't)
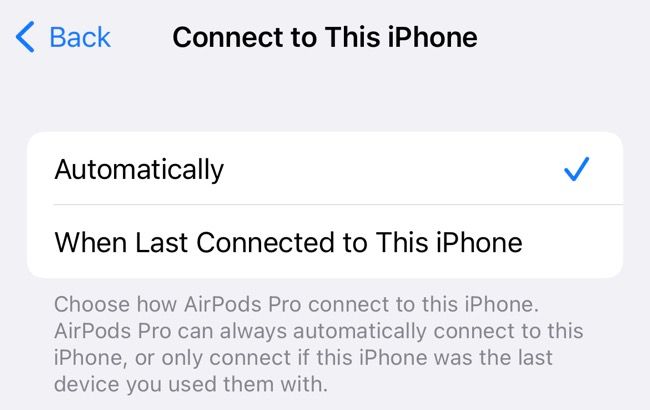
Once you've paired your AirPods with one of your devices, they'll be linked to your Apple ID. Any other devices that use the same Apple ID should "just work" without needing to be paired again, including the iPad, other iPhones, or your Mac. On top of this, AirPods will attempt to follow you around and switch between devices automatically.
This isn't always a handy feature, which is why you can modify its behavior. While using your AirPods with your iPhone or iPad head to Settings > Bluetooth and tap on the "i" button next to your headphones. Under "Connect to This iPhone/iPad" choose "When Last Connected to this iPhone/iPad" to stop your iPhone or iPad from automatically switching to your AirPods when you're using them with something else.
You can do the same on your Mac under Settings > Bluetooth by clicking the "i" next to your AirPods and changing the same setting. This preference applies on a per-device basis, which lets you use it for some devices where handy (like on your iPad) and disable it for others where it's a nuisance (like your Mac).
Use Customizable Shortcuts
Original AirPods and second-generation AirPods can make use of the double-tap gesture, with each left and right AirPods able to perform different functions like stopping and starting playback, invoking Siri, and skipping tracks.
Third-generation AirPods use a force sensor that is triggered with a squeeze. Use a single squeeze to play and pause, a double squeeze to skip forward, a triple squeeze to skip backward, or a squeeze-and-hold to activate Siri. You can also use a single squeeze to answer incoming calls when you receive them.
AirPods Pro and second-generation AirPods Pro use a force sensor too, with the same controls as the third-generation AirPods. The exception here is that squeeze-and-hold is used to switch between Transparency and active noise cancellation. You can change this behavior in your AirPods settings panel.
The AirPods Max headphones use a digital crown (single tap to play and pause, double-tap to skip forward, triple-tap to skip backward, or adjust the volume with a twist) and a noise control button for switching between Transparency mode and active noise cancellation. You can change these settings if you want.
Find out if your AirPods have customizable controls (and change them) under Settings > Bluetooth, then tap on the "i" next to your AirPods while you're wearing them.
Block Background Sound with Active Noise Cancellation
If you have a pair of AirPods Pro, Beats Fit Pro, Beats Studio Buds, or AirPods Max you can use active noise cancellation (ANC) to remove background noise. Apple's ANC is pretty good and can be toggled by pressing and holding the AirPods stem or using the dedicated noise control button on the AirPods Max.
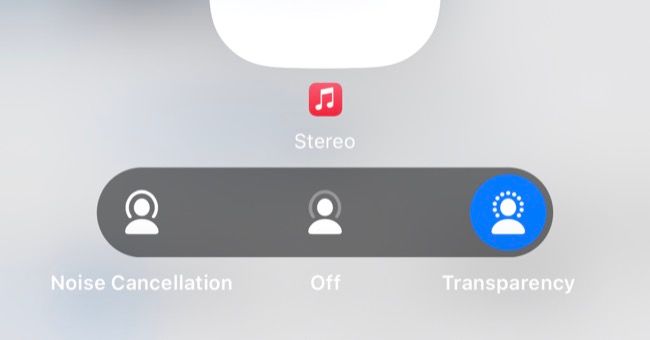
Toggle these settings whenever your AirPods are in use by launching Control Center on your iPhone or iPad and then tap-and-hold the Volume Slider. Tap on the "Noise Control" button to toggle between Noise Cancellation, Off, and Transparency. On a Mac, click on Sound in Control Center to see the same options when your AirPods are connected.
ANC uses more battery than simply turning the setting off, so if you're interested in maximizing your available battery life (or you're listening in a quiet enough environment), it might be worth turning this off.
Hear the World Around You with Transparency Mode
Just like ANC, Transparency mode works with AirPods Pro, Beats Fit Pro, Beats Studio Buds, and AirPods Max. You can toggle between this by squeezing and holding the stem of your AirPods or tapping the noise control button on the AirPods Max.
The feature is especially useful since it removes the need to take your earbuds out of your ears to hear what someone is saying, like when paying for something in a shop. Transparency isn't just convenient, it could be an important safety feature. This is especially true if you run or cycle in your AirPods (bone conduction headphones are probably still your safest bet though).
Unfortunately, Transparency has some limitations. It can be hard to hear what others are saying if your music volume is too loud, though spoken word like a podcast isn't so bad. Turn the volume down or quickly pause with a single squeeze (or tap of the Digital Crown on the AirPods Max) and then engage Transparency mode for best results.
Share Audio with other AirPods (or Beats)
You can share whatever you're listening to with another pair of headphones, including first-generation AirPods, old Beats models like BeatsX, just about any headphones that use the W1, H1 and H2 chips made since. You'll also need at least an iPhone 8, iPad (fifth generation), iPad Air (third-generation), or similar for this to work.
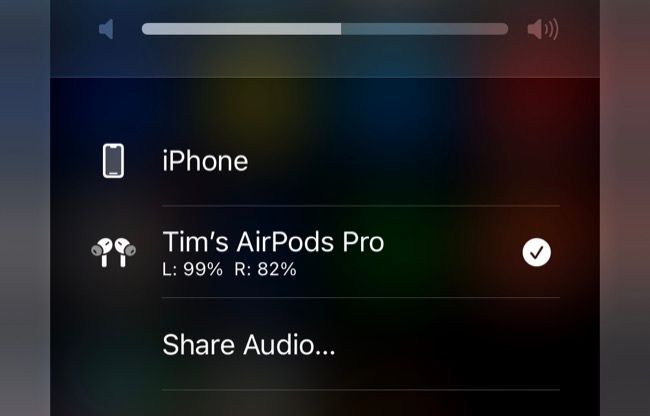
To share audio wirelessly, start listening on your own pair of AirPods or Beats headphones as you would normally. Reveal Control Center on your iPhone or iPad by swiping down from the top-right corner of the screen, then tap on the AirPlay (wireless audio) button in the top-right corner of the Now Playing box.
Next, hit the "Share Audio..." prompt in the device list. Now pair your friends' AirPods by holding the charging case close with the earbuds in it and the lid open. For AirPods Max, just hold them close to the device. For Beats headphones, put them in pairing mode and hold them close.
You should see the second pair of headphones appear on the list where you can select them. Once connected, you'll be able to control the volume independently for each using the slider in the device list. To end the session, tap on the pair of headphones you want to stop sharing with from the device list in Control Center.
Listen to Spatial Audio with Dolby Atmos
Enjoy spatial audio for impressive surround sound on AirPods Pro, third-generation AirPods, AirPods Max, and Beats Fit Pro. For this to work you'll need a spatial audio source like Apple Music, Tidal, Netflix, Apple TV+, or similar. Anywhere you see the Dolby Atmos logo you can use spatial audio with your compatible AirPods or Beats.
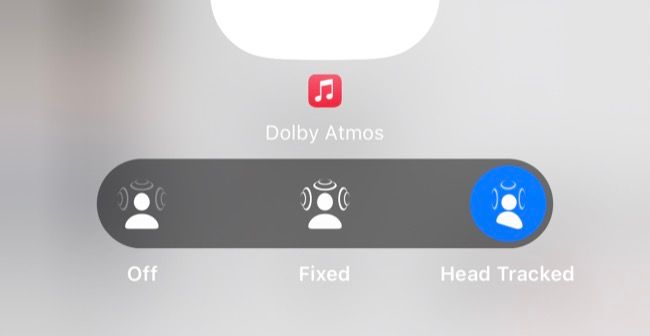
To engage spatial audio on an iPhone or iPad, start playing a source that supports it and then trigger Control Center by swiping down from the top-right corner of the screen. Now tap and hold the Volume slider, then tap on "Spatial Audio" and choose between "Fixed" and "Head Tracked" or "Off" to disable the setting altogether.
Enabling head tracking makes for a more immersive and unique Dolby Atmos experience, though it might not be ideal for all situations. You can also "Spatialize Stereo" in standard stereo content, but this doesn't always sound great.
While you're at it, you can also scan your head and set up personalized spatial audio, a feature that Apple introduced with iOS 16.
Get Cinema Sound with an Apple TV
If you have an Apple TV, your AirPods should be available without having to pair them again. Press and hold the Home button on your remote, then tap on the AirPlay (wireless audio button, it looks like a circle with some triangles behind it) to see a list of available outputs. While wearing your AirPods, you'll be able to select them on your Apple TV as an output.
If you have AirPods Pro, third-generation AirPods, AirPods Max, or compatible Beats models you'll be able to use your headphones to experience spatial audio with Dolby Atmos sources like Apple TV+, Netflix, and more. You'll need a first-generation Apple TV 4K (2017) or newer for this feature to work.
Other models can still pair with an Apple TV, but they'll be limited to standard stereo output.
Use Siri with Your AirPods
If you have "Listen for 'Hey Siri'" enabled under Settings > Siri & Search on your iPhone or iPad, your AirPods will take over as your default microphone. You can trigger Siri while wearing them by issuing commands like "Hey Siri, set a timer for five minutes" to do things hands-free.
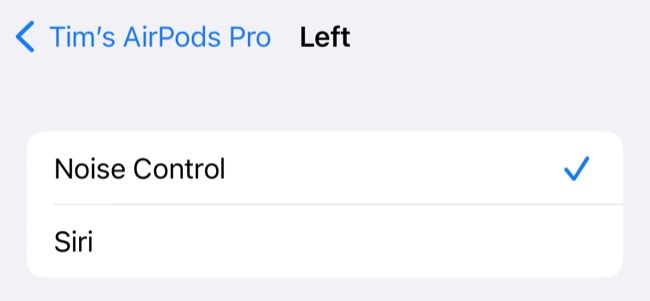
If you don't use "Hey Siri" functionality, you can still use Siri with your AirPods but you'll need to trigger it manually. This works differently depending on the model you have, for example, third-generation AirPods invoke Siri by squeezing and holding. On AirPods Pro, you can change the default behavior of this gesture on a per-earbud basis under Settings > Bluetooth then tapping the "i" next to your AirPods model.
Connect Your AirPods to Anything Over Bluetooth
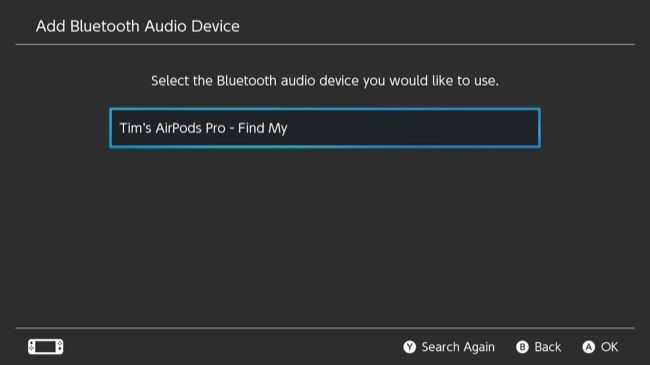
Your AirPods connect effortlessly to Apple devices, even if they're not yet paired. You can also connect them to other Bluetooth devices like a Nintendo Switch or Windows PC just as easily. Once paired, you can switch to these devices at any time by entering pairing mode.
To do this with AirPods other than the AirPods Max, place your AirPods in their charging case and open it. Press and hold the button on the back of the case until the LED indicator starts to flash. Now pair your AirPods as you would any other Bluetooth headphones (usually by going to Bluetooth settings on the device in question and selecting your AirPods).
The AirPods Max works in the same way, except you'll need to hold the noise control button until the status light flashes white.
To return your AirPods to "normal" mode for use with your iPhone or other Apple gadgets, simply select them as a sound source in iOS or macOS. Repeat the "pairing" process the next time you want to use them with a Bluetooth device (it's faster if you've already paired before).
Locate Your Missing AirPods
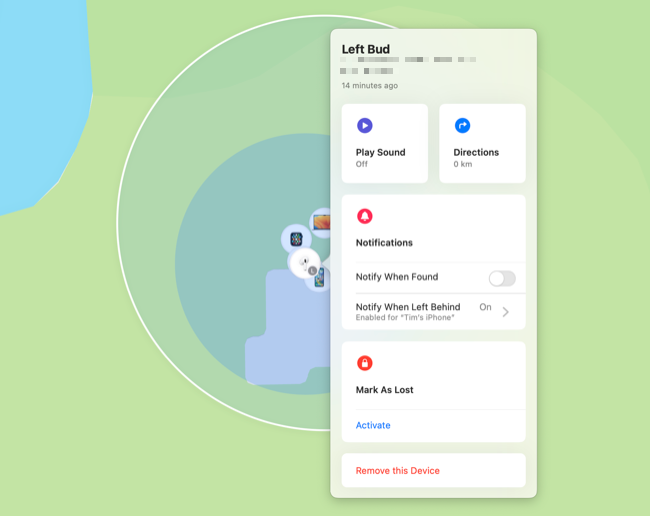
You can use the Find My app on your iPhone, iPad, or Mac to see the last-known location of your AirPods. Simply open the app, tap on Devices (or look in the sidebar on a Mac) and choose your AirPods.
If an earbud is out of the case but within range of another device, you're even able to choose "Play Sound" to sound an alert. Make sure you don't have the AirPod in your ear when trying this since the sound will be very loud. You'll also want to make sure the room is as quiet as possible to give you the best chance of finding them. This is perfect for finding an AirPod that has slipped down the crack in your sofa.
If you've lost your AirPods, you can make them as lost which works just like Lost Mode on an iPhone, Mac, or AirTag. Other iPhone users will see a message when they try to pair the AirPods that may help reunite you with your missing earbuds.
Get the Best Fit with a Fit Test
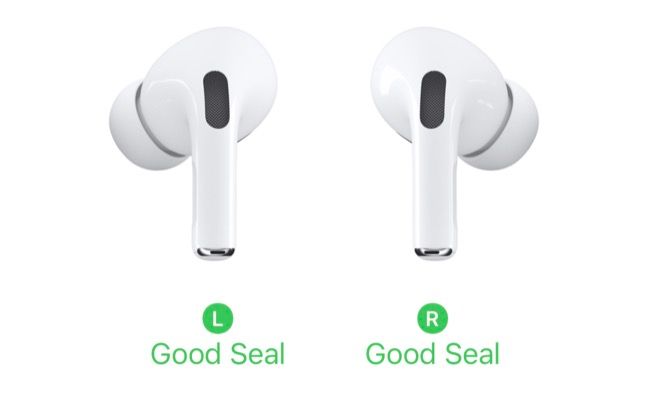
If you have AirPods Pro or third-generation AirPods, you'll get a choice of earbuds to use when you first receive your headphones. These earbuds should form a seal with your ear canal for best results, though you don't want things to be too tight or you risk your earbuds falling out or being uncomfortable.
If you're not sure if your current ear tips are the right size, you can perform a fit test. Put your AirPods into your ears then head to Settings > Bluetooth and tap in the "i" next to your AirPods, then select Test Ear Tip Fit and follow the instructions.
Charge Wirelessly
Charge AirPods Pro, second-generation or newer AirPods, and AirPods with the wireless charging case wirelessly with a Qi-certified wireless charger. Simply lay your AirPods on the charger and look for the yellow charging light. If the light is red, you may need to adjust the position of your charging case.
You can charge the case separately from the AirPods, or leave your AirPods in the case and charge everything at once. If you have a second-generation AirPods Pro, you can even use an Apple Watch charger since this model comes with a MagSafe Charging Case instead.
Troubleshooting Your AirPods
AirPods don't always behave like they're supposed to. Check out what to do if they keep disconnecting unexpectedly. You might also want to give your AirPods a good clean from time to time, to keep them hygienic.
You can also stop your AirPods from falling out of their charging case with an aftermarket case, one of the few worthwhile aftermarket AirPods accessories you might want to invest in.

