Quick Links
Microsoft PowerToys is a handy utility for Windows that lets you customize all sorts of things about Windows---everything from the behavior of windows on your screen to your keyboard shortcuts. Here's how you can use PowerToys to remap your favorite (or least favorite!) shortcuts.
Download PowerToys from Microsoft and Install It
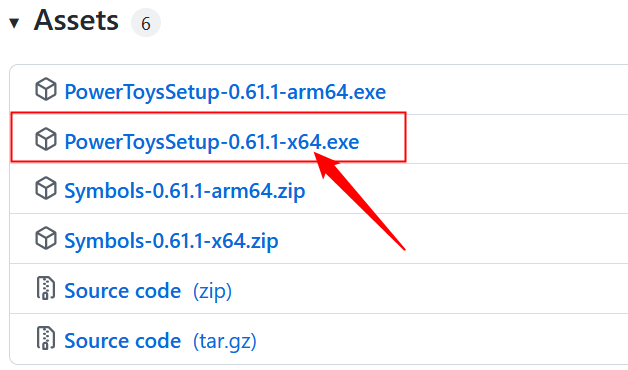
PowerToys doesn't come preinstalled on Windows; you need to download it manually. Microsoft recommends that you download PowerToys directly from GitHub. You should grab the latest version --- it'll always be the one nearest to the top.
Make sure that you grab the correct version for your PC. Most Windows desktops and laptops out there use 64-bit Intel or AMD processors, so download the installer that has "x64" in the name somewhere. Click the ".exe" file once it has finished downloading and follow the prompts.
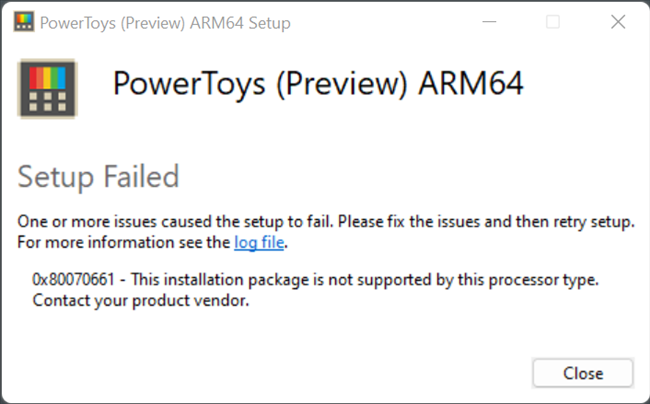
ARM-based processors are gradually becoming more common in PC, so it is possible your have one. You can always see what CPU is in your PC, and then look up the model number to be sure. Alternatively, you can just guess --- if you try to install the wrong one, you won't hurt your computer, you'll just see an error message.
The other option is to install PowerToys from the Microsoft Store. Just click "Install" and everything will be handled automatically. The only slight downside is that the version on the Microsoft Store is updated a bit more slowly than the version on GitHub, so you'll have to wait a bit longer for bug fixes.
If you want you can install PowerToys via a command line as well. Open up Terminal, make sure it is a PowerShell tab, then copy and paste
winget install Microsoft.PowerToys --source winget
into the window and hit Enter.
Use PowerToys to Remap Keys or Shortcuts
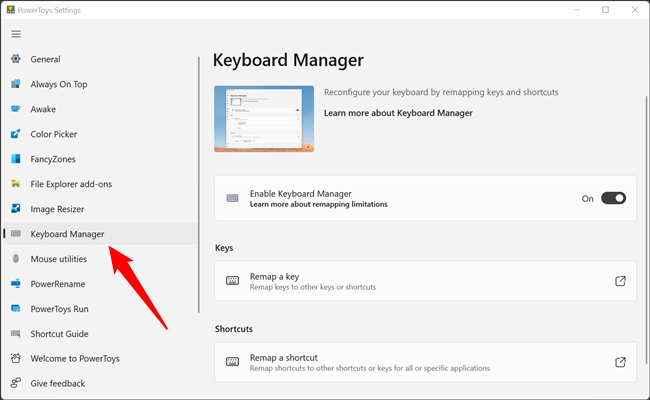
Launch PowerToys and click on "Keyboard Manager" on the left-hand side.
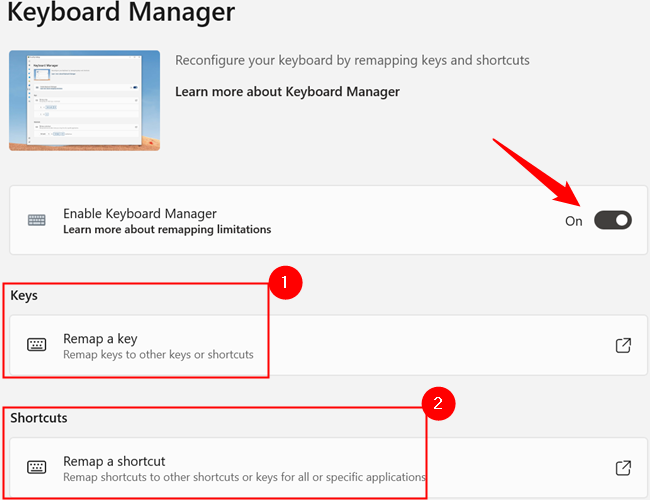
Ensure that "Enable Keyboard Manager" is toggled to the "On" position --- it should be by default. There are two choices: "Remap a Key" and "Remap a Shortcut."
The names mostly speak for themselves. "Remap a Key" lets you map a key to a different key, a key to a shortcut, or a key to a function.
As a silly example, you could use "Remap a Key" to map the "T" key to "Ctrl+V" so that pressing "T" would trigger the paste function. You could map the "[" and "]" keys to "Volume Down" and "Volume Up," respectively.
You can select a key, shortcut, or function, using the drop-down menus, or you can click "Type." If you click "Type," you just need to press the key you want instead of scrolling through the list.
You're mostly constrained by the fact that there aren't many keys on your keyboard that can reasonably be rebound to other keys, shortcuts, or functions without impinging your ability to use your computer normally.
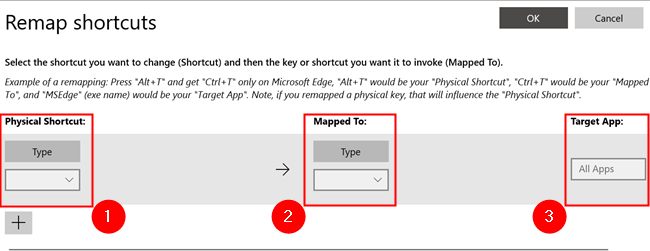
"Remap a Shortcut" is more useful in that regard. Unlike "Remap a Key," "Remap a Shortcut" allows you to combine multiple keystrokes and map them to another shortcut or function, and you can even make the remapping application specific. That gives you a ton of flexibility and lets you work around almost any preexisting shortcuts that might cause a conflict.
Select your new key combination, select the shortcut or function you want to map the new key combination to, and then pick the application you want to use it with.
Leave "Target App" blank to make the remap system-wide. If you want a remap to apply only to a specific program, you need to enter the program's executable name into the box.
You can open Terminal and enter the command "tasklist" to get a list of the processes currently running. It will display the name you need to enter into the "Target App" box under the "Image Name" column.
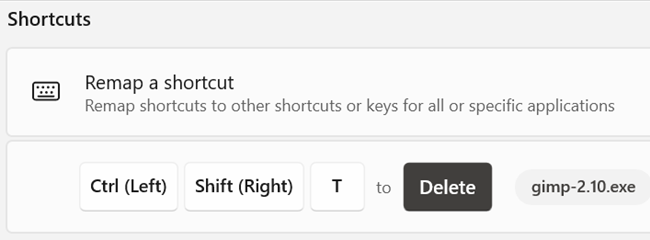
Now instead of mapping "[" and "]" to "Volume Down" and "Volume Up," you can map "Ctrl+[" to "Volume Down" and "Ctrl+]" to "Volume Up," and you don't need to worry about messing with your ability to insert brackets or curly brackets at all. If you wanted, you could map "Ctrl(Left)+Shift(Right)+T" to "Delete" and make it only apply in GIMP.
Plenty of applications let you remap shortcuts or functions within their settings, but some don't --- they're ideal candidates for the PowerToys remapping utility. Microsoft specifically warns that it may not work well in games, though, so test it thoroughly before you join a competitive match.
Alternative Solution: Remap Keys in Windows 11 Using SharpKeys
The one drawback to using PowerToys is that the utility needs to be running if you want to keep the key remapping working. Windows actually supports built-in key remapping via the Registry, but it's so complicated that you're better off using the open source SharpKeys application to handle it.
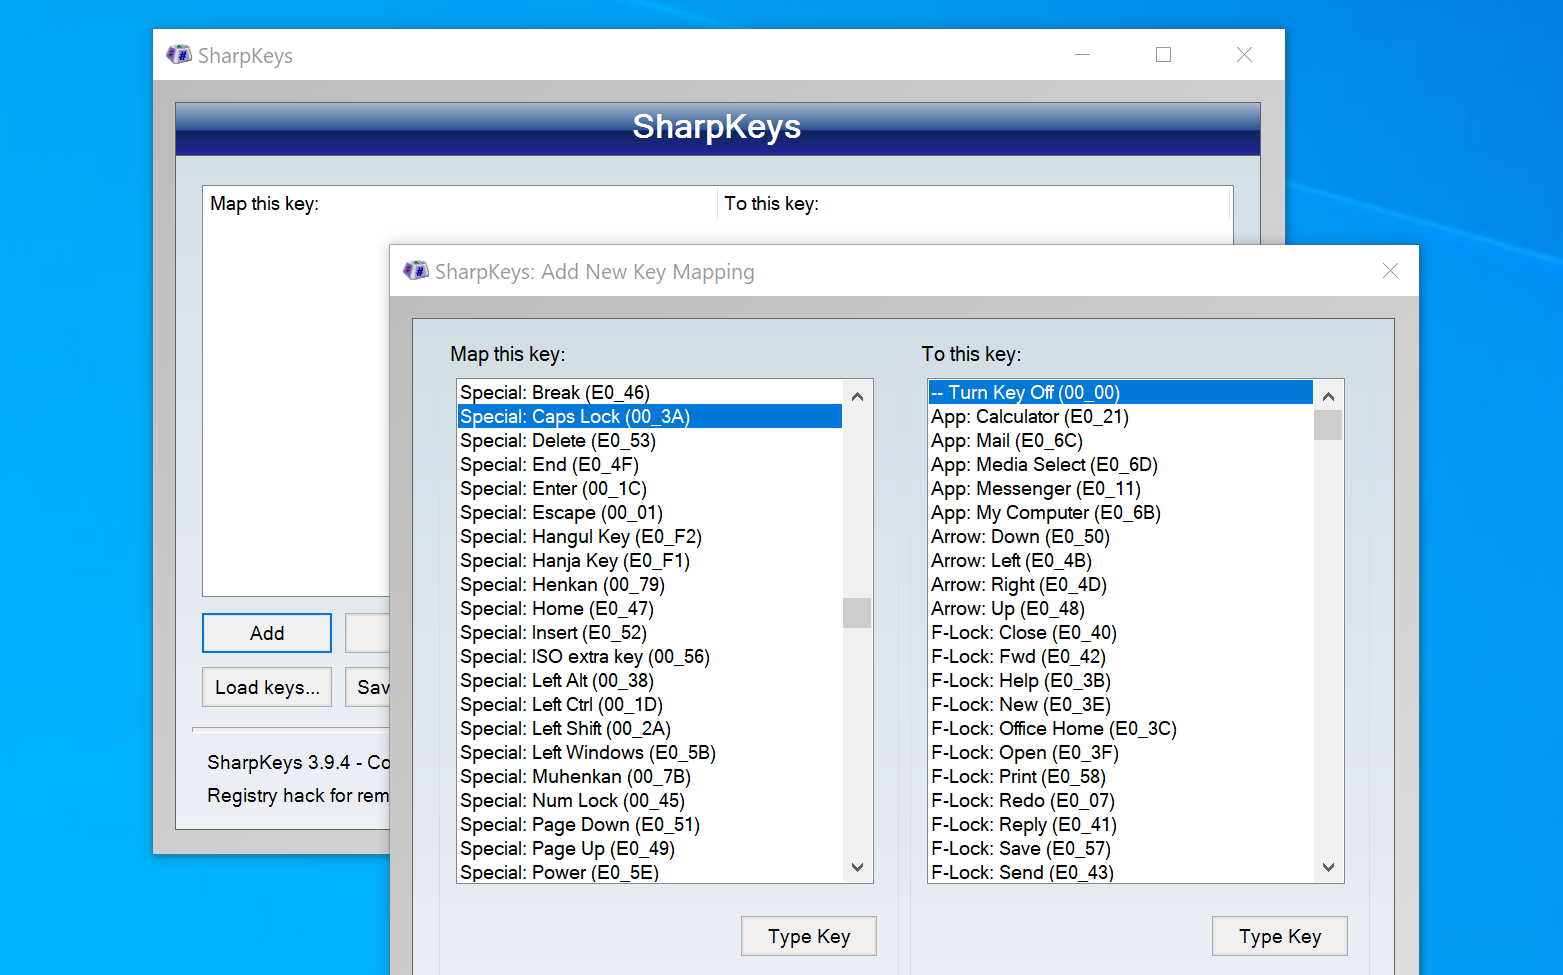
SharpKeys will allow you to remap any key to any other key, on any version of Windows, and you can even delete the application when you're done. The limitation? It can't handle shortcut key combinations, so you couldn't remap ALT+C to CTRL+C, but you can use it for things like disabling or remapping the Caps Lock key.
Simply install the application from the Microsoft Store or their Github repository, launch it, and then you can click the Add button from the interface to bring up the Add New Key Remapping dialog. From there, you can map from one key to another easily.
SharpKeys has worked in every version of Windows since at least Vista, so you can definitely use it for remapping keys on Windows 10 as well.


![An example mapping the "[" key to volume down and the "]" key to volume up.](https://static1.howtogeekimages.com/wordpress/wp-content/uploads/2022/09/remap-keys-example.png)
