Quick Links
Key Takeaways
Press Windows+Shift+S to open the Snipping Tool on Windows 10 or Windows 11. The Snipping Tool can take rectangular region screenshots, full-screen screenshots, screenshots of a specific window, or freeform screenshots. You can also draw on a screenshot before you save it.
Need to quickly take a screenshot on your PC? If so, Windows' built-in Snipping Tool is just a keyboard shortcut away. This tool lets you capture screenshots in various shapes and also allows you to edit them. We'll show you how to launch it.
Snipping Tool vs. Snip and Sketch
The original Snipping Tool is a legacy program introduced in Windows Vista continued to exist in Windows 7 and was eventually replaced in Windows 10 by Snip and Sketch. Despite being replaced, the Snipping Tool remains popular, and the Snipping Tool and Snip and Sketch are both commonly referred to as just "Snipping Tool."
To confuse matters further, Microsoft merged the legacy Snipping Tool and Snip and Sketch into a new application also named Snipping Tool with the release of Windows 11. The new Snipping Tool features a user interface reminiscent of the legacy snipping tool, but with all of the bells and whistles of Snip and Sketch.
Technically, Windows+Shift+S opens a program called Snip and Sketch on Windows 10 and Snipping Tool on Windows 11. We're going to refer to it as "Snipping Tool" for the purposes of this article because that is what most people call it still.
Launch Snipping Tool With a Windows Keyboard Shortcut
To open the built-in Snipping Tool on Windows 10 or 11, press the Windows+Shift+S keyboard shortcut on your keyboard.
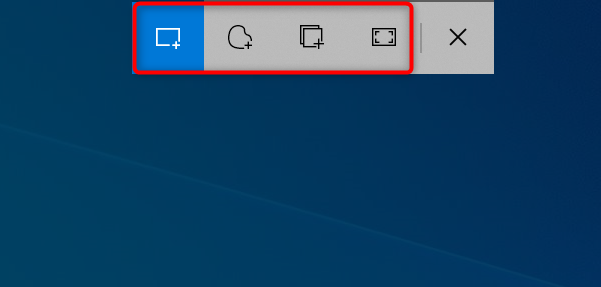
Once you press those keys, your screen will turn darker indicating the tool is active. At the top of your screen, you will see five icons, four of which allow you to choose the shape for your screenshot.
Here's what clicking each icon does, from left to right:
- Rectangular Snip: This is the default option and it captures your screenshots in a rectangular shape.
- Freeform Snip: If you'd like to capture screenshots in a freeform way, select this option.
- Window Snip: This option captures the entire window of a specific app open on your PC.
- Fullscreen Snip: This captures your entire screen, including all your open windows and even the taskbar.
- Close Snipping: If you don't wish to take a screenshot, click this option to close the tool.
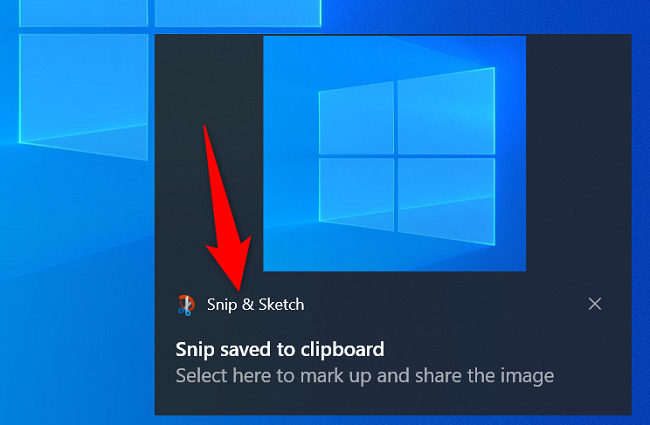
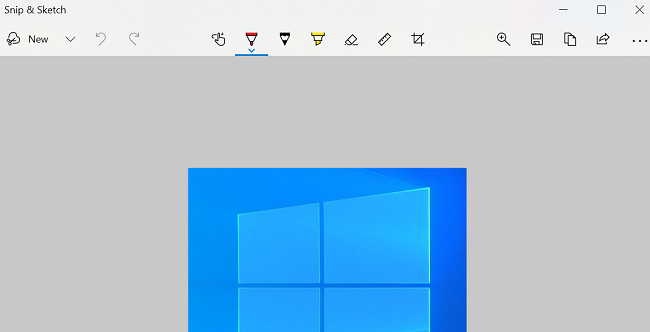
When you capture a screenshot, Snipping Tool displays a notification in the bottom-right corner of your screen. Click this notification to open Snipping Tool with all its features.
Launch Snip and Sketch via the Start Menu on Windows 10
In addition to having a keyboard shortcut for opening Snipping Tool, you have multiple shortcuts to access the features within this tool.
Here are a few of the useful shortcuts you may want to use when Snipping Tool is open:
- Ctrl+N: Use this to take a new screenshot.
- Ctrl+S: To save your current screenshot in your chosen folder and selected file format, press this shortcut.
- Ctrl+C: This copies your current screenshot to your clipboard.
- Ctrl+P: You can print your screenshot with this option.
And that's how you open Windows' built-in screen capture tool to make and edit your screenshots. Very useful!
Besides Snipping Tool, both Windows 10 and 11 also have other ways to take screenshots. Feel free to use whatever method that's convenient for you.


