Quick Links
It's tough shopping for an external hard drive with reasonable performance these days. Many USB options use a slow hard drive technology called SMR that can be hard to spot. If you want good transfer speeds for a reasonable price, you'll need to roll your own. Here's how.
Why Build Your Own Drive?
Since at least 2020, manufacturers of external USB hard drives have been using a technology called Shingled Magnetic Recording (SMR) in their products that increases capacity and lowers cost, but dramatically limits the performance of the drives. SMR uses a special method of partially overwriting previously written tracks on a hard disk platter (like shingles on a house roof). In contrast, Conventional Magnetic Recording (CMR) hard drives use conventional parallel writing methods that don't overlap tracks, so they don't suffer the same performance penalties.
Manufacturers love SMR because the drives require fewer platters verses a CMR-based drive, and that saves them money. Unfortunately, these same manufacturers have also stirred up controversy by selling these arguably inferior SMR drives---especially in USB hard drives---without openly advertising that fact.

Luckily, you can take the guesswork out of external USB hard drive shopping by assembling a drive yourself. Using a clearly-marked CMR drive from a reputable vendor and an inexpensive USB hard drive enclosure, you'll be up and running in no time.
It's important to note that there are many avenues you can travel when it comes to rolling your own external storage, including choosing different drive sizes (2.5"), SSDs, or RAID arrays that dramatically increase performance. For now, we're going to stick with building a simple USB 3.0 external USB drive that uses a 3.5" CMR hard disk. It will be ideal for home backups.
First, Pick an Internal Hard Drive Model
The heart and soul of your custom USB hard drive is a SATA internal hard disk---the kind you'd put into a custom PC build or a NAS. In this situation, we'll focus on conventional 3.5" disks because they offer a wide variety of storage options for a reasonable price and performance.
What's paramount when choosing a hard drive is picking one that uses CMR technology (and avoiding SMR drives, as described above). While some manufacturers aren't open about which drives use SMR, Seagate provides a handy chart that shows which of its hard drive models use CMR or SMR technology.
In our drive build, we chose an 8 TB IronWolf hard drive for its balance between capacity and price. As of April 2022, all IronWolf drives utilize CMR, which is what you want for a higher-performance backup or storage drive. They also operate at 7200 RPM, which translates to quicker access times.

IronWolf 8TB CMR Hard Drive
A great CMR hard drive for extra storage or backup.
And like nearly all modern hard drives, IronWolf drives use the Serial ATA (SATA) connection standard. This is important to note because of the enclosure we'll be picking below.
Of course, you can pick any 3.5" SATA hard disk you want. Just make sure it uses CMR for its recording technique, and know that sometimes manufacturers label it "PMR" instead, for Perpindicular Magnetic Recording. PMR is basically the same as CMR.
Next, Pick a USB Hard Drive Enclosure
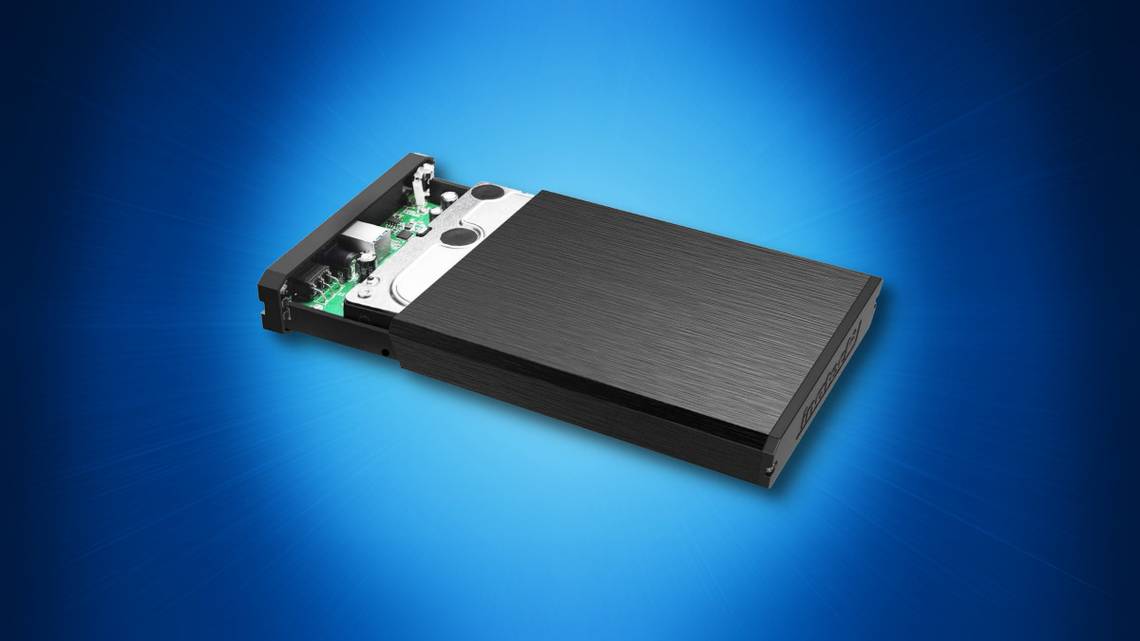
Now that you have your 3.5" SATA hard disk picked out, it's time to buy a USB enclosure. There are dozens on the market available, mostly from generic OEM vendors with different badges. The choice of USB enclosure has a large effect on performance because each enclosure includes an interface board that translates between the SATA standard used by the hard drive and the USB standard you use to connect it to your PC. We'll be aiming for USB 3.0 enclosures here for price purposes, but it's also possible to find enclosures that support faster standards such as USB 3.2.
For our build, we picked the ORICO Toolfree USB 3.0 to SATA External 3.5'' Hard Drive Enclosure, because it includes everything you need (aside from the hard disk), is easy to put together, supports USB 3.0 transfer speeds, includes a power button, and retails for only around $24.

ORICO USB 3.0 to SATA External 3.5'' Hard Drive Enclosure
A good, easy-to-assemble USB 3 hard drive enclosure.
The ORICO enclosure is a serviceable purchase for a non-rugged environment, such as a desktop in a clean, air-conditioned home. Otherwise, it has some drawbacks, including a plastic enclosure that does not conduct heat well and no mechanical mounting inside the unit (the drive slips in place easily, as you'll see ahead). If you want a slightly more robust case for high-performance environments, you might try the Inateck 3.5" Hard Drive Enclosure instead (for around $30).

Inateck 3.5 Hard Drive Enclosure, Aluminum USB 3.0 Sata HDD Enclosure
A metal hard drive enclosure with more secure mounting, a rocker switch, and good heat conductivity.
Another metal enclosure alternative is the OWC Mercury Elite Pro Storage Enclosure. It supports USB 3.2 and is somewhat pricier at around $55. Any one of these enclosures will work on PCs, Macs, or Linux once you format the drive you'll insert with the proper file system.
Finally, Put Them Together
Now that you have your USB enclosure and SATA drive, it's time to put the two parts together. For the ORICO enclosure, all you have to do is slide off the plastic cover, insert the hard disk into the SATA slot inside, then slide the case back on. You'll notice that nothing secures the hard drive other than the SATA connector and the plastic case around it, so to make the fit more snugly, use the foam inserts that come with the ORICO case to pad the drive into place.

As discussed above, the ORICO design has pros and cons. The pro is that it's more like a SATA dock, where it would be easy to change out hard drives if necessary. The con is that it's not mechanically secure for rugged environments. If you purchased the Inateck or OWC case for a more secure fit, mounting the hard drive is easy with a few screws.
Once assembled, plug the drive into your PC or Mac using the USB cable provided and switch it on. In some cases, the hard drive might already be formatted and ready to go. If not, you can use Disk Management on Windows or Disk Utility on a Mac to partition and format the drive. On Windows, you should choose the NTFS file system, and choose AFS on a Mac. If you want to format the drive for use on both Macs and Windows, choose exFAT as the file system.
For backups on Windows, the built-in File History feature is simple and easy to use. On a Mac, you can use the new USB drive with Time Machine for easy backups. Enjoy your new drive!