To perform certain tasks that require admin privileges, you can enter Task Manager as admin using a graphical option, a command-line option, as well as by creating a desktop shortcut. We'll show you how to do that on both Windows 10 and 11.
For single instances where you want Task Manager with admin rights, use the first and second methods below. To always run the utility with admin privileges, use the third method in this guide.
The steps to run Task Manager as admin are pretty much the same for both Windows 10 and Windows 11. We'll use a Windows 10 PC to demonstrate the steps in this guide.
Method 1: The Start Menu
To quickly launch Task Manager as administrator, use an option in your PC's Start menu.
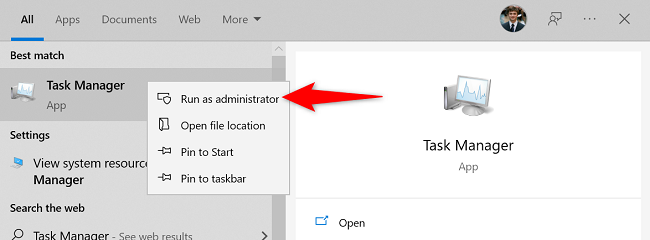
First, open the "Start" menu and search for "Task Manager." When you see the utility in the search results, right-click it and select "Run as Administrator."
You'll see a "User Account Control" prompt. Here, enter your admin account's password and press Enter.
Your Task Manager instance is now open with full admin rights, and you may carry out your tasks requiring special privileges. Note that in Windows 11 you can make Task Manager stay on top of other windows.
Method 2: Command Prompt
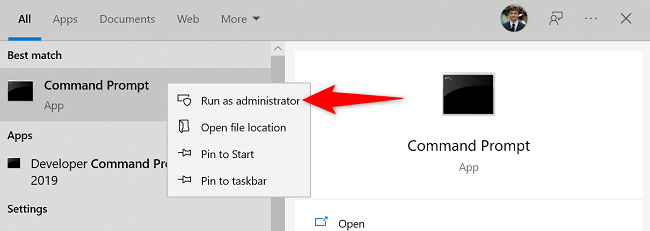
To use a command to enter Task Manager as admin, first, open your "Start" menu and search for "Command Prompt."
Right-click the "Command Prompt" utility and select "Run as administrator" from the menu.
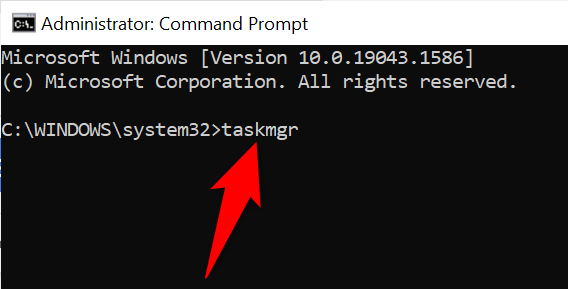
In the "User Account Control" prompt that opens, enter your admin password and press Enter. Then, on the Command Prompt window, type the following command and press Enter:
taskmgr
Task Manager will open with full admin rights.
Method 3: A Desktop Shortcut
If you often run Task Manager as admin, add a shortcut to your desktop that always opens this utility with administrator rights.
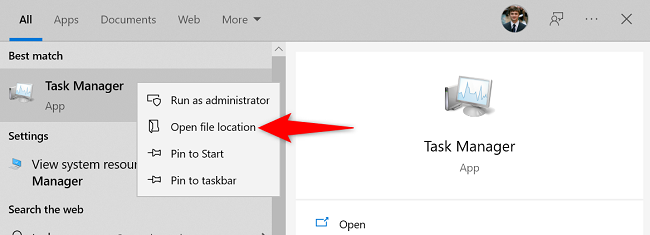
To do that, first, launch the "Start" menu and search for "Task Manager." Right-click the utility and choose "Open File Location."
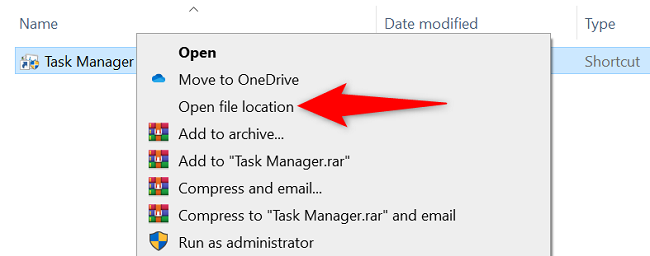
On the File Explorer window, right-click the "Task Manager" shortcut and choose "Open File Location."
You'll see a "Taskmgr.exe" file. Right-click this file and choose Send To > Desktop (Create Shortcut).
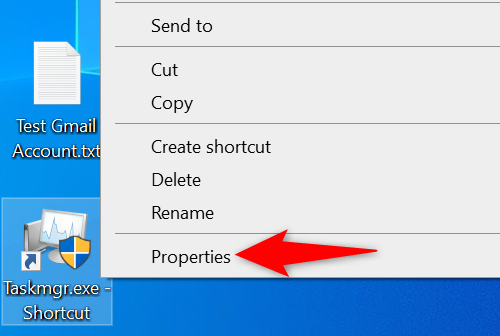
You now have a Task Manager shortcut on your desktop. To make this shortcut always open the utility with admin rights, right-click it and choose "Properties."
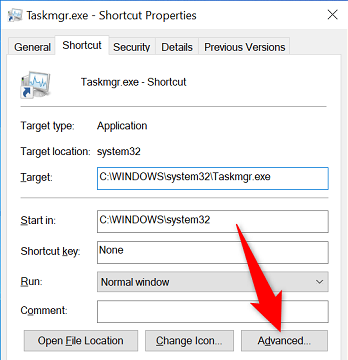
On the "Properties" window, in the "Shortcut" tab, select "Advanced."
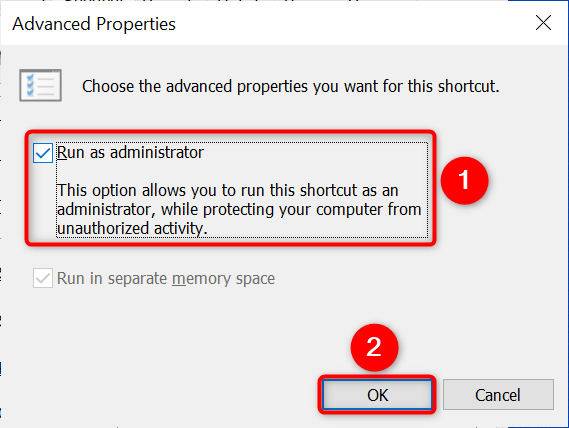
Turn on the "Run as Administrator" option, then click "OK."
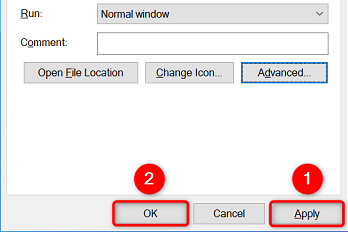
Back on the "Properties" window, click "Apply" followed by "OK."
And you're all set. From now on, whenever you open your desktop Task Manager shortcut, the utility will launch with admin rights.

