A simple thing you can do to improve your online privacy and security is to use a custom DNS server. Like changing the DNS server on other platforms, this is possible to do on your Android device. We'll show you how it works.
DNS stands for "Domain Name System," and it connects web servers to their respective domain names. Your internet provider provides its own DNS server, but you can change which one your devices use. There are plenty of advantages to using a custom DNS server.
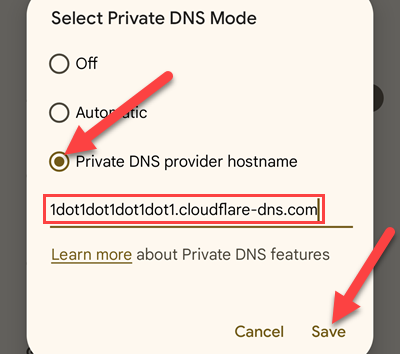
Changing the DNS server on your Android phone is slightly different than on other devices. You can't just enter the string of numbers---Cloudflare is 1.1.1.1, for example. Instead, you'll need the full TLS hostname. For Cloudflare, that's 1dot1dot1dot1.cloudflare-dns.com. You can find this for whichever DNS server you'd like to use.
First, swipe down once or twice (depending on your phone) from the top of the screen and tap the gear icon to open the Settings.
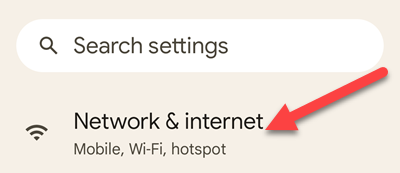
Next, select "Network & Internet" or "Connections."
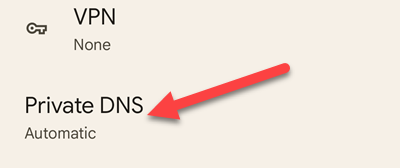
Scroll down and select "Private DNS." On Samsung phones, you will need to go to "More Connection Settings" before you can see Private DNS.
Switch to "Private DNS Provider Hostname" and enter the hostname. Tap "Save" when you're done.
There you have it! You're now browsing the web with a little extra security on your Android device, and that's never a bad thing. If you're not sure which DNS to use, OpenDNS, Google DNS, and Cloudflare DNS are popular choices.


