Quick Links
If you have a lengthy presentation, keeping it organized is important. One way to do this in Microsoft PowerPoint is to use sections. We'll show you what they are and how you can make use of them.
You can group slides into various sections to keep things neat and tidy. Expand a section and collapse the rest so you can focus on what you're working on. You can also easily move sections if you want to rearrange your presentation.
If you're looking for a better way to organize your PowerPoint slideshows, let's look at how to use sections.
About Sections in Microsoft PowerPoint
If you use Microsoft Word, you might be familiar with how sections work in that application. But sections in PowerPoint are completely different. Rather than breaking up a document, as sections do in Word, sections work more like folders in PowerPoint.
Sections contain groups of slides for organizational purposes only. Sections are not visible when presenting your show, and after creating sections you can still move your slides to rearrange them as you normally would.
Sections are available in Microsoft PowerPoint on Windows, Mac, and the web. Because the features differ slightly on the web versus desktop, we'll look at each separately.
Use Sections in PowerPoint on Windows or Mac
You can organize your slideshow easily with sections on Windows or Mac. This is especially helpful if you're collaborating with others. For instance, you might assign certain sections to specific people.
Create a Section
You can create a section using Normal or Slide Sorter view as well as with the Home tab.
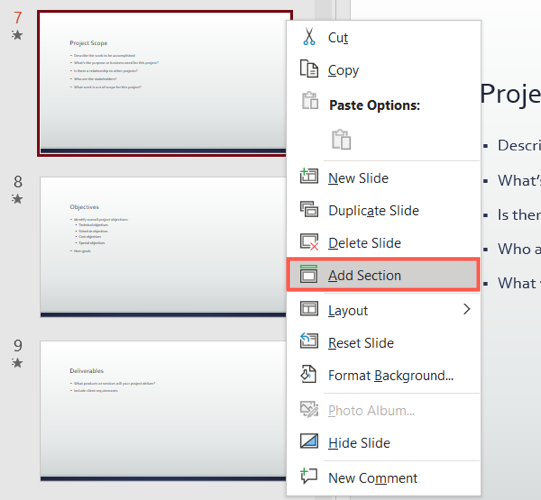
On the View tab, select "Normal" or "Slide Sorter" and pick the thumbnail for the first slide you want in the section. Right-click and choose "Add Section" from the shortcut menu.
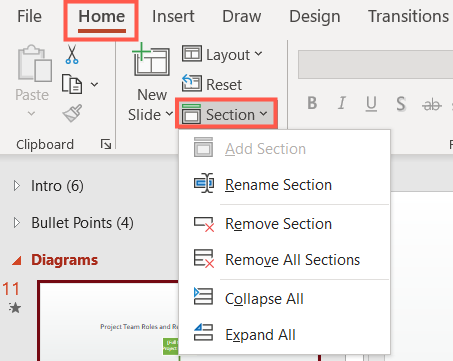
To use the Home tab, select the slide to start the section by making it the active slide. Then, click the Section drop-down arrow and pick "Add Section."
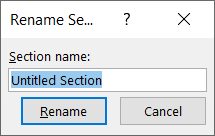
You'll immediately see a pop-up window prompting you to name your section. Enter the name and click "Rename."
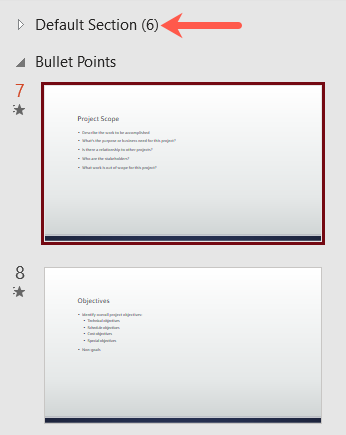
If the slide you pick to start a section is not the first slide in your presentation, a Default Section will be created automatically and contain all slides before your created section.
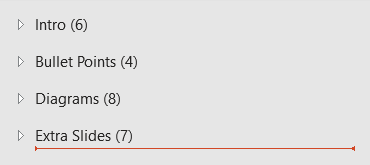
Once you set up sections, you'll see the number of slides within each one. Click the arrow next to a section header to collapse or expand it.
Manage Sections
You can rename and collapse or expand all sections in your slideshow. And like creating a section, you can do so in Normal view, Slide Sorter view, or using the Home tab.
Either right-click the section in one of the mentioned views or select the Section drop-down arrow on the Home tab to take an action on your section.
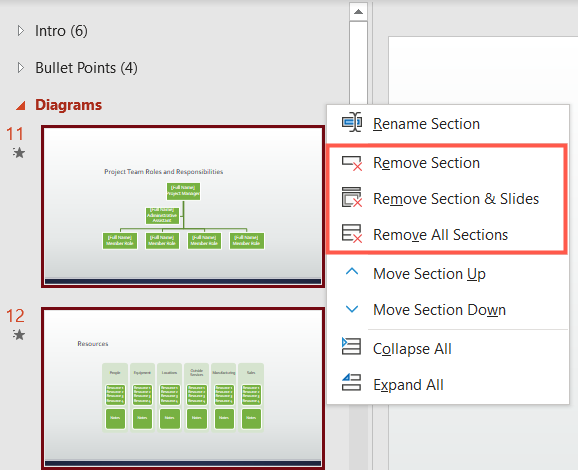
If you want to delete a section, you have three different options. You can delete the selected section, delete the section and the slides in it, or delete all sections in the slideshow.
Right-click the section and choose one of the delete actions.
If you use the Home tab to manage your sections, you'll only see two of the delete actions in the Section drop-down box. You can either remove the selected section or all sections. So if you want to delete a section and its slides too, use the right-click method above.
Move a Section
You may decide to move a section, which would include that group of slides, to a different spot in your presentation.
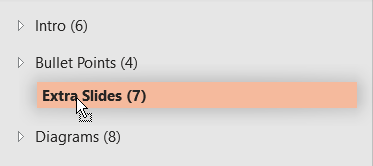
In either Normal or Slide Sorter view, select the section, drag it to its new location in the slideshow, and release.
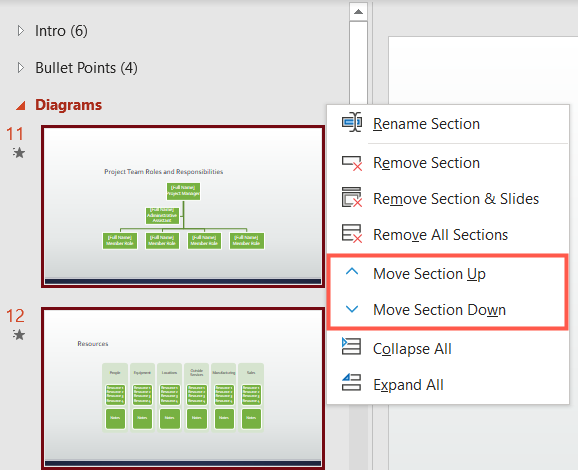
Alternatively, right-click the section and choose "Move Section Up" or "Move Section Down."
Use Sections in PowerPoint on the Web
In Microsoft PowerPoint on the web, you can create and use sections. However, you do have limited actions.
Create a Section
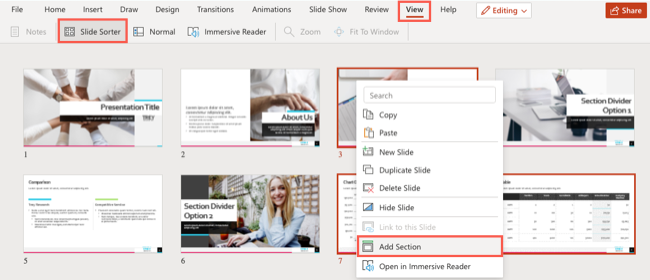
To create a section, select the View tab and choose "Slide Sorter" at the top. Then, right-click the first slide you want in the section and choose "Add Section" from the shortcut menu.
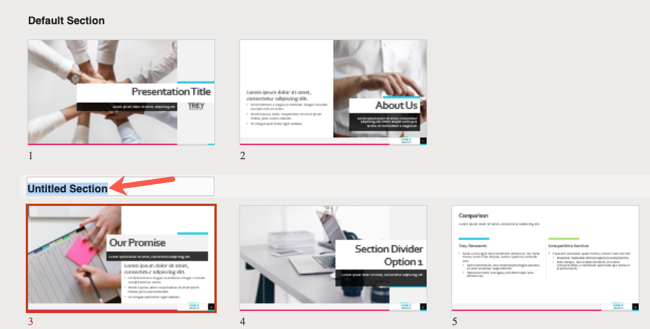
When the section appears, replace "Untitled Section" with the name you want, and press Enter or Return.
You can only see sections you create in Slide Sorter view. They are not collapsible or expandable like in the desktop application.
Manage Sections
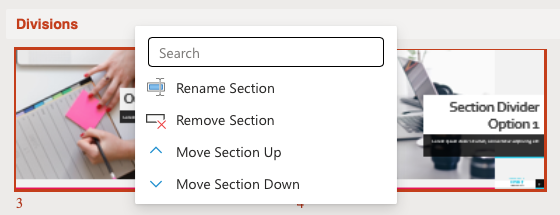
To rename, remove, or move a section, head back to View > Slide Sorter. Right-click the section header to take an action.
Sections in PowerPoint give you a good way to keep track of and manage your slides. Whether working alone or sharing the slideshow with others, you're sure to keep your presentation organized.


