Quick Links
As a matter of good practice, you should always safely remove your USB drive on your Windows PC. Otherwise, the data on your USB may become corrupt. Not sure how to safely remove your USB? Here are five ways.
Use the System Tray
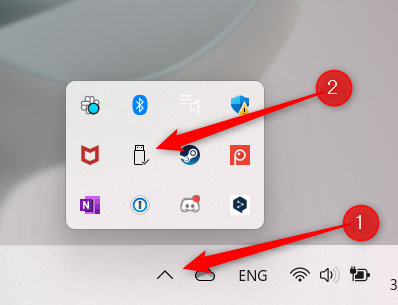
The most common way to safely eject your USB drive is by way of the System Tray. In the System Tray, click the "Up Arrow" icon to expand the menu. Next, double-click the "USB" icon.
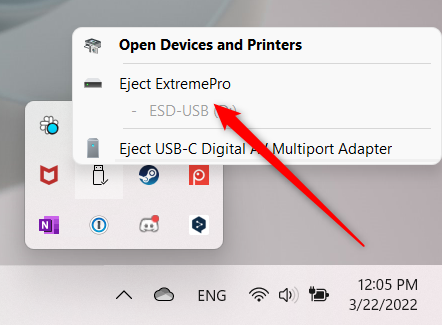
In the sub-menu that appears, select the "Eject <USB>" option. The text that appears will depend on which type of USB you're using.
You can now safely remove your USB.
Use File Explorer
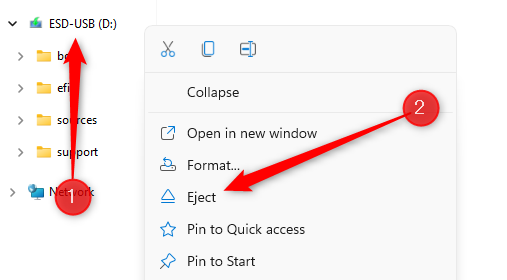
If you happen to be working in File Explorer, there's an option for you to remove your USB. In the left-hand pane in File Explorer, find and right-click your USB device. In the context menu that appears, select "Eject."
Simple, right?
Use the Settings App
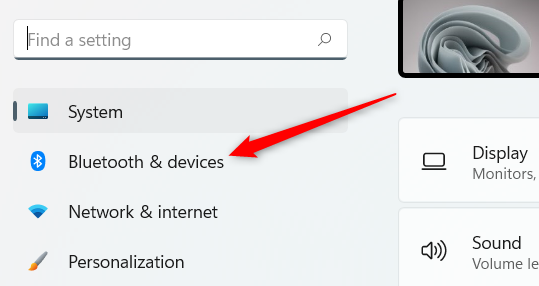
There are a ton of different things you can do from the Settings app, including removing your USB drive. First, press "Windows+I" to open the Settings app. Once open, select "Bluetooth & Devices" in the left-hand pane.
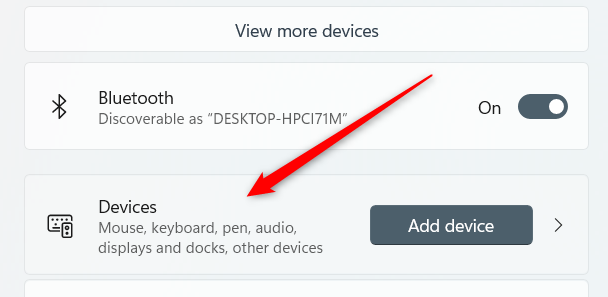
On the next screen, click the "Devices" option near the top of the window.
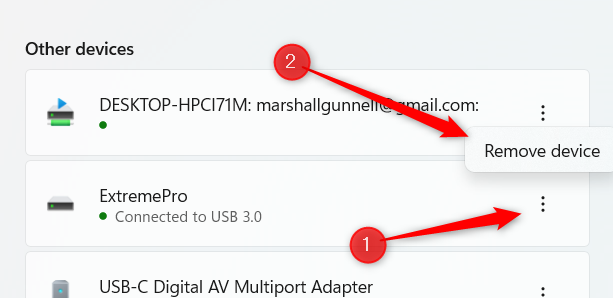
Next, in the "Other Devices" group, click the three vertical dots next to your USB drive and then select "Remove Device" from the one-option context menu.
It's now safe to remove your USB device.
Use Disk Management
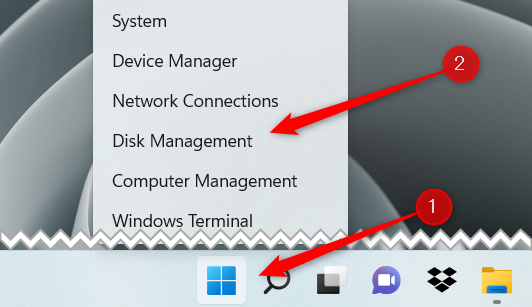
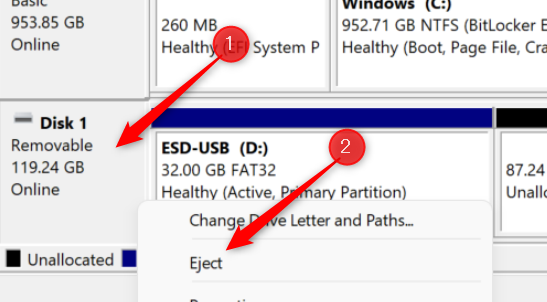
You can also safely remove your USB from Disk Management. Open Disk Management by right-clicking the Windows icon to open the Power User menu. Then, select "Disk management from the menu.
Next, locate the drive you want to eject (in this case, your USB). Right-click it and then select "Eject" from the context menu.
You're now able to remove your USB.
Use Windows Terminal
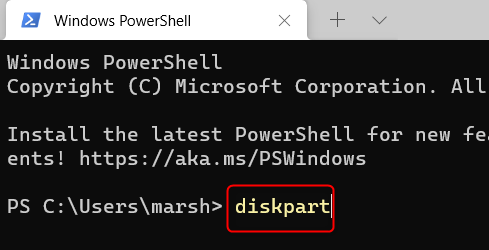
If you have no GUI (such as in a Hyper-V server), or if you simply want to feel like a hacker, you can remove the USB from Windows Terminal. Open Windows Terminal and then run this command:
diskpart
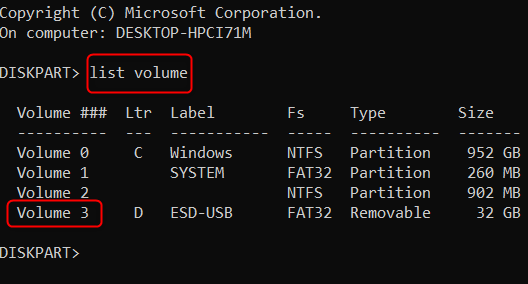
A new terminal will open and you'll be in the C:\WINDOWS\system32\diskpart.exe file path. Before you go removing the drive, you'll need to know its volume number. To do so, run this command:
list volume
A list of volumes will appear. First, find your USB drive under "Label," and then note its volume number under the "Volume ###" column. In our case, that's Volume 3.
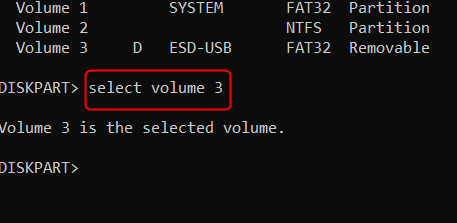
You'll now need to select the volume number of your USB. To do so, run the select volume <number> command. In our example, we'd run:
select volume 3
A message will appear saying you've selected the volume.
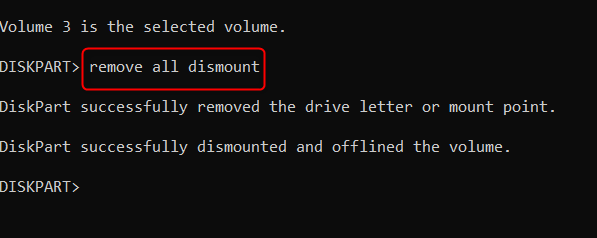
With the USB's volume selected, run this command to eject it:
remove all dismount
You'll receive a message stating you've successfully removed the drive letter or mount point, and dismounted and offline the volume. In other words, you can now safely remove the USB drive.
There you have it. With so many different ways to safely eject your USB drive, there's really no reason you should ever risk data corruption by removing it when you shouldn't. But, if you want to save a few clicks and some time, there's a way to never have to "safely remove' your drive again.

