Quick Links
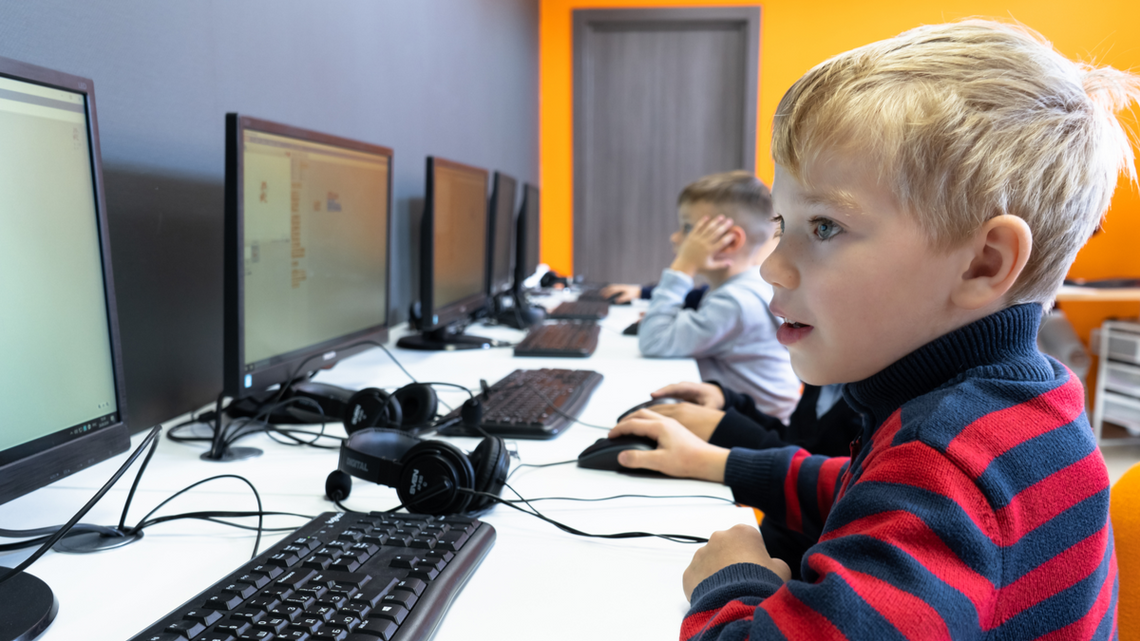
Scratch is a visual, drag-and-drop introduction to programming for kids. Coding improves problem-solving skills, promotes analytical thinking, and fosters creativity. Here's how they can get started.
Why Should Kids Learn to Program?
The very act of learning to program is a worthwhile discipline. Children especially benefit from the repeated experience of taking an idea and producing a finished program. It requires and refines many desirable skills. The idea phase requires planning and creativity. The implementation phase requires understanding the programming language, the logical piece-by-piece assembly of the code, and the methodical and analytical debugging of the program.
As you develop your skills, programming continues to stretch you. There's always another idea or project you can pursue. And like most learned skills, the earlier you start the better. But making programming engaging and satisfying for young minds isn't as easy as simply plonking them in front of an editor.
To capture the imagination of young children you need to make things fun. Whatever it is, it has to look like an endeavor they want to be involved in. Scratch is a perfect solution for this. It's a very high-level programming language, so getting things done quickly is easy. It's mostly drag-and-drop, so there's little chance of a typo causing a meltdown.
Registering a Scratch Account
Scratch is a platform for creating programs and also for sharing them. To get started, visit the Scratch online platform and register for a new account. Registering allows you to store your projects online and return to them later. Looking through other programmers' code is a great way to learn as well.
Scratch lets registered users share their projects, so by registering you're getting access to all of the shared projects on the platform. There are more than 82 million projects shared by over 74 million users, making it a valuable reference resource.
When you register a new account you'll be asked to create a username and password, and to complete some other fields such as an email address. You need to verify your email address to complete your account creation. Once that's complete, your child can begin their programming journey.
How to Get Started With Scratch
Scratch programs feature characters called sprites. Programs act on sprites, allowing you to move sprites, attach sounds to actions, and create speech bubbles. To give you a feel for programming with Scratch, let's walk through the process of creating a small game in Scratch. It will seem like a long and complex process on paper, but your child will quickly start cruising through the intuitive process.
Selecting a Sprite and Backdrop
To start a project click the "Create" item in the menu bar.

The Scratch workspace will open.

- The left-hand side of the screen shows a list of programming blocks.
- The main screen area is where you create your programs by combining programming blocks into routines.
- The top right portion of the screen is a preview window.
- The bottom right portion of the screen holds the sprites and backgrounds that are in use in your program.
The default sprite has already been added to the preview window and the sprite window. We won't be using that, so click on the trash icon to delete it.

Click the blue "Cat" icon at the bottom right corner of the sprite window, and click the "Choose a Sprite" (magnifying glass) menu item.

The sprite selection window appears. Click on the sprite you wish to use. We chose a penguin.

The sprite you choose is shown in your sprite window and in the preview window. Click the blue "Landscape" icon in the bottom right of the screen, and click the "Choose a Backdrop" (magnifying glass) menu item.

The backdrop selection screen appears. Click on the backdrop you wish to use. We chose an arctic setting. The preview window will show your sprite and backdrop.
Adding Code Blocks
In the preview window, drag your sprite into its starting position. Place it near the bottom left of the backdrop. Your preview window should look similar to this:

At the left-hand side of the screen, there are colored icons that look like filled circles or dots. Selecting one of these changes the category of code block that is displayed. The categories are:
- Motion: Movements of sprites like angles and position
- Looks: Controls the visuals of the sprite
- Sound: Plays audio files and effects
- Events: Event handlers
- Control: Conditionals and loops etc.
- Sensing: Allows sprites to interact with the surroundings
- Operators: Mathematical operators, comparisons
- Variables: Variable and Lists of usage and assignment
Make sure the "Motion" blue dot icon is selected, and drag the "Change Y by" code block into the main screen area.

This code block moves the sprite 10 pixels in the Y-axis, which is the up and down axis. Because 10 is a positive number, the new position of the sprite will be higher on the screen than its old position.
Select the yellow "Control" dot icon, and drag a "Repeat" code block to the main screen. Drop it over the "Change Y by" code block. It should wrap itself around the change block. The code inside the repeat block will be repeated 10 times.
If you ever drag out the wrong code block just click on it and then hit the "Delete" key.

Repeat that process so that you have another "Change Y by" code block wrapped inside another "Repeat" code block. If you drag this code block to the bottom of the first code block they'll click together and become one larger code block.
Change the values in the "Change Y by" code blocks to 15 and -15. This set of code blocks will move our spite upward 10 times in steps of 15 pixels, and then downward again in 10 steps of 15 pixels. This will make our sprite bob up into the air and then fall back down.

Click the orange "Variables" dot icon, then click the "Make a Variable" button. The "New Variable" dialog appears.

We'll call our new variable "score." Click the blue "OK" button.
Drag a "Change My Variable by" code block and attach it to the bottom of our growing stack of code blocks. Select "score" from the drop-down menu in the "Change My Variable by" code block.
From the yellow "Events" category, drag a "When Space Key Pressed" code block and drop it at the top of our stack code blocks. From the magenta "Sounds" category drag a "Start Sound" code block and select "Chirp" from its drop-down menu. Drop it below the "When Space Key Pressed" code block. It'll snuggle into place between the "When Space Key Pressed" and "Start Sound" code blocks.
Start a new stack of code blocks by dragging a "Go to X Y" code block from the blue "Motion" category, and a "Set My Variable To" code block from the orange "Variables" category, and click them together. Handily, the "Go to X Y" code block has the sprite's current position already loaded into it. When the game starts, the penguin sprite will be moved to this position.
To start the game we'll click the green flag icon. To make something happens when we do click it, drag a "When Green Flag Clicked" code block and put it at the top of our new stack of code blocks. Your work area should look like this:

If you click the green flag icon and press the "Space" key, the penguin should jump, chirp, and float back to earth.
Adding Another Sprite
Click the blue cat-shaped icon again and choose another sprite. We chose the egg. The egg is added to your sprite window and to the preview window. Drag the egg until it is at the bottom right-hand end of the preview window.

Our penguin is going to jump over sliding eggs, so let's give it a fighting chance. Click the egg in the sprite window and set its size to 65.
When you click the egg in the sprite window the main work area is cleared. You only see the code blocks associated with the currently selected sprite. Click on the penguin in the sprite window and you'll see the code blocks we've already created.

To make the egg sprite do something, select it in the sprite window. Drag a "Go to X Y" code block into the main work area. The position of the egg is already entered. In the preview window drag the egg to the far left bottom corner. Drag a "Glide Secs to X Y" code block into the work area and click it onto the bottom of the "Go to X Y" code block.
Drag a "Forever" repeat code block and wrap it around the other two code blocks. Change the 1 seconds value in the "Glide Secs to X Y" code block to 2 seconds. Drag a "When Green Flag Clicked" code block and put it on top of our little stack of code blocks. It should look something like this:

If you click the green flag icon and run the game eggs should slide in from the right to the left. If you time it right, the space bar makes the penguin jump over the egg. To make the game a challenge we need to bring in a penalty for bad jumps and collisions with eggs.
Adding a Penalty
With the egg sprite highlighted in the sprite window, drag a "Wait Until" code block from the orange "Control" category of code blocks. Then drag a "Stop All" code block too. Clip them together with the "Stop All" code block on the bottom.
From the "Sensing" category drag out a "Touching" code block and drop it on the "Wait Until" code block. Drop it on the stretched hexagon shape that is filled with a darker orange.

Select the name of our penguin sprite in the drop-down menu in the "Touching" code block. The default is "Penguin 2." Finally drag a "When Green Flag Clicked" code block and put it on the top of our new stack of code blocks. These are the two code blocks for the egg sprite:

The code blocks we've just added detect when the egg touches the penguin. Click the "Green Flag" icon to start the game. The game will stop when you click the "Red Circle" stop icon or an egg touches the penguin.
Scratch Is Easy
Scratch is easy. It takes longer to describe what to do than it takes to do it. But even going through the steps of creating this simple game we've encountered some useful concepts. Repeat loops, cartesian coordinates, collision detection, and incrementing variables are all contained within this little example.
If you've got kids in the 8-upwards age range, Scratch is a great way to introduce them to disciplined thinking, while they think they're playing. If you want to take their programming education a step further, you may want to get them coding toys or a coding subscription box.