Quick Links
Microsoft PowerPoint is known for presentations, but if you properly utilize some of the basic tools PowerPoint has to offer, you can also design a beautiful infographic and then download it as an image to use as you wish.
Choose a Template for Your Infographic
The PowerPoint template you choose will act as the background for your infographic, so choosing one that matches your imagined design is important. You'll need to consider various things when choosing a theme, such as which color text you want to use, if the objects you insert are dark or light in color, and even what type of impression (serious, funny, entertaining, etc) you want your infographic to give.
When you launch PowerPoint, the first thing you need to do is choose the theme. You can choose "Blank Presentation" if you want a plain white background, or you can choose one of the various other templates provided in PowerPoint's large library.
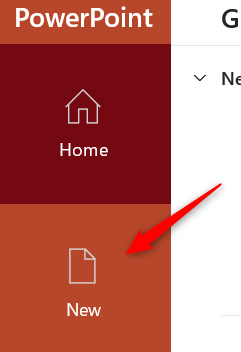
To choose a template, open PowerPoint and click "New" in the left-hand pane.
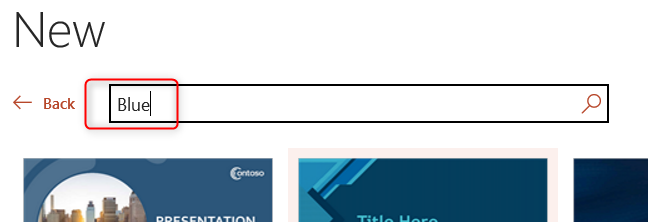
On the next screen, you'll find a long list of themes to choose from. If you can find one that works for you, you can also try searching for a theme in the Search box. For example, if you want a blue theme, you can search "Blue" in the Search box.
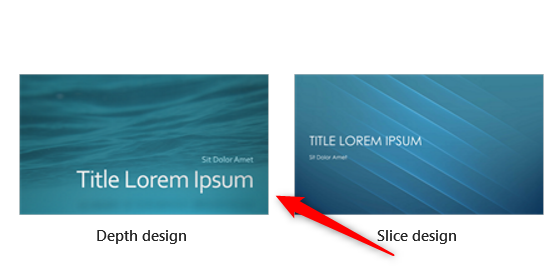
Once you've found the theme you want to use, click it to select it.
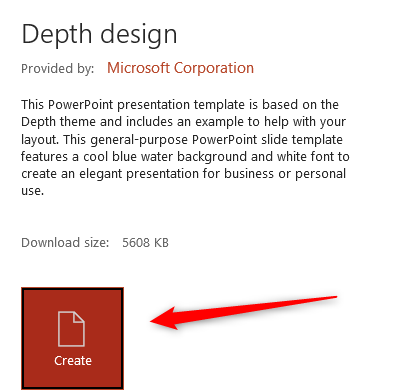
A pop-up window will appear, giving you more information about the theme. Click "Create" after reading through the additional information.
You'll now be ready to create your infographic using the selected theme.
Create a Custom Slide Size
Once you've chosen a theme, you'll need to create a custom slide size. The size you need to use depends on where you'll be sharing the infographic. We'll be using the standard size for legal infographics (8.5 x 14 inches) in this example, but check out Easelly's fantastic infographic size reference sheet to find which dimension you should use for your project.
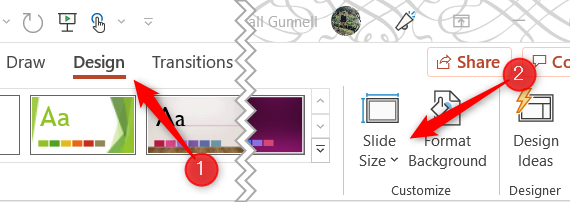
To change the slide size, click "Slide Size" in the Customize group of the Design tab.
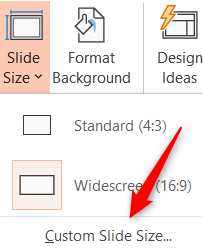
Next, click "Custom Slide Size" in the menu that appears.
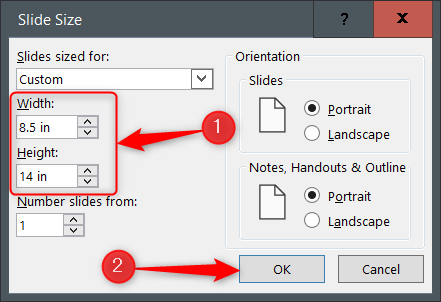
The Slide Size window will appear. Adjust the dimensions of the width and height by clicking the up and down arrows to the right of each box. Note that the "Slides Sized For" will automatically change to "Custom" when you edit the dimensions.
Click "OK" when ready.
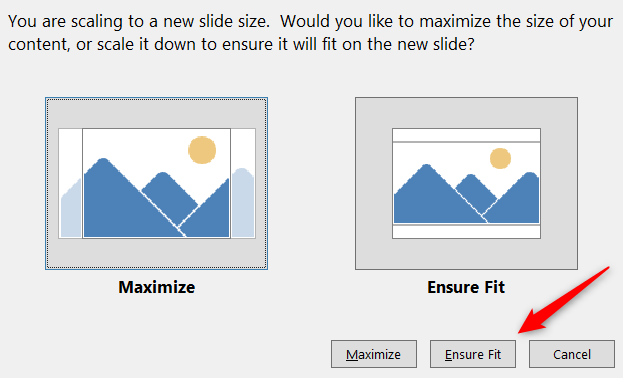
Another window will appear telling you that you're changing the size of your slides and will give you a choice on what to do with the elements within the slide. This doesn't matter much right now since you haven't added any content, but choosing "Ensure Fit" will resize the default title text that we'll use later to a more appropriate size, so go ahead and click that.
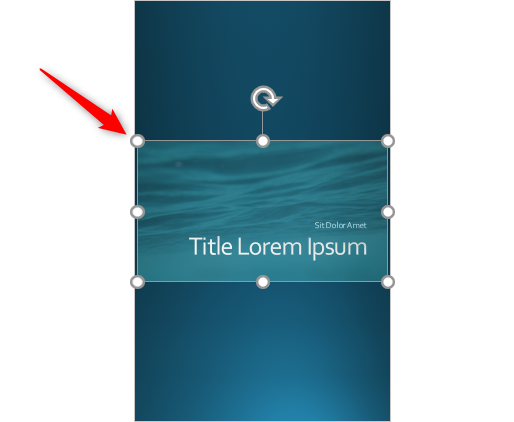
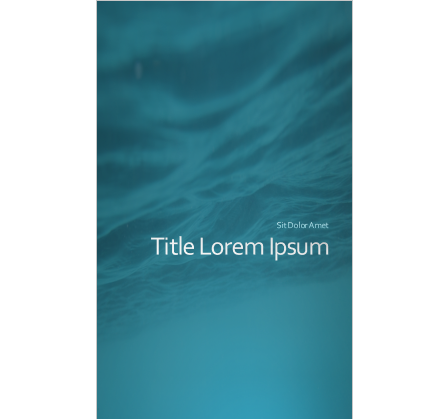
You'll now see the slides have been resized. However, the main design of your theme may not fit the entire slide, so PowerPoint fills in the additional space with a color that compliments the theme. If you choose to, you can fill this additional space with the main design by clicking and dragging the handles on each respective side of the design element.
Doing this may or may not distort the design, so use your best judgment on how to move forward here.
Add, Edit, and Format Slide Elements
Now that the slide is the correct size, you can begin adding, editing, and formating different elements to your infographic.
How you design your infographic depends on what sort of information you want to convey to the reader. There's not a "one-size-fits-all" solution here, so play around with different elements until you're happy with the design.
To Insert a text box, click Insert > Text Box. Your cursor will turn into a cross. Click and drag your cursor across the slide to draw the text box, and then begin typing to enter the text. You can also click and drag the text box to a new position on the slide.
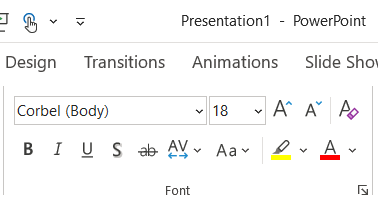
You can update the font of your text using the options in the Font group of the Home tab. These options include things like changing the font style or size, adding bold, italics, or underline to the font, and changing the font color.
You can also insert images, SmartArt, Charts, and other objects by using the options in the Images and Illustrations groups of the Insert tab. Properly using different visuals is the key to making your infographic successful.
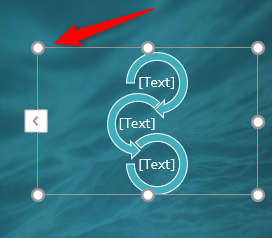
You can reposition a graphic by clicking and dragging its box, just as you would a text box. You can also resize them by clicking and dragging the handles on each side.
There are also object-formatting tools found in the object's Format tab. To show this tab, you'll first need to select the object. You can do things such as change the color of the shape or shape outline, add different effects (like a shadow), and so on.
Continue adding, editing, formatting, and repositioning text and other objects until your infographic is complete.
Save Your Infographic as an Image
Once you're finished designing the infographic, you'll want to save it as an image so you can easily share it. Luckily, you can save a single PowerPoint slide as an image.
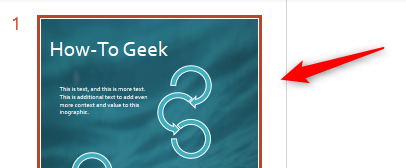
First, select the slide that you want to save as an image in the left-hand pane. A red box will appear around the slide when selected.
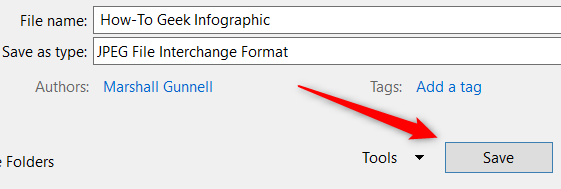
Next, click File > Save As, and then choose the location you would like to save your infographic. Before clicking Save though, you'll want to change the file type it is saved as. You can choose between these five image types:
- Animated GIF Format (*.gif)
- JPEG File Interchange Format (*.jpg)
- PNG Portable Network Graphics Format (*.png)
- TIFF Tag Image File Format (*.tif)
- Scalable Vector Graphics Format (*.svg)
Click "Save" after you've chosen the desired image file type.
A dialog window will appear asking you which slide you want to export. Select "Just This One" to save the selected slide as an image.
Your infographic is now saved as the selected image file type.
That's all there is to it. PowerPoint is a great application for design and, even though it may not be as comprehensive in its image editing tools as Photoshop, it has a much smaller learning curve. If you're ready to take your infographic to the next level, though, there's no better time to start learning Photoshop than now.


