If you've searched for a simple to-do list app to keep up with your personal tasks or have discussed project management tools with your team, you've probably heard of Trello. Here's how it works and how to get started.
What Is Trello?
Trello is a popular project management tool that lets you create and manage tasks, whether that be a team project or just your own personal list of chores. You can set deadlines, leave notes on projects and tasks, and assign tasks to other project collaborators. Trello uses a kanban board view to let you easily visualize how the progress of the project is going.
Trello is widely known for being one of the easiest project management tools to pick up and start using. Its no-nonsense design makes for a short learning curve. Trello is also free, to an extent. For the purpose of creating and managing small-scale projects with a small team, the free version should be enough. You can always upgrade to a paid tier later if you decide you need more for your project.
How to Use Trello
Trello offers many different features that allow you to create and manage tasks in different ways. We'll introduce each main feature, and break each one of them down individually.
Create Boards to Manage Projects
Trello boards are a place where you create and organize all of the details of a project, such as the tasks that make up the overall project, task deadlines, roadmaps, and so on. Boards are also where you invite your team to collaborate on your project.
So, when you create your account, the first thing you're going to want to do is to create a board for your project. The free tier lets you create up to 10 boards per workspace.
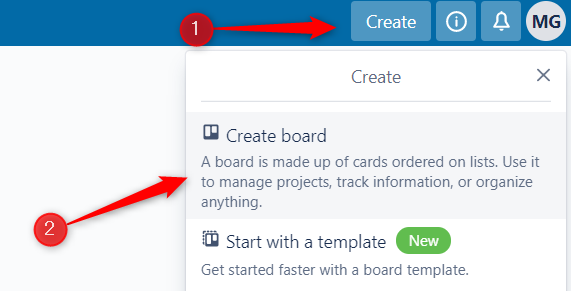
To create a board, log in to your account and then click "Create" in the top-right corner of the window. Next, click "Create Board" from the drop-down menu that appears.
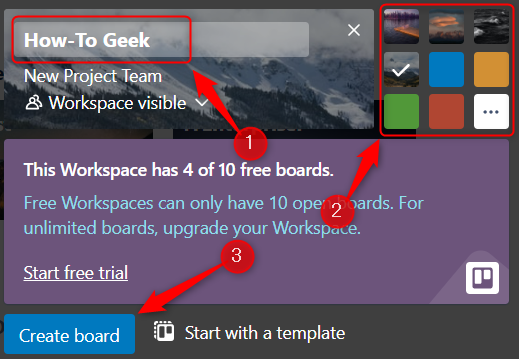
A small window will appear. Here, give your board a name, choose a theme for it, and then click "Create Board."
Your Trello board is now ready!
Invite Members to Collaborate
If your Trello board is for personal use, you can skip this step. If you want others to have access to your board, such as other members of your organization, you'll need to send them an invite.
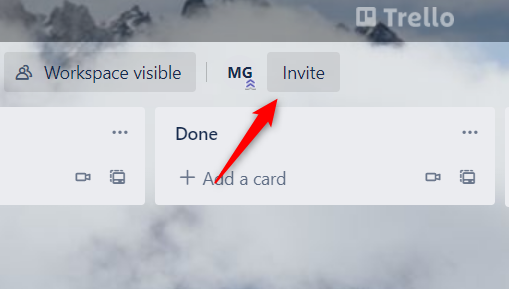
To invite someone to collaborate with you on your project, click the "Invite" button in the board's header menu.
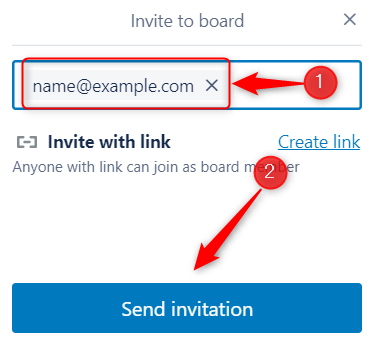
A pop-up window will appear. Enter the email of the person you want to invite in the text box and then click the blue "Send Invitation" button. You can also create a unique link and share it to give people access to the board.
They'll receive an email and can follow the instructions to join your board.
Add Lists for Better Task Organization
Once you've created the board (and added members if you want), it's time to add all the details of the project. Before you can start creating new tasks, though, you'll need to create a "List." Think of lists as your project roadmap. Your roadmap doesn't have to be complicated---it can be something as simple as "To-do," "In Progress," and "Done."
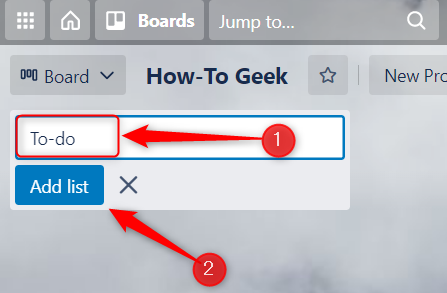
If your board is brand new, you'll see a text box in the top-left corner of the window with a blue "Add List" button under it. Type the name of your list in the text box and then click that button.
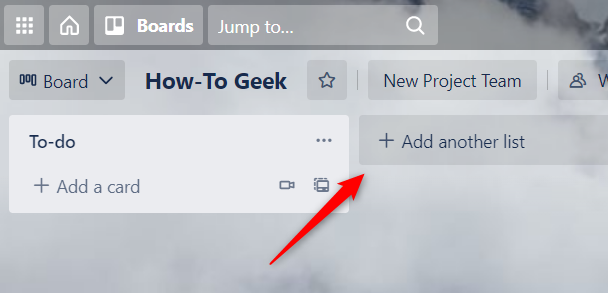
Once your first list is created, a gray "Add Another List" button will appear to the right of your list. Click it to create another list.
You can create as many lists as necessary for your project. The more involved your project is, the more lists you may need. If you ever need to rearrange your lists, it's as simple as clicking and dragging them to a new location.
Once your lists are ready, you can start adding tasks to them.
Create and Manage Tasks
In Trello, your tasks will be created on "Cards." Think of cards as sticky notes. It's where you'll write down everything you need to know about a specific task.
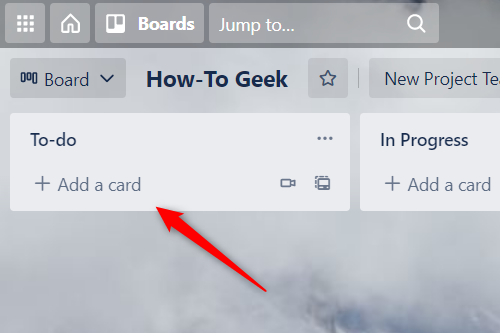
You can create a card under any of your lists. Simply click "Add a Card" under the list you would like to add the card to.
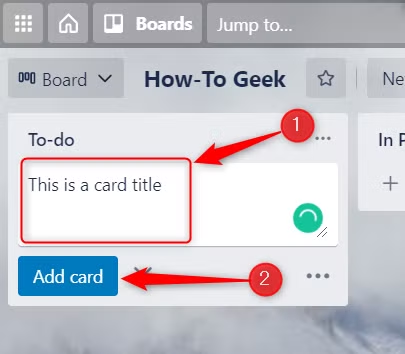
In the text box that appears, give your card a title. Make it something memorable so you can immediately recognize the task. After that, click the blue "Add Card" button.
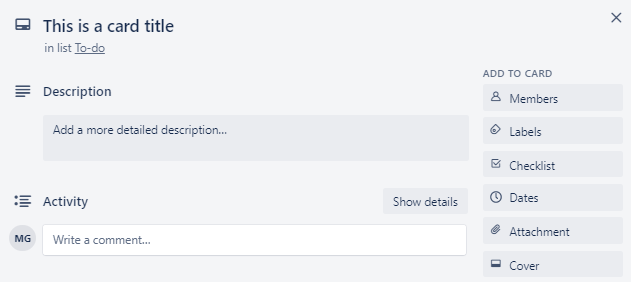
Your card is now created. If you click the card, a pop-up window will appear. Here, you can add additional details to the card, such as giving the task a more in-depth description, adding a checklist for the task, setting a deadline, uploading attachments, and so on.
Depending on your progress on the task, you may want to move it to a different list. For example, if you've finished the task, you may want to move it to "Done." To do so, just click and drag the card over to the list you want to drop it in.
[video width="652" height="296" mp4="https://www.howtogeek.com/wp-content/uploads/2021/08/Click-and-drag-the-card-to-move-it..mp4"]
Power Up Your Board With Power-Ups
Trello offers what it calls "Power-Ups." These are essentially add-ons and integrations. Trello offers a very large library of Power-Ups with features ranging from adding a calendar view, integrating your board with popular apps like Slack, Gmail, MailChimp, Giphy, and OneDrive, and a hundred other cool things.
Previously, you could only add one Power-Up per workspace if you were using Trello's free tier. That's gone now---Trello lets you use an unlimited amount of Power-Ups for free. However, Trello does state that some of their Power-Ups provided by their partners still require a paid subscription.
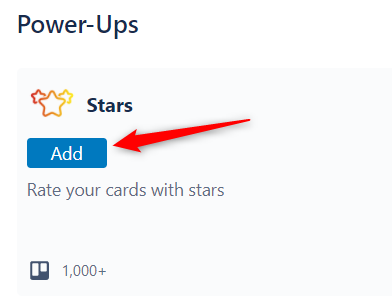
To add Power-Ups, you'll need to go to Trello's Power-Ups page, find the one you want, and then click the blue "Add" button under it.
The instructions to properly add and configure the Power-Ups depend on what you're adding. Each Power-Up is different, so follow the on-screen instructions to get everything set up.
Trello is one of the most popular project management software currently available---and for good reason. It's easy to use, has a clean interface, and its free tier lets you get a lot done. If you'd like to evaluate other tools, Microsoft Planner, Asana, and Jira are all great alternatives. Check them all out to discover which works best for you.

