Quick Links
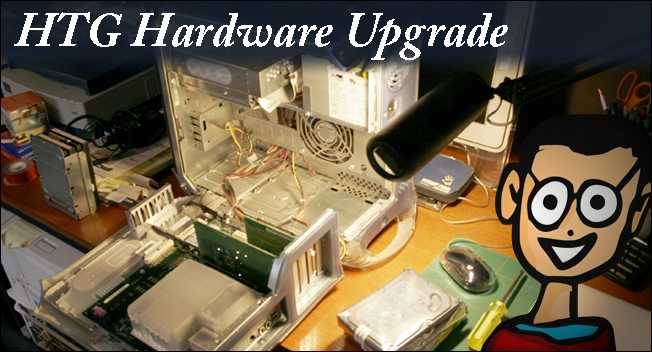
It’s recession economics 101—you can’t always afford to shell out for a whole new PC! HTG is here to help you repair and upgrade the parts that are in desperate need. Today’s topic: how to upgrade your hard drive.
In this first of a new series of “Hardware Upgrade” posts, we’ll cover the basics for buying new drives, backing up old system disks, and opening up your PC to swap out drives. It’s great geeky fun, and it can help you put off a new PC purchase for just a little bit longer. Check it out!
What You’ll Need
Installing a hard drive is a fairly simple—although intimidating—affair. Here’s the lowdown on what you’re going to need to upgrade your storage.

|
Phillips Head Screwdriver: The most important tool in a PC geek’s toolkit—a regular Phillips head screwdriver. Almost all the screws you’re going to run into are going to be Phillips head. While your author has never had any trouble with magnetized screwdrivers, considering we’re going to be working with hard disks today, they probably aren’t the best of ideas. Find yourself an ordinary, non-magnetized screwdriver just to be on the safe side. |

|
A “Tower” Style PC: Unfortunately, we aren’t going to talk about how to install a hard drive in a laptop today. Some day! Hopefully your PC is in reasonable shape and isn’t incredibly ancient, and you know, runs. If your hard disk is dead, you can follow these directions to install a new one, but having a functional hard drive with a running OS can save you a lot of time and heartache. |

|
A Shiny New Hard Drive: Depending on how old your PC is, you might be installing a shiny old hard drive. There are two basic types of drives we’ll be concerning ourselves with today: SATA and IDE. More detail on those later, as well as some guidelines for buying a drive.You're going to need a form factor of 3.5 inch. Any other size will most likely not fit inside your case. |

|
A USB HDD Enclosure: Optional, but very very helpful if you intend to back up your existing drive. More on this later. USB HDD Enclosure |
How Does Your Drive Connect: IDE or SATA?


Most standard internal hard drives have a form factor of 3.5 inches, and come in one of two major connection styles. Neither are cutting edge new, so most PCs you upgrade should have the capability of one or the other. Pictured above, the left cable is a SATA cable, which is a newer standard, and easier to work with. The older connection is called IDE, and the drives are sometimes called PATA. While there’s nothing wrong with IDE hard drives, you’ll want to check if you have the capacity to use SATA before buying a IDE drive.


Not all PCs will have the connections to read a SATA drive. If your machine is older, you may wish to open up your case first, and see if your mother board has the connections for SATA. In most situations, you’re going to want to opt for SATA, because the setup is easier and the transfer rate is faster than IDE.
The red connectors like the ones on the left connect up to SATA cables—you can even see the beginning of “SATA” behind the right side of the connector. Most motherboards (that aren’t terribly old) should support it. If you don’t see these connectors, you’ll have to use the IDE connectors, like those pictured on the right.
There are, of course, loads of other ways to connect hard disks to a PC. For today, and for the sake simplicity, we’ll stick with what’s most likely to be inside most PC cases.
Buying A New Hard Disk

When you buy a drive, you buy based on several different factors. The first is usually “can my system handle it?”
Older systems have drive capacity limits and will struggle to recognize large disks. Systems older than 1998 will be limited to 8.4 GB, while systems older than 2002 may have a drive capacity limit of 137 GB imposed by the motherboard’s BIOS. You’ll require a PC that supports 48 Bit LBA (Logical Block Address), at the very least by the OS, if not the BIOS as well. If your machine is running XP with Service Pack 1, Windows Vista, or Windows 7, your machine likely supports these large drives over 137 GB, and you shouldn’t have to worry about this. If you’re running Windows 98, or something just as old, you’re likely to have some trouble with this upgrade—maybe more than it’s worth.
Once you’ve determined the size disk your PC can support, and found out what kind of of drives you can connect to your motherboard (IDE or SATA) you can start to answer the other big questions that go into buying a drive. Here’s a short list of the three main criteria you should go over before shelling out your hard earned cash for a drive.
- Capacity (Size, measured in MB, GB, and TB)
- Performance (Disk read speed, measured in RPM)
- Price (What fits your budget?)
There are lots of other factors that go into buying a drive, although these are the major ones. If you can determine what kind of drive your PC can handle, you’ll be able to pick a drive based on these criteria. You might be able to get a high capacity drive (1TB +) for very cheap, but you’ll likely be sacrificing performance, and end up with a slow drive. High performance drives are often expensive, no matter the capacity, but can be worth it if you’re replacing your system disk.
Once you’re satisfied with your HDD purchase, you’re ready for the next steps.
Backup The Old Drive

Before you open up your PC and start ripping out hardware, it might behoove you to make a copy of the disk you’re planning to remove. This is where the aforementioned (see above, in tools) hard drive enclosure can come in handy. There are several ways to make a perfect, bootable copy of your system disk, like PING, DriveImage XML and FOG Project, as well as Clonezilla, which we covered in an extensive hard drive-saving how-to.

If you’re simply adding a second drive for storage, you don’t need to back up your system disk. But many of you may want to replace it with a newer, larger, faster drive and keep your OS and files intact. If that’s the case, check out some of the many imaging programs listed above, or read our how-to on cloning your disk.
Upgrading A System Disk: Removing the Old Drive

With your prep out of the way, you’re finally ready to start ripping out hardware. A couple of warnings—removing hardware from a PC is done at your own risk and at the risk of your own hardware, so only do it if you’re prepared to learn some potentially expensive lessons!
Step one is always removing these screws that hold on the case sides. Notice how the PC is also unplugged, and make sure that yours is, as well.


If the sides of your case don’t come off the way the red arrows are directing, you’ll likely find more screws holding them in place. Double-check and try them again. If this doesn’t work, your case may be built differently—look to see what catches or releases might be holding the sides in place.

If you're unfamiliar with the innerworkings of a PC, here's a rundown of the parts we will be working with today, and the parts we'll need to avoid. Notice that the optical drive and the hard disk are in roughly the same place, and may even be connected with the same cables. Make sure you remove the right one!

Remove the cables from the old hard drive as shown. You’ll need to remove two cables from each disk—one for power, and one for data. The cables above are IDE data cables, the more difficult of the two to remove. SATA cables are fairly easy to remove from a drive, while IDE cables are wide and firmly seated on a large row of pins. You may struggle when removing them—be firm, but careful not to warp the pins, break any part of the cable, or yank to hard on any part that is connected to the motherboard.

There are typically four screws holding a HDD in place. Look for this cage in the front of your PC case and undo the screws as shown.

The opposite side of the PC case should also have screws holding the drives in place. You’ll have to remove them from the hole illustrated here to get the drive out.

Depending on how tight the inside of your case is, you may have to remove other hardware. In this case, the easiest part to remove would be the power supply, shown top left, rather than the processor fan and heatsink, shown bottom left. Pull the drive out as shown, and you’ll be ready to connect up your new drive. You can expect to install the new drive the same way you removed this one, but backwards—but for more detailed directions and solutions to common problems, check back next Monday for part 2.
Next: Connecting and Troubleshooting Your New Drive

Installing a new hard drive can get complicated if something goes wrong, and we’re already getting into tl;dr territory. Check back next week, when we’ll cover common problems with installing new hard drives, how to get your system to recognize your new disk, and some tips for fresh installs of an OS.
Image Credits: Transplant by Grant Hutchinson, available under Creative Commons. IDE Ports and IDE Cables Image in public domain. SATA Cables and Ports by Berkut, available under GNU Free License. All other images copyright the author.