Quick Links
Key Takeaways
- Creating separate user accounts on Windows can help maintain professional files and serve as a backup for trying new features or accessing work-related features.
- You can easily change a user account to an administrator using either the Settings app, Control Panel, Computer Management, Netplwiz command, Command Prompt, or PowerShell.
- While it's a simple process, it may not be recommended to change a user account to an administrator on a shared computer. You can always disable the user or administrator account if needed.
On Windows, every new account you create is a user account by default. As a result, it gets limited privileges and is restrictive. But, you can grant full access by turning the user account into an administrator. Here's how.
Whether you share your computer with someone or not, maintaining separate professional files can help save the day. Creating a user account is simple, and you can change it into an administrator account as a backup in case something goes wrong while trying new features, especially if you need to use a Microsoft account to have access to certain features for work.
We're showing Windows 11 in this example. However, these will work on Windows 10 and on older versions as well.
Change a User Account to Administrator Using the Settings App
Using the Settings app is a straightforward way to change an existing user account to administrator. You can make this happen only from the administrator account on your computer. So, log in with your administrator account to proceed.
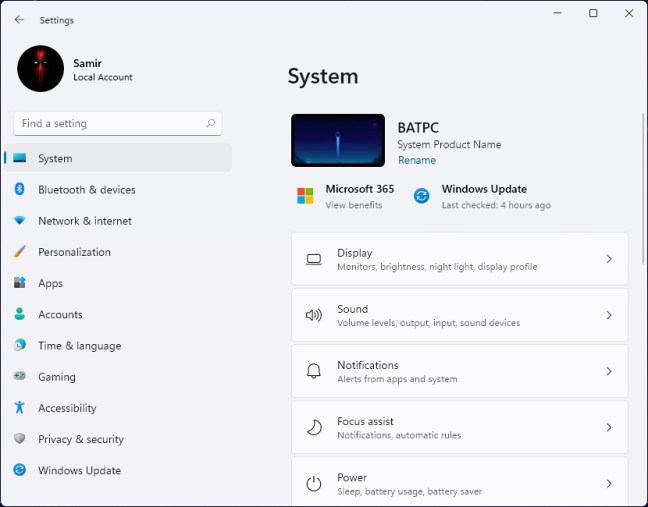
To upgrade the user account, press Windows+I to open the "Settings" app.
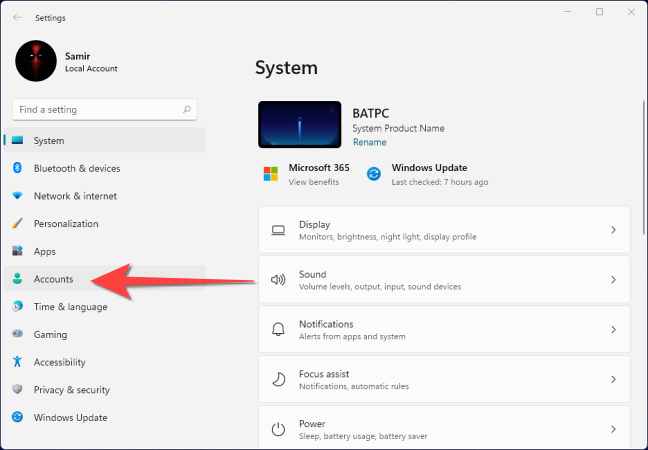
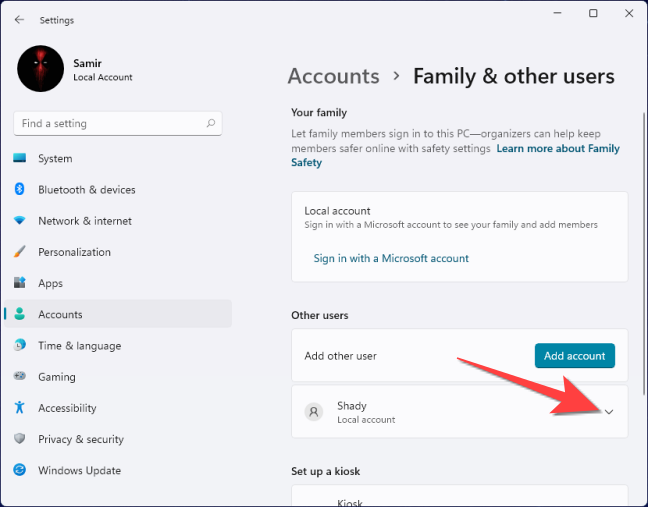
Select the "Accounts" option from the left column.
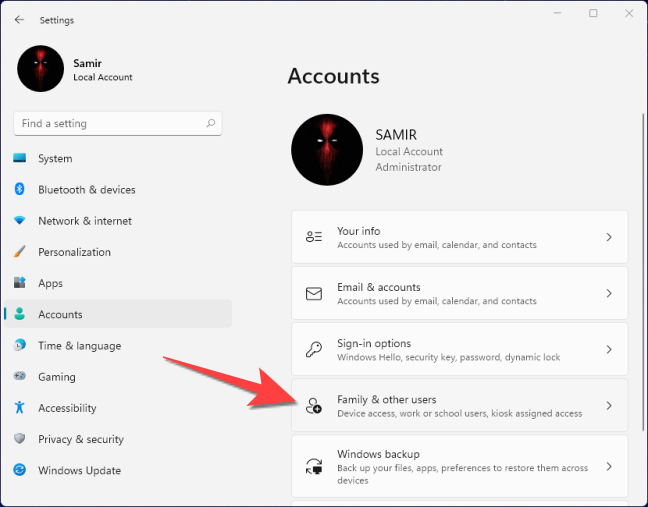
Select the "Family & other users" option.
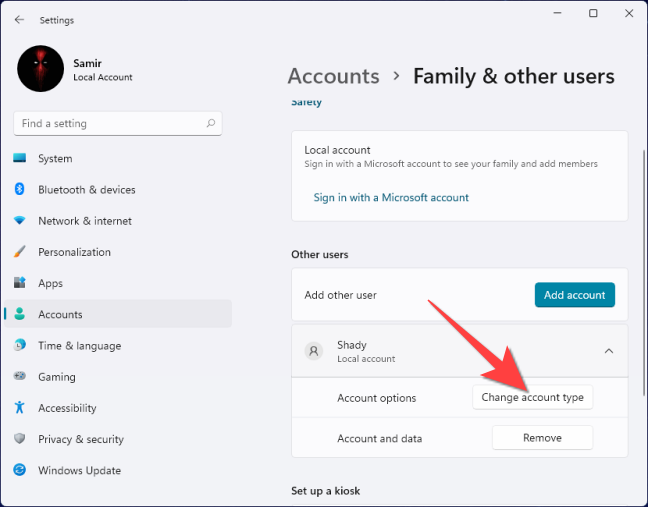
You'll see the Standard User account under the "Other Users" or "Your Family" section. Select the dropdown next to the user account.
Select "Change account type."
Select "Yes" when the User Account Control prompt asks you whether you want to let the "Settings" app make changes.
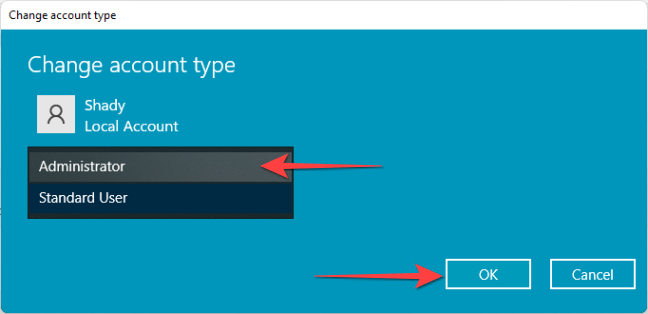
From the ''Change Account Type" window, use the dropdown for the "Account Type" to pick "Administrator." Press the "OK" button when you're done.
That will upgrade the Standard User account to Administrator.
Change a User Account to Administrator Using the Control Panel
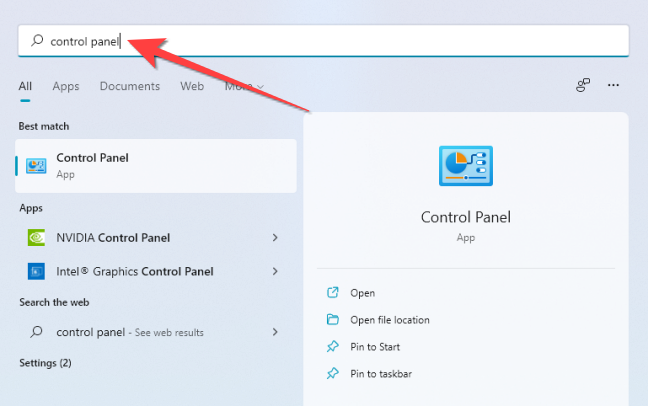
Click the Start button, type "Control Panel" in the Windows Search, and press Enter to launch it.
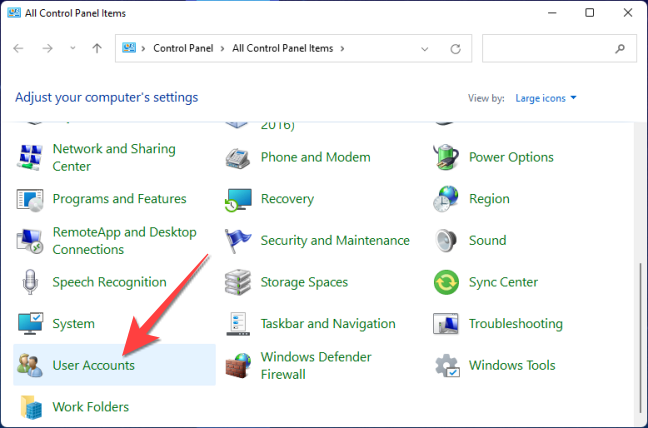
When the "Control Panel" window opens, select "User Accounts."
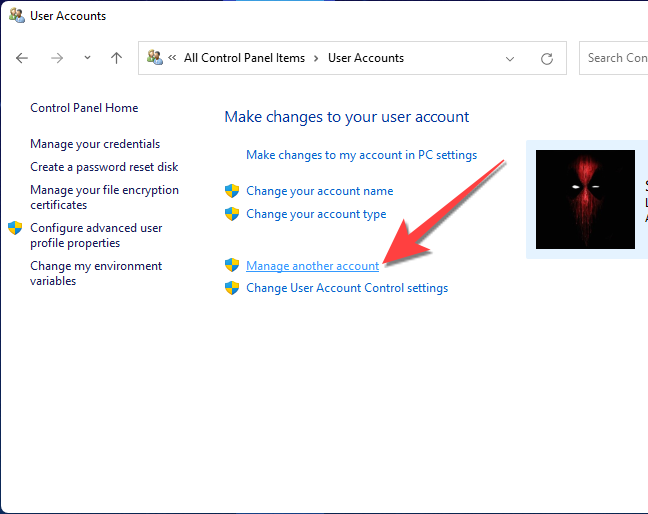
Then, select "Manage Another Account."
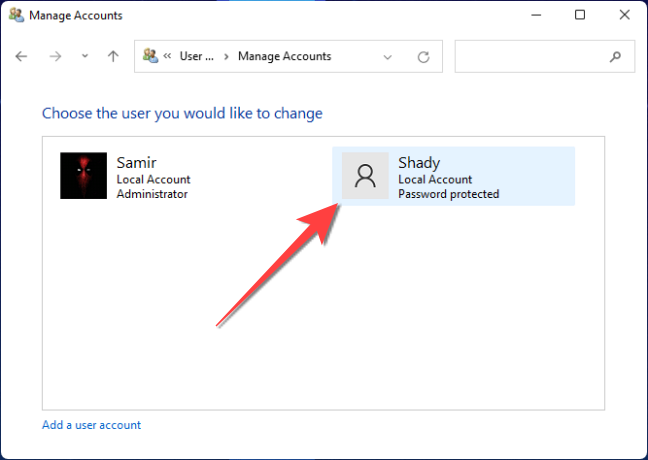
Select "Yes" from the User Account Control prompt. From the next window, double-click the user account that you want to change.
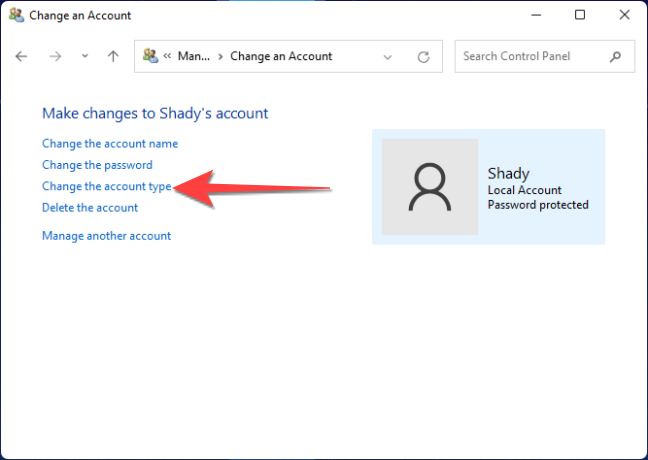
Then, select "Change Account Type."
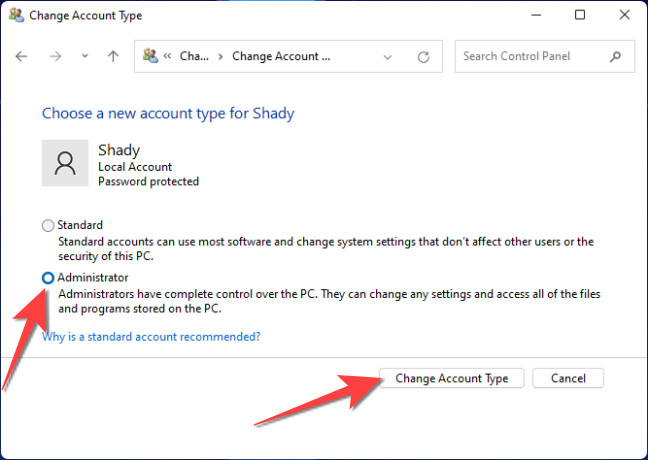
Finally, select the "Administrator" option and click "Change Account Type" to confirm the change.
Change a User Account to Administrator Using Computer Management
You can also use the Computer Management app. This method is more complex but achieves the same result.
You can't use this method if you're running the Home edition of Windows.
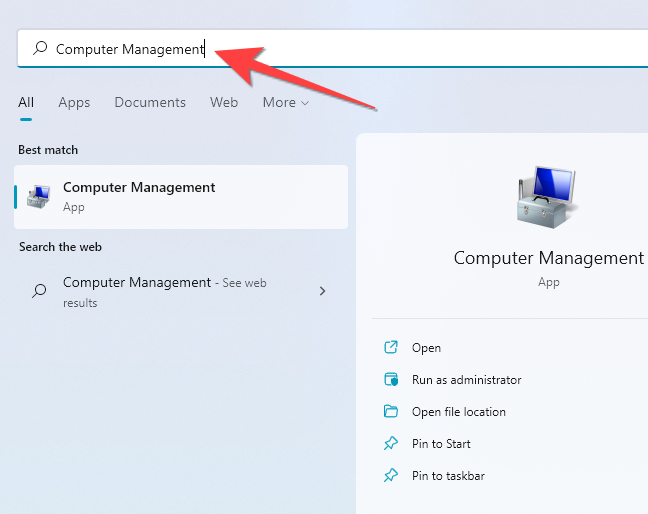
Click the Start button, type "Computer Management" in the Windows Search, and hit Enter.
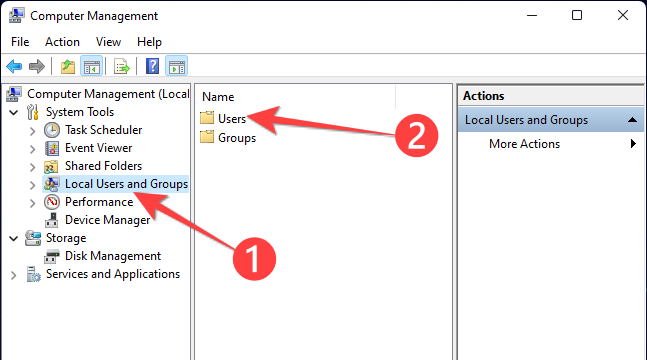
From the Computer Management window, select "Local Users and Groups" from the left column and "Users" from the middle column.
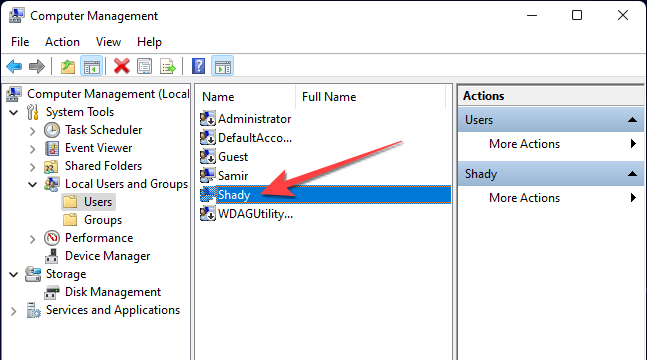
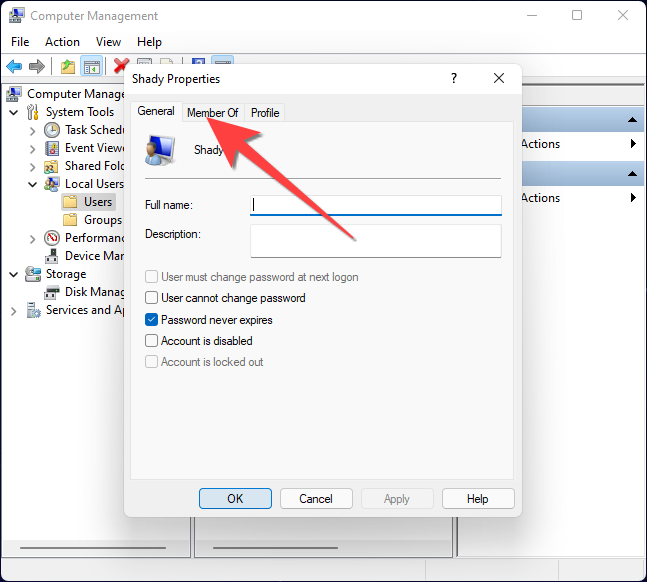
Next, double-click the user account that you want to change to administrator from the middle column.
When the account properties window pops up, go to the "Member Of" tab.
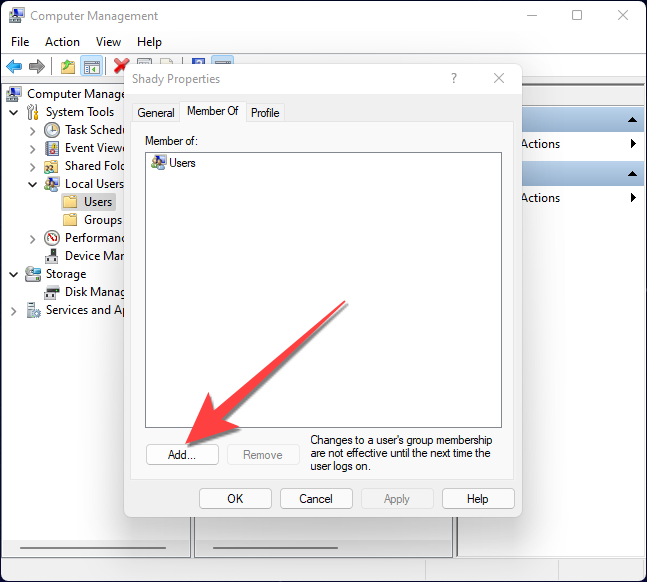
You'll see that the select user account only appears as a member of the "Users" group. Next, select the "Add" button.
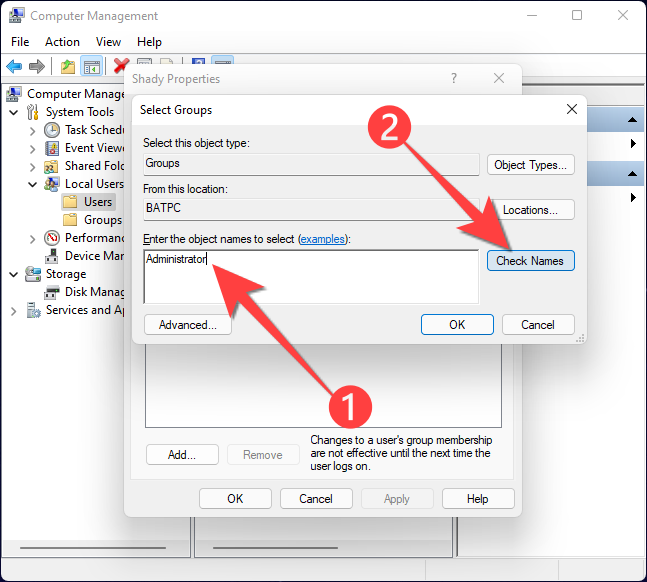
Type "Administrators" in the text field and select the "OK" button.
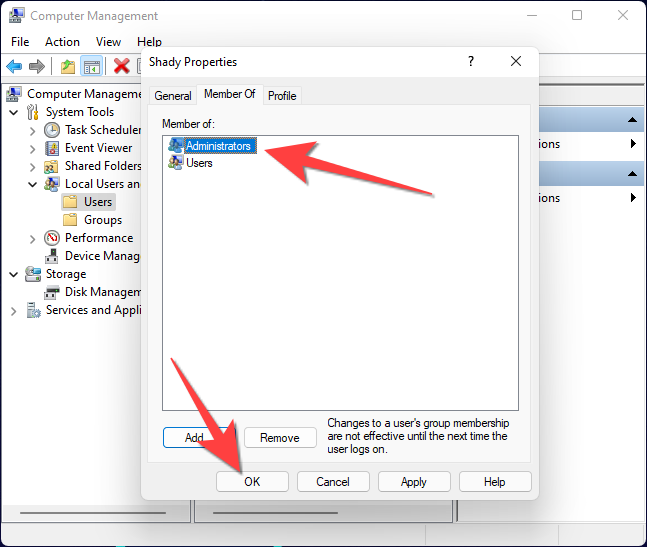
From the account properties window, select "Administrators," and then select the "OK" button to add the user account to the Administrators group.
Change a User Account to Administrator Using the Netplwiz Command
Using Netplwiz gives you a similar experience to Computer Management but in a simplified environment.
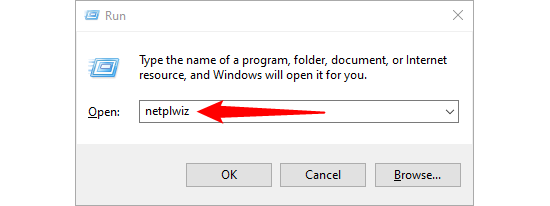
Hit Windows+R to open the Run dialog box, type "netplwiz," and press Ctrl+Shift+Enter to launch it with administrative privileges.
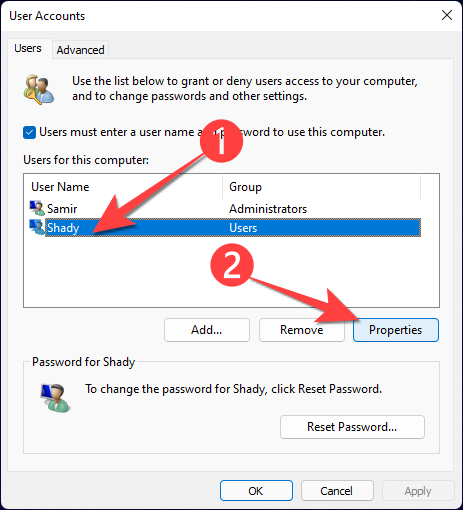
When the User Accounts Control prompt shows up, select "Yes." From the "User Accounts" window, select the account that you want to upgrade from user to administrator and select "Properties."
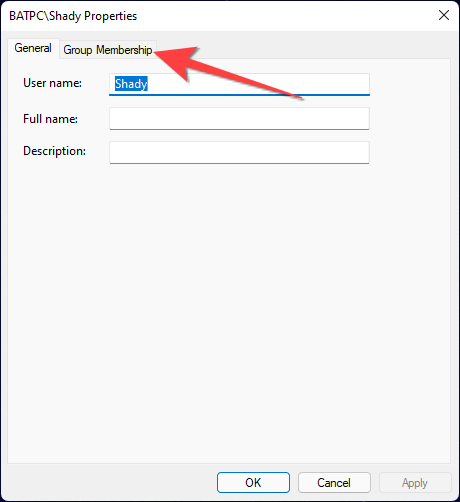
Head to the "Group Membership" tab on the window that pops up.
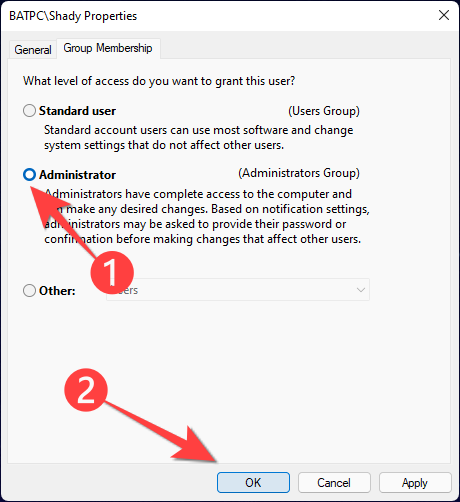
Select "Administrator," and then choose the "OK" button.
Change a User Account to Administrator Using the Command Prompt
You can use the command prompt to run a simple command to change a Standard User account to Administrator.
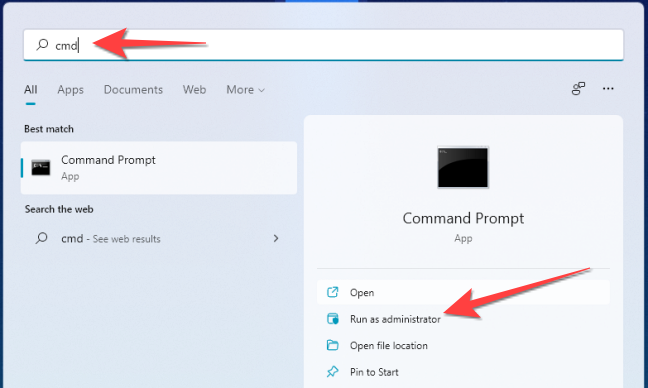
To open the command prompt, click the Start button, type "cmd" in the Windows Search, and select "Run as Administrator."
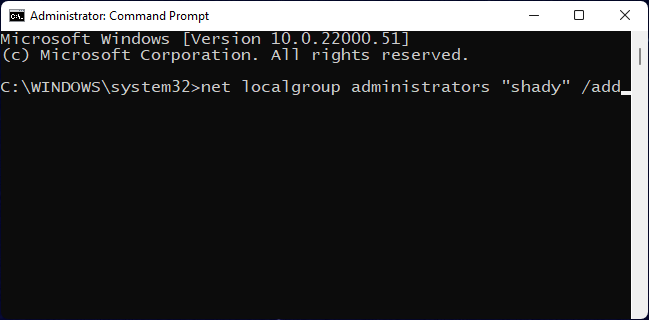
In the Command Prompt, type the following command, and then press Enter:
net localgroup administrators "UserAccountName" /add
Replace the text in quotes with the account username on your computer. When you run this command, it looks like this:
Change a User Account to Administrator Using the PowerShell
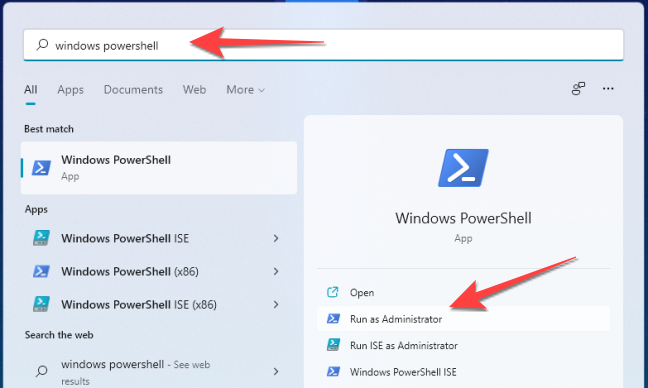
After clicking the Start button, type "windows powershell" into the Windows Search, and select "Run as Administrator."
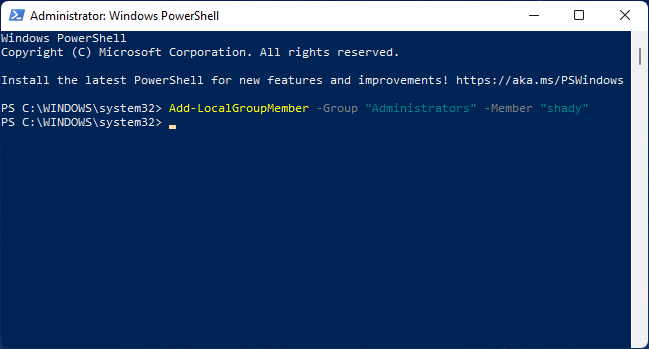
Choose "Yes" when the User Account Control prompt shows up. Then, type the following command into Windows PowerShell, and then hit Enter:
Add-LocalGroupMember -Group "Administrators" -Member "username"
This is how it will look:
That's it! While it's a simple process, changing a user account to administrator on a shared computer might not be a good idea. So, if you change your mind later, you can always disable the user or administrator account on Windows.

