Quick Links
Do you create really long documents in Word? If so, you probably know that Word doesn't always play well with them. It's usually smarter to split your long documents into multiple Word files.
But, then, how do you make sure the pages are numbered correctly and easily create a table of contents and an index for the whole document? That's where Word's master document feature can help. It allows you to combine multiple Word files into a single Word file.
A master document is a Word file that contains links to a set of other, separate Word files, called subdocuments. The content of the subdocuments is not inserted into the master document. The master document only contains links to the subdocuments. This allows you to edit the subdocuments separately. Any changes made to subdocuments are incorporated into the master document automatically. If there are multiple people working on a single document, a master document allows you to send different parts of the document to different people to work on.
In this article, we show you the basics of creating a master document and subdocuments from scratch, and creating a master document from existing subdocuments. We also show you how to easily add a table of contents to the beginning of the master document.
Create a Master Document from Scratch
If you are starting a fresh master document with no existing subdocuments, you can create one from scratch. To do so, create a new, blank Word document and save it, indicating in the file name that it is a master document.
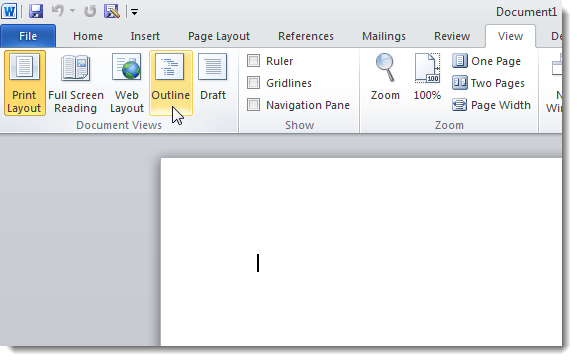
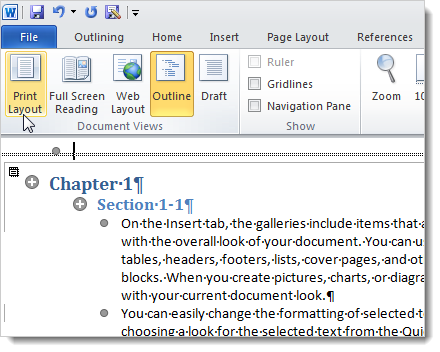
Once you have saved your master document file, click the View tab and click Outline in the Document Views section of the tab.
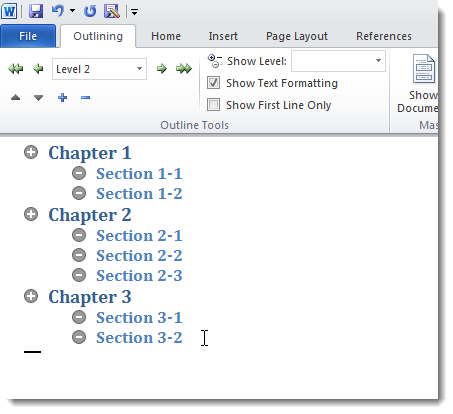
Start entering the headings for your document in outline form, using the drop-down list of Level styles and the green right and left arrows in the Outline Tools section of the Outlining tab to change the levels of your headings.
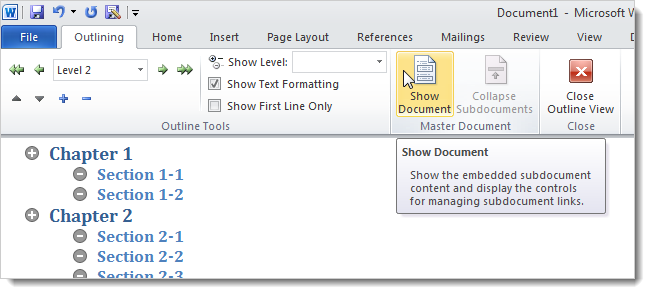
When you have entered all the headings you want, click Show Document in the Master Document section of the Outlining tab.
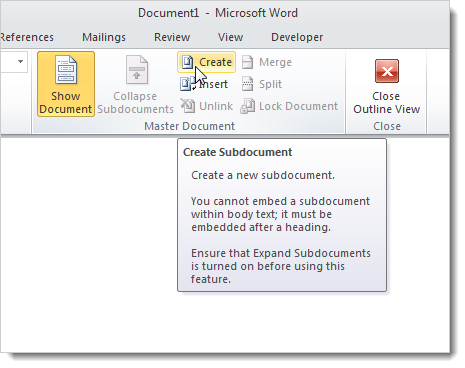
More options become available in the Master Document section of the Outlining tab. Select the entire outline in the document and click Create.
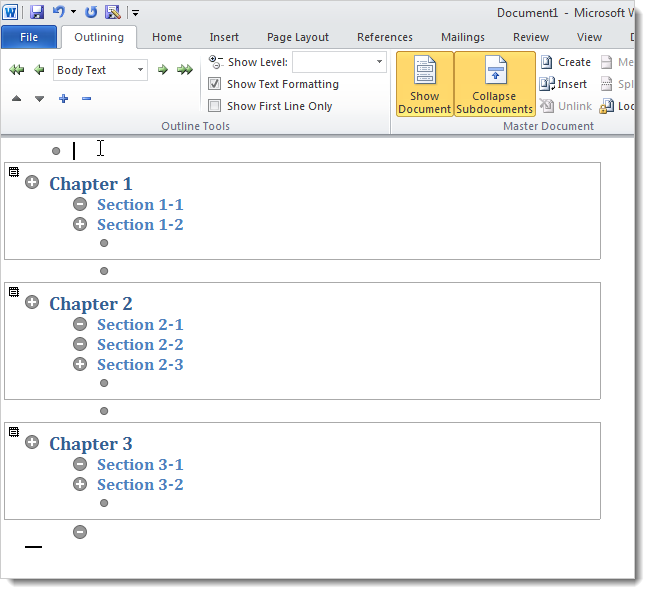
Clicking Create encloses each document in its own box. Save the master document file again at this point.
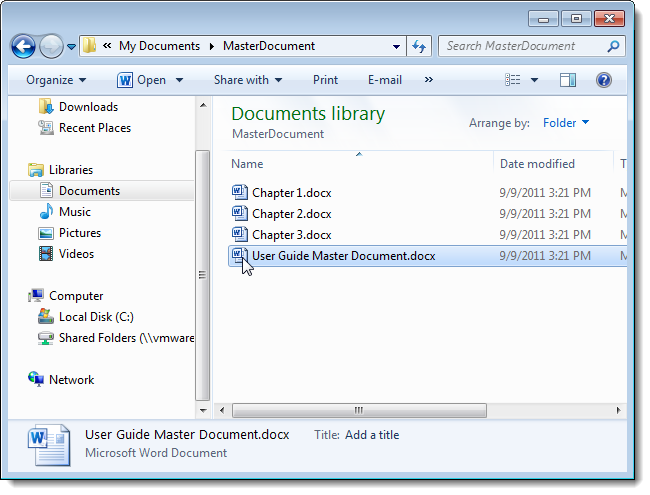
Each box in the master document becomes a separate file, as shown below. The name of the first heading in each box in the master document is used as the filename for each subdocument file.
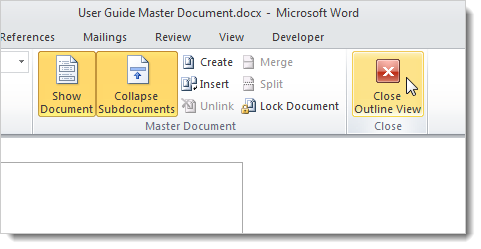
To go back to the previous view, such as Print Layout, click Close Outline View in the Close section on the Outlining tab.
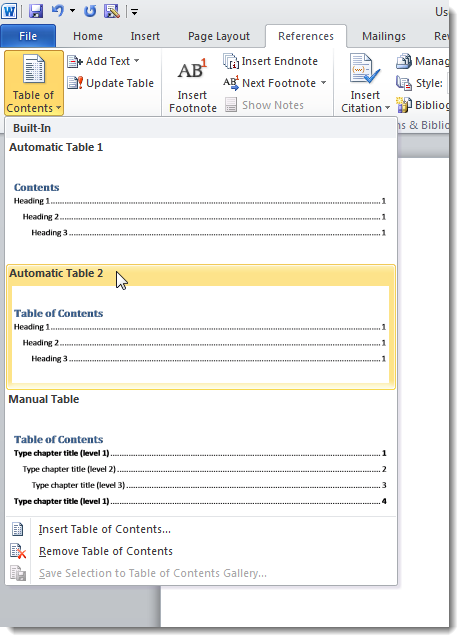
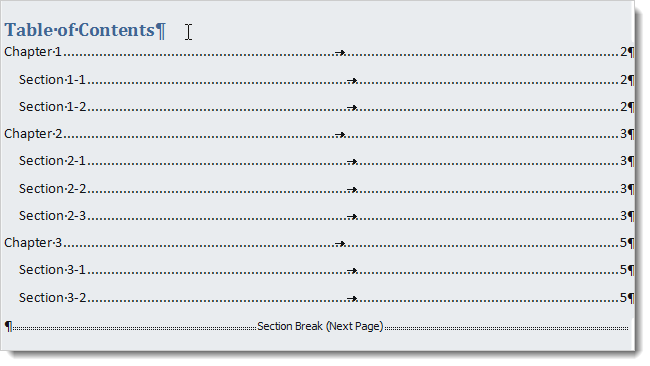
To add a table of contents to your master document, put the cursor at the beginning of the document and click the References tab. Click the Table of Contents drop-down button in the Table of Contents section. Select one of the Automatic Table options to insert an automatically generated table of contents at the insertion point.
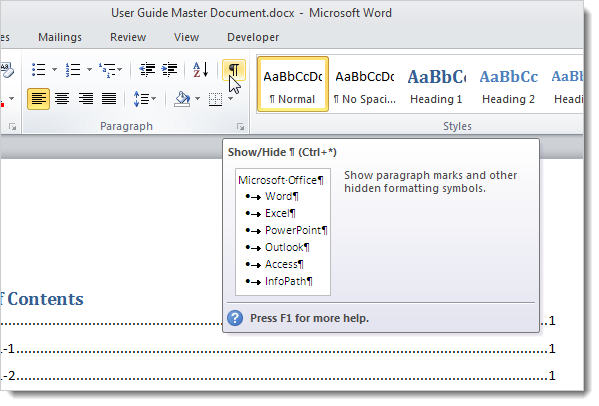
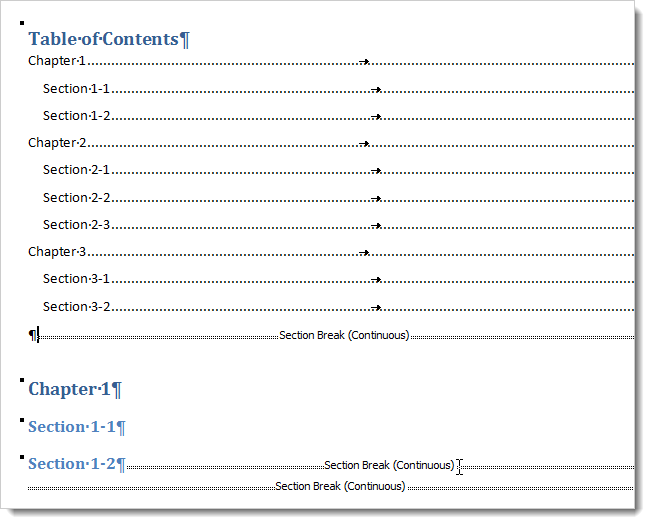
To see the section breaks inserted by Word when you created the subdocuments, click the Home tab and click the paragraph symbol button in the Paragraph section.
Word displays the section breaks and what types they are.
NOTE: When you create a master document from scratch, Word inserts a continuous section break before and after each subdocument you create. This means there are no page breaks in your document. You can easily change the type of each section break.
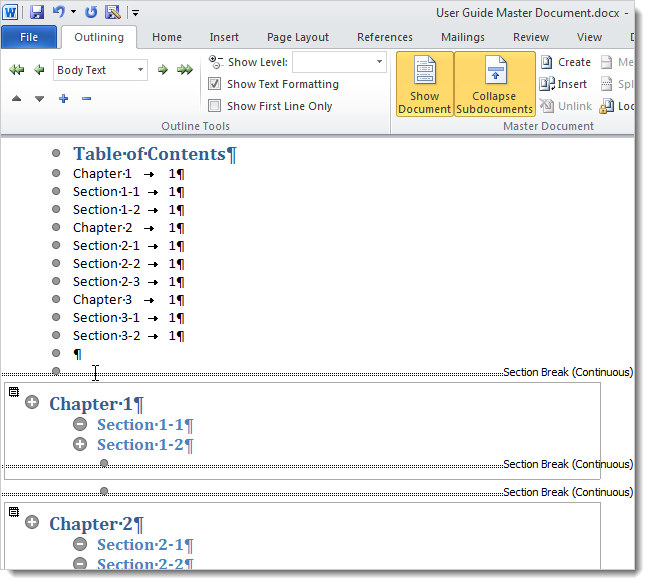
The following image shows how your document looks in outline mode with the subdocuments showing expanded.
Create a Master Document Using Existing Word Files
If you have some existing documents you want to include in a master document, you can create a new master document file and insert the existing documents as subdocuments. To do this, create a new, blank Word document and save it like we mentioned earlier when creating a master document from scratch.
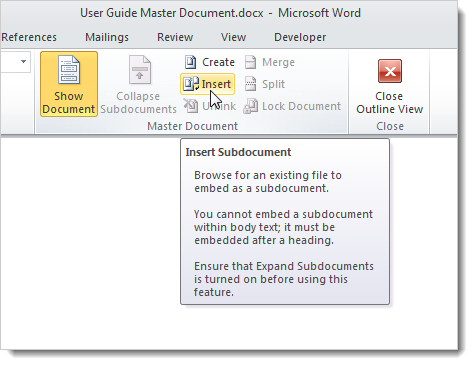
Click the View tab and then click Outline in the Document Views section. The Outlining tab becomes available and active. Click Show Document in the Master Document section to activate additional options. To add a subdocument to the master document, click Insert.
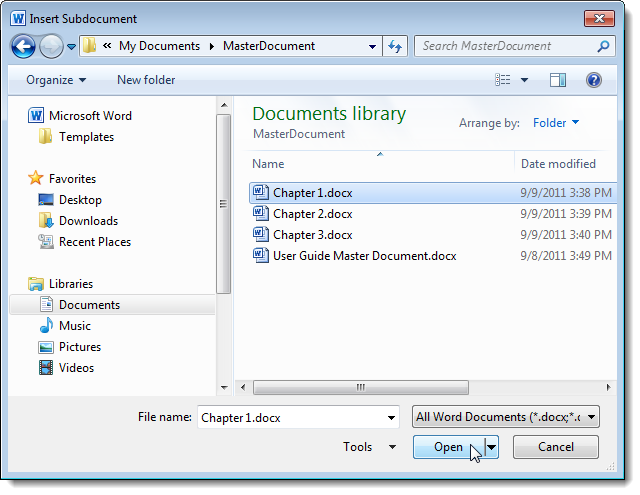
On the Insert Subdocument dialog box, navigate to the location of the documents you want to insert. Select the first file and click Open.
NOTE: It might be easier if you store your subdocument files in the same directory as your master document file.
If the following dialog box displays, telling you about a style that exists in both the subdocument and the master document, click the Yes to All button. This keeps all the styles in the subdocument consistent with the styles in the master document.
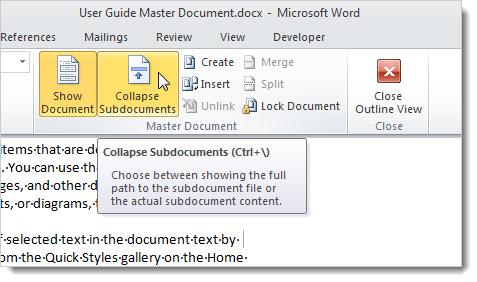
Repeat the steps for inserting subdocuments for each of the documents you want to include in your master document. When you are finished, you can collapse the subdocuments, if desired. To do this, click Collapse Subdocuments in the Master Document section of the Outlining tab.
You must save your document to collapse the subdocuments, so the following dialog box displays if you haven't done so. Click OK to save the document.
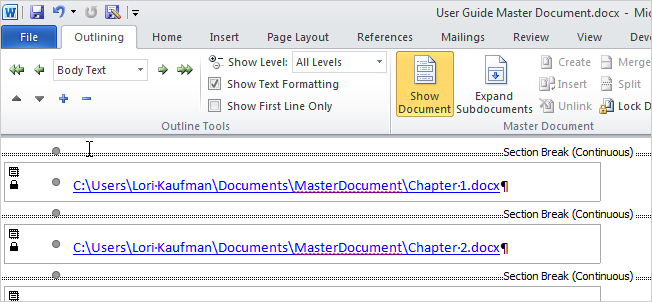
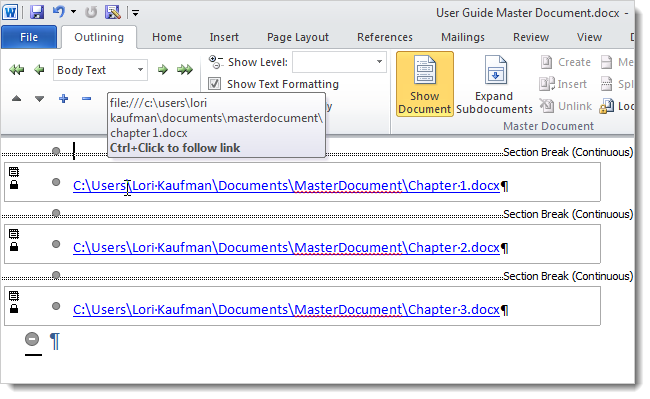
Notice that the full path to each of your subdocument files display in each subdocument box. To open a subdocument for editing you can either double-click the document symbol in the upper, left corner of the subdocument box, or Ctrl + Click the link to the file.
NOTE: When you import existing Word files into a master document file, Word inserts a next page section break before and a continuous section break after each subdocument. Again, you can easily change the type of each section break, if needed.
To view the master document in a non-outline view, click the View tab, and click Print Layout or other view type in the Document Views section.
You can add a table of contents in the same way we mentioned above when creating a master document and subdocuments from scratch.
Once you have included all the subdocuments in the master document, you can add or edit headers and footers, create the table of contents (as we illustrated), create an index, and work on other parts of the document that are common to the whole document.
For both methods discussed in this article for creating master documents, when you edit a document included in a master document, the content for that subdocument is updated in the master document.
Master documents in earlier versions of Word sometimes corrupted the documents. You may encounter this problem in Word 2010. See the Microsoft Answers site for more information.

