Windows 11's "Snap Layout" feature lets you quickly move a window to a specific region of the screen by hovering over the "Maximize" button. How can you replicate that in Windows 10? We'll show you a few ways.
Snap Basics
Windows has had "Snap" features since Windows 7, and they were greatly improved in Windows 10. You can't do all of the advanced layouts that Windows 11 offers, but Windows 10 can do a lot more than the side-by-side two windows that most people know.
What makes all of this easy to use is something called "Snap Assist." Rather than manually resizing and moving windows around, you can simply drag them to areas on the screen, and Windows 10 will automatically do the work for you.
There are six zones that you can use with Snap Assist. Drag to a corner to snap the window to that quarter of the screen. Drag to the left or right edge to snap to that half of the screen. Basically, you can do any layout that fits in a 2x2 grid: four-quarter windows, one-half and two quarters, or just two halves.
This all works by simply dragging windows around the screen. Left-click the title bar on a window and drag it to the corners or left or right edges. You'll see a transparent overlay indicate how the window will snap. Release the mouse to snap.

When using the left or right edge snapping, the second half of the screen will automatically display your other open windows. You can select one to fill that section of the screen.

Snapping to the quarters of the screen won't display the list of open windows until you've filled three of the corners.

All of this works with keyboard shortcuts as well: Windows Key + Left arrow or Windows Key + Right arrow to snap an app to the left or right halves of your screen. For the smaller quadrants, use Windows Key + Right / Left, and then Windows Key + Up / Down.
Unfortunately, Windows 10's doesn't support vertical snapping. You can't use Snap Assist to put one window on the top half and another on the bottom half. You have to do it manually.
Fancy Zones

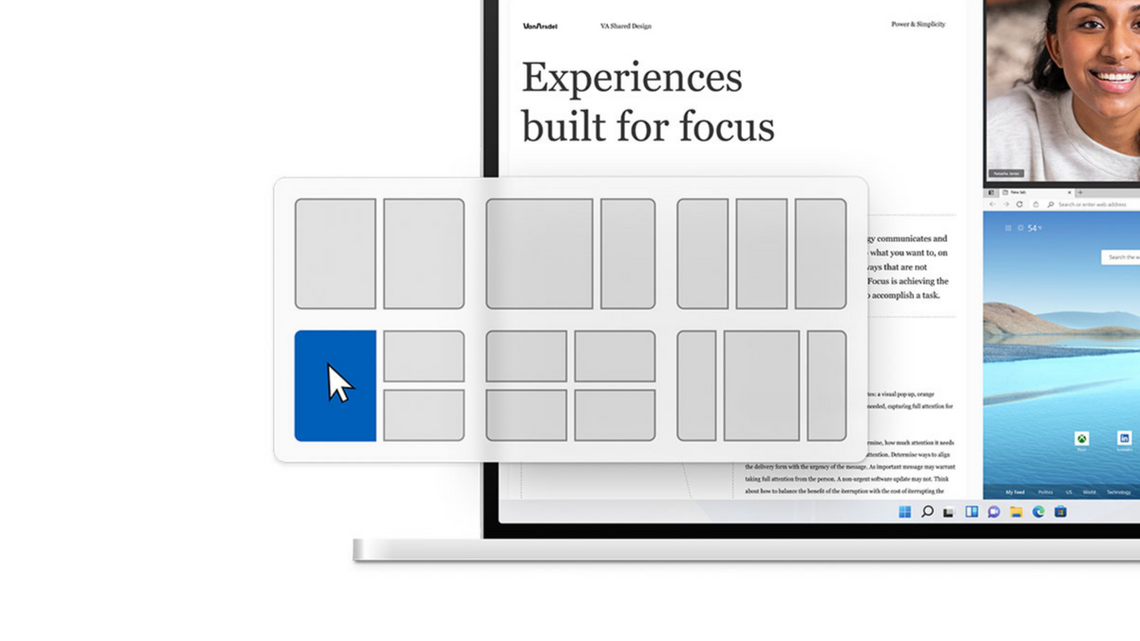
If Windows 10's built-in Snap Assist features aren't enough, you can try Microsoft's free "PowerToys" app. It includes a powerful window layout tool called "Fancy Zones."
Fancy Zones stretches the functionality of Snap Assist past the basic 2x2 grid. You can actually create your own layouts with complex grids and even overlapping zones. It's pretty awesome if you need that sort of thing.
We have a full guide on setting up and using Fancy Zones. The tool also lets you configure windows to automatically open to the last zone they were in. If you really want to replicate the Snap Layouts from Windows 11, Fancy Zones is the way to do it. It's definitely not as quick and easy to switch between the layouts as it is in Windows 11, but it's better than the default Snap Assist.
Still not satisfied? The good news is that Windows 11 will be a free upgrade, and it's coming in late 2021. You can try a preview of Windows 11 right now if you're impatient. (Provided that your PC can run Windows 11, of course.)