Quick Links
By default, Windows and Mac file systems don't play well together. So when it comes time to transfer files between them on a USB stick, you'll need to make special arrangements. Here's how to format a USB stick to work on both systems.
The File System Is the Key
Windows 10 and macOS use two different file systems by default. A file system determines how an operating system writes data to a hard disk or a USB drive. Windows 10 uses a file system called NTFS, and macOS currently uses APFS by default.
So here's the problem: If you format a USB drive as APFS on a Mac, Windows 10 won't read it without third-party tools (and will actually ask to format it). And likewise, if you format a USB drive as NTFS on Windows, Macs can read it but not write to it (although there are some ways around it).
If you're frequently using both Macs and PCs with the same drive, the ideal solution is to configure a USB drive with a file system that both operating systems can read. That file system is called exFAT, and it's designed for flash media cross-platform compatibility. Below, we'll show you how to set up a USB drive as exFAT for both Windows and Mac. This disk preparation setup process is called "formatting."
Before You Get Started: Back Up the USB Drive First
If the USB drive that you want to use as a universal transfer drive contains any data that you want to keep, you'll need to back up that data onto another disk or a cloud backup service first. Formatting a drive always erases all of the data on the drive.
If the USB drive is formatted with the Mac file system, you'll need to use a Mac to transfer the data off of the drive. If the USB drive is formatted as a Windows drive, it's probably best to back it up with a Windows Machine.
How to Format a USB Drive as exFAT on Windows
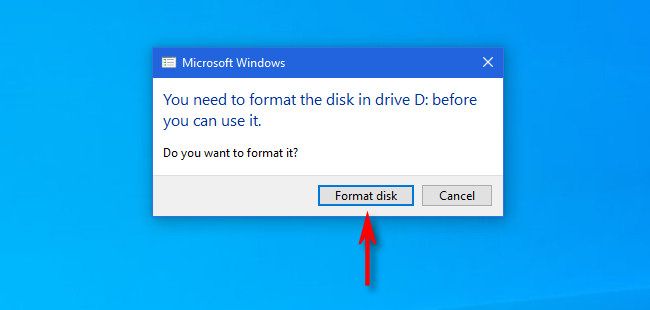
First, plug the USB drive that you'd like to format as a universal Mac/Windows drive into your Windows machine. If Windows says that it doesn't recognize the drive (and you've already backed up any data on it), click "Format Disk," and then skip the next step.
The contents of the drive will be erased when you click "Format Disk." Make sure that you've backed up your important files first.
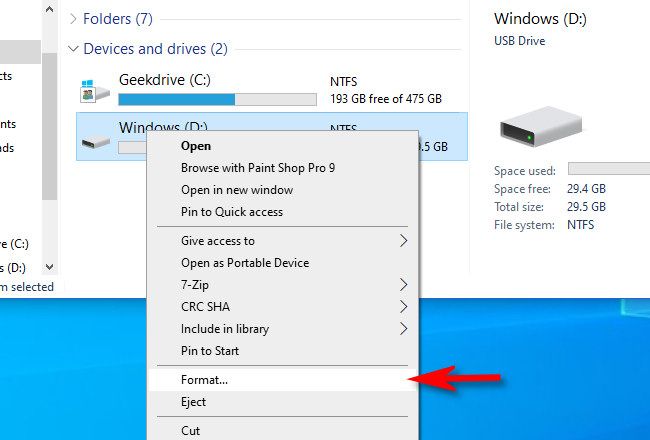
If Windows recognizes the drive, open File Explorer and navigate to "This PC." In your "Devices and Drives" list, right-click the USB drive that you want to use as a universal drive and select "Format" from the list.
Make sure that you pick the right drive, or you could end up accidentally erasing important data.
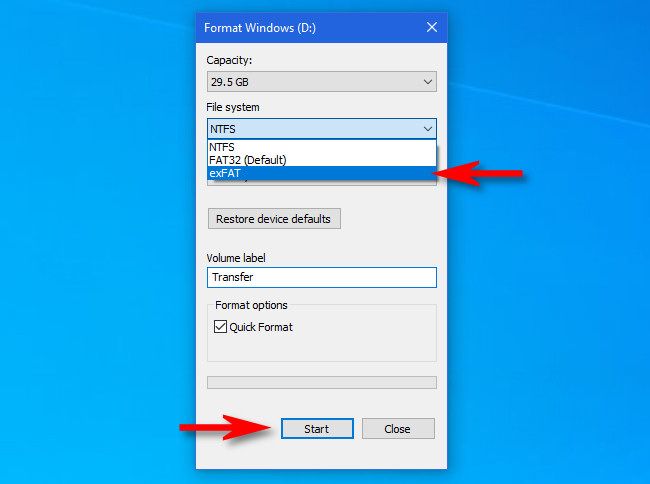
In the "Format" window that appears, click the drop-down box labeled "File System" and select "exFAT." Then, type in a name for the drive in the "Volume Label" box (if you'd like) and click "Start."
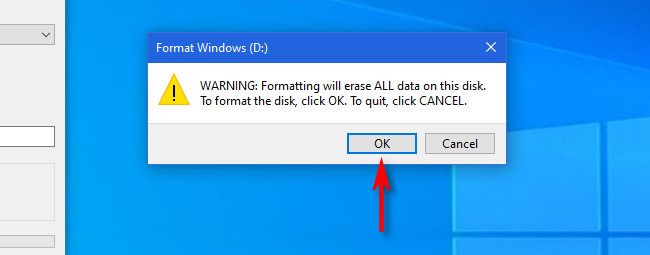
Next, you'll see a warning that reminds you that you're about to lose all of the data on the disk that you're going to format. If you're ready, click "OK."
You're about to lose all of the data on the drive. Formatting erases the drive completely. Make sure that the USB drive is either blank or that you already have a backup first.
Windows will format the drive with the exFAT file system. When you see a "Format Complete" window, click "OK."
The next time that you open File Explorer, you'll see the formatted USB drive in your "Devices and Drives" list. You can copy data to the drive as you normally would, and the drive will also be readable and writable on a Mac.
How to Format a USB Drive as exFAT on Mac
First, find a free USB slot on your Mac and plug in the USB drive that you'd like to set up as a Windows and Mac disk.
To format a USB drive with the exFAT file system on a Mac, you'll need to use a tool called "Disk Utility" created by Apple that ships with macOS. To run it, press Command+Space on your keyboard and type "disk utility," and then click the Disk Utility icon.
(Or, you can open Launchpad, type "disk," and then click the Disk Utility icon.)
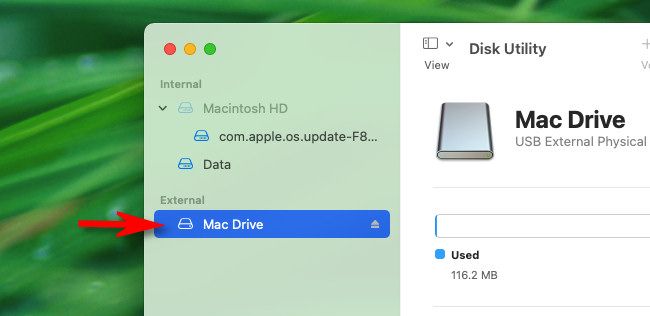
When Disk Utility opens, look at the sidebar in the "External" section and select the USB drive that you just inserted.
Triple-check that you're selecting the correct drive in the Disk Utility list. Everything on that drive is about to get erased.
After selecting the USB drive, click "Erase" in the toolbar near the top of the window.
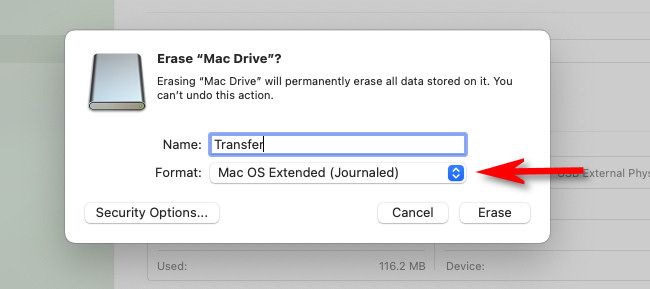
In the "Erase" pop-up that appears, click the drop-down menu labeled "Format."
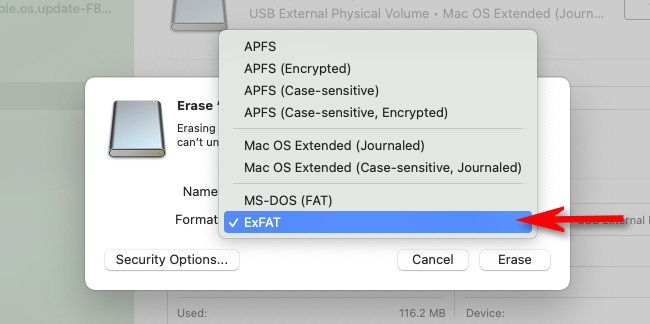
In the file system format menu, select "exFAT" from the list.
If necessary, type a name for the USB drive in the "Name" box, and then click "Erase."
Before clicking "Erase," make sure that the USB drive that you're formatting is either empty or that the data on it has already been backed up. After this step, all the data on the drive will be lost.
Disk Utility will erase and format the USB drive as exFAT. When it's finished, click "Done," and you're ready to go. Quit Disk Utility and you can copy files to your newly formatted USB drive as usual. You can then insert it into a Windows PC and read from it or write to it with no trouble.
Have fun!

