Add details to your Microsoft Excel spreadsheets for cities, foods, music, plants, and more. With the data type tool, there's no need to open your web browser. Just type in a keyword and go!
When Microsoft implemented its data type tool in Excel, we showed you just how easy it is to use. You could gather geographical data or add stock details to your sheets without scouring the internet. But the tool goes beyond its early stages of a few data types to over a dozen now, including an automatic data detector.
About Data Types in Excel
Once you add data to your Microsoft Excel spreadsheet, you can turn words or phrases into data types. Those data types provide you with details from the web that you can also add to your sheet.
For example, you can type the word "bacon" in your spreadsheet and turn that word into a food data type. Then, with a click, you can insert nutritional details for bacon in the cells next to it.
You can also use the automatic data type. This all-encompassing option detects the data type and applies it automatically. This is ideal if your spreadsheet covers a variety of different types. In this tutorial, we'll go into detail about how to use the automatic data type.
Access the Data Types
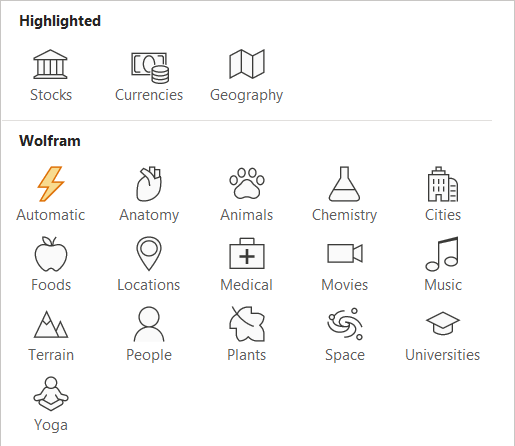
If you're a Microsoft 365 subscriber, you should have the data type feature in Excel. Head to the Data tab and look for the Data Types section in the ribbon.
Use the two top arrows to move through the data types a couple at a time or the bottom arrow to see them all in one spot.
Apply the Automatic Data Type
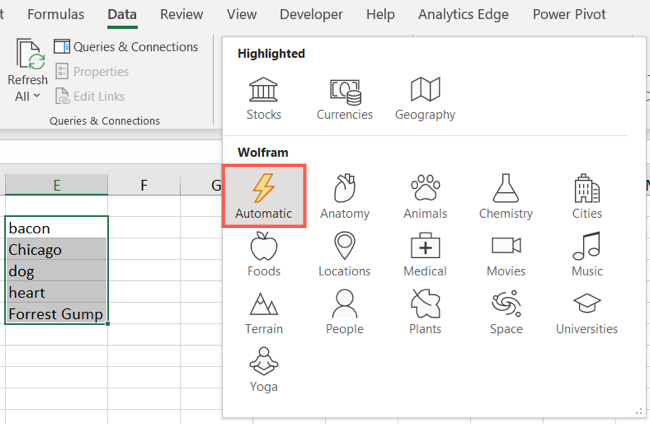
With any data type, you must have data in your sheet first. Since we're using the automatic data type, we'll use different words and phrases that will cover a variety of data types. This is really the best use of the automatic tool as well as the ideal way to show its power.
Select the cells containing the data that you want to turn into data types. Go to the Data Types section of the ribbon as described above and choose "Automatic."
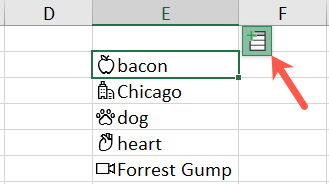
Within a few seconds, you'll see data types apply to your cells as denoted by icons. For instance, the animal data type will display a paw-print icon and the food data type will display an apple icon.
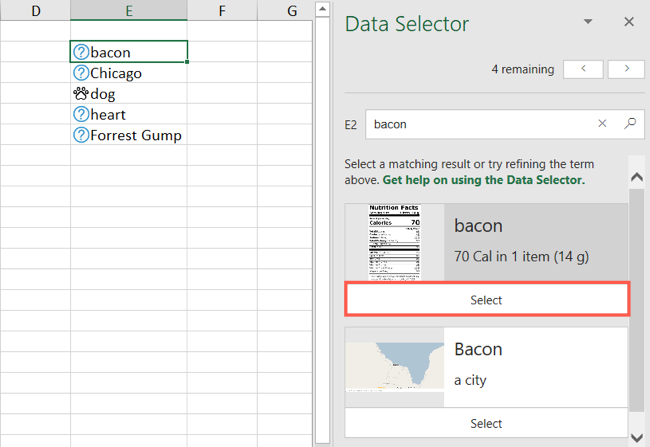
If the tool displays a question mark next to the data (like in the screenshot above), that means it's not sure which data type to use. Normally, that's because it fits into more than one. For instance, did you know that "bacon" is not only food but also the name of a city?
Select the cell in question and the Data Selector sidebar will open on the right. You can then simply review the list of options and click "Select" for the one you want. If you don't see what you're looking for, you can also use the search box in the sidebar.
The correct data type will then be applied to the cell. You can do this for any data cells with question marks.
Add Data Details
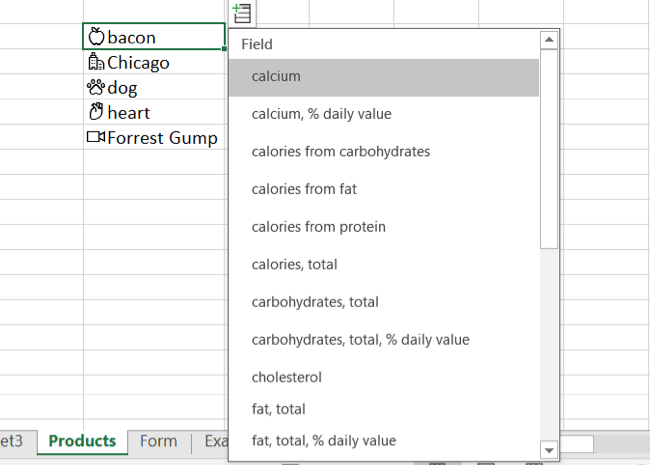
Once you have data types applied to the cells you want, it's time to put them to work. Click a cell to get started, and a small icon will appear.
Click the Insert Data icon, and you'll see a scrollable list of information. You can then choose items from the list, and the details will populate the cells to the right. You can include as much or as little information as you like.
You'll find a plethora of details. Find a species for the animal data type, a body location for the anatomy data type, a production budget for the movies data type, and so much more!
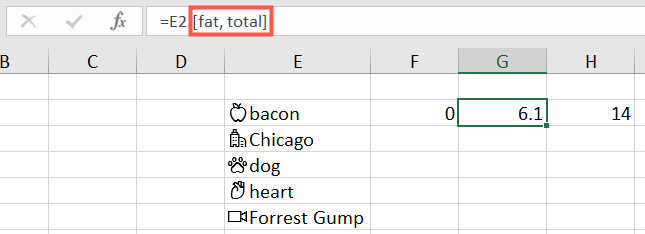
The details that you insert do not include references such as labels or headers. And if you have a lot of data and data types, your sheet can fill up quickly. Simply click the cell containing the information that you added, and you'll see the details in the formula bar.
Just make sure that you're connected to the internet when you apply or refresh the data.
Refresh the Data Details
As previously mentioned, the data type tool in Excel gets its information from the internet. And many details change over time, sometimes even within the same day. To make sure that you always have the most current information, you can refresh it.
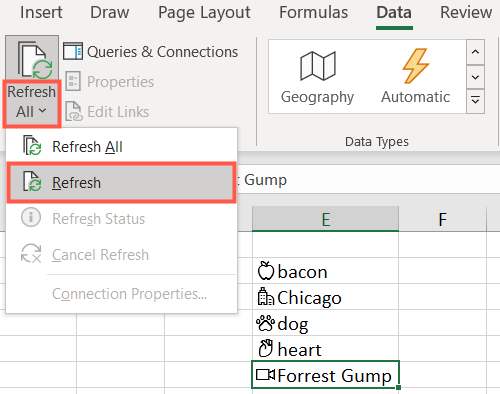
Go to the Data tab and click "Refresh All" in the Queries & Connections section of the ribbon. You'll see your cells containing data types display a refresh symbol briefly as the data updates.
If you only want to refresh one item, select the cell and click the arrow below "Refresh All" instead. Choose "Refresh."
The next time that you need to obtain data details for items in your Microsoft Excel spreadsheet, try out the data type tool. You can save time from manual research and refresh the data as much as you like!


