If you need to work with another date format in Google Sheets, it's easy to change your Sheet's default format to match the standard in any location. Here's how.
Imagine you're working with a Sheet from a U.K. client. The U.K. uses the "DD/MM/YYYY" format, meaning that the day value comes first, followed by the month and the year. But if you're from North America, you likely use a different format, such as "MM/DD/YYYY." You'll want your spreadsheet to match that format so that the dates make sense to you.
Google Sheets uses the typical conventions of your region to determine whether the day or the month comes first in a date timestamp. To change the date format for a particular spreadsheet, you'll need to switch the "Locale" setting to that of the area with the date format that you'd prefer to use.
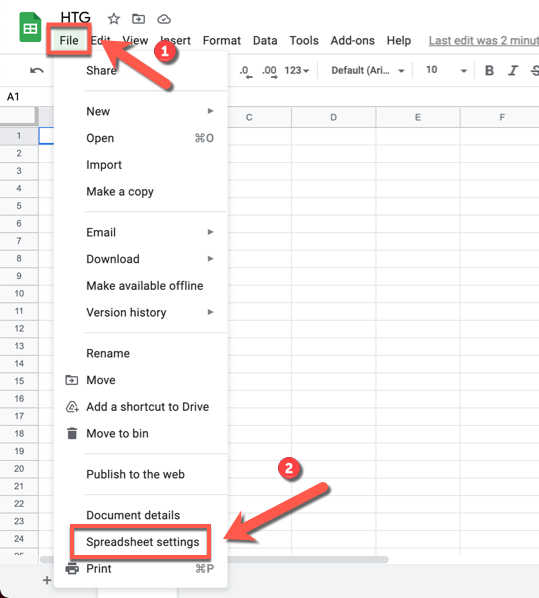
To do this, open your spreadsheet in Google Sheets and press File > Spreadsheet Settings.
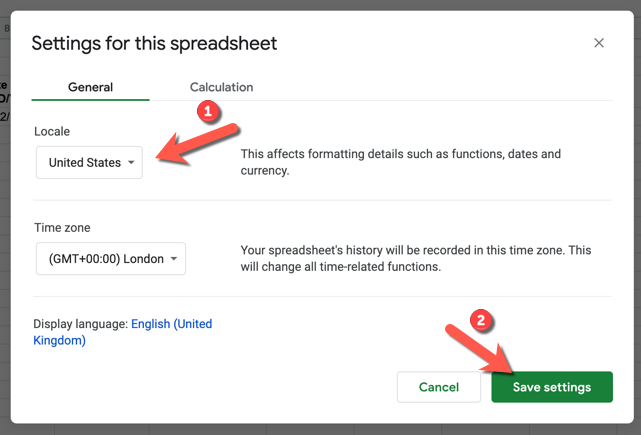
From the "Locale" drop-down menu, select an alternative location. For instance, setting the locale to "United Kingdom" will switch your spreadsheet to the "DD/MM/YYYY" format and set the default currency to GBP, and so on.
To change the default date format to "MM/DD/YYYY," set the Locale value to "United States" or another region that uses that format. To save the change, click "Save Settings."
After changing your locale, any dates already entered into the Sheet will be automatically translated to the date format of the locale you chose, and any date values that you insert after this point will match the conventions of that location. And remember: This change only applies to this one spreadsheet.
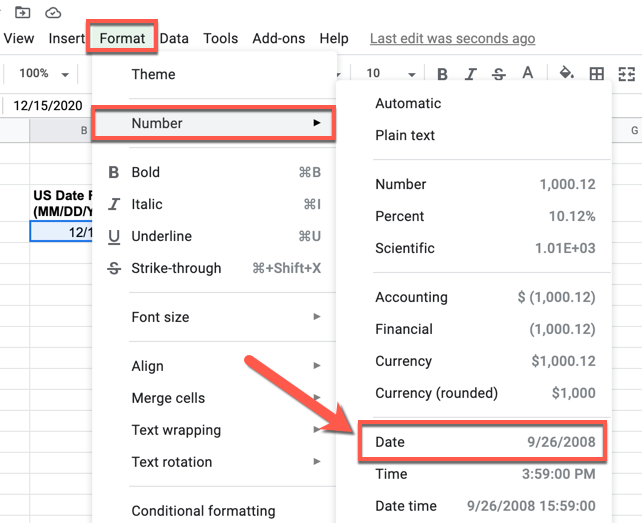
In some cases, you may need to manually change the number format for some previously entered dates if they aren't automatically recognized. To do so, select those cells and choose Format > Number > Date from the menu.
This will apply the spreadsheet's new default date format to the existing data, ensuring that the same format is used across your spreadsheet.
If you want to switch the spreadsheet's locale back when you're done (before, say, handing it off to someone else in another region), visit File > Spreadsheet settings again and choose the locale with the desired date format.


