Quick Links
With such big screens these days, it's easy to lose track of such a tiny mouse cursor. Luckily, Apple introduced a quick way to visually locate the cursor in 2015. Here's how to use it.
If you've lost track of the mouse pointer arrow on your screen, quickly shake your mouse or trackpad finger back and forth. The cursor will momentarily grow much larger on the screen, making its location more visually obvious.
When you stop shaking, the cursor will return to its normal size. This feature works in all versions of macOS, starting with macOS 10.11 El Capitan. We also tested it on macOS 11.0 Big Sur.
How to Disable the "Shake to Find" Mouse Pointer
Shaking the cursor to find it is a handy feature, but if you trigger it too often by accident and find it annoying, it's easy to disable.
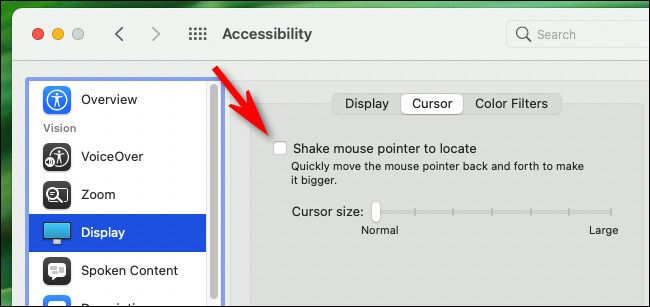
Just open System Preferences by clicking the Apple menu and selecting "System Preferences." Navigate to "Accessibility," and then click "Display" in the sidebar. In the "Cursor" tab, uncheck "Shake mouse pointer to locate."
After that, quit System Preferences, and you'll have no more surprise giant mouse cursors. Reenabling it is as easy as revisiting this option and checking the "Shake mouse pointer to locate" box again.
How to Permanently Increase Your Mouse Cursor Size
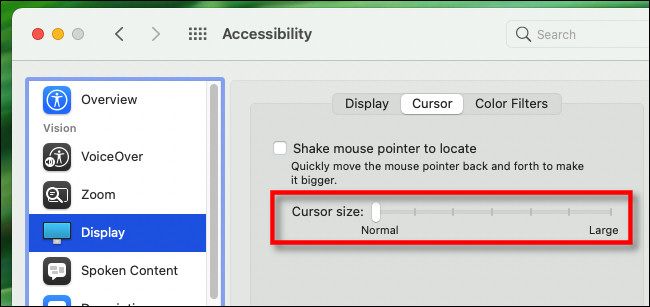
If you find yourself frequently losing the mouse cursor, you can make the pointer bigger permanently. Just open System Preferences, click "Accessibility," then select "Display" in the sidebar.
Under the "Cursor" tab, use the "Cursor size" slider to increase or decrease the size of your mouse pointer.
When you have it set how you like it, close System Preferences, and your cursor will always stay that size. It feels good to be able to see it again---no shaking required!


