Quick Links
AMD offers a free overclocking program called Ryzen Master that lets you experiment with overclocking your AMD Ryzen CPU. Ryzen Master makes overclocking a lot easier than it used to be.
Ryzen Master lets you easily fall back to the default settings if things go wrong. You still need some basic overclocking understanding, but it's a nice, easy gateway into the world of overclocking.
What Is Overclocking?
Overclocking increases the clock speeds of your processor (measured in Megahertz or Gigahertz) beyond what its advertised specifications are. Dialing up the clock speeds makes your CPU work faster, and that, in turn, improves performance. A CPU needs to be unlocked before you can overclock, and all AMD Ryzen processors come unlocked by default. Intel, by comparison, unlocks only specific SKUs of its processors.
These days, a CPU overclock can show improvements in general performance and can also improve performance for CPU-intensive work. As for gaming, it may or may not improve your experience, depending on how heavily your favorite games rely on the GPU.
All CPUs have at least two advertised clock speeds: the base clock and the boost clock. The base clock is the fastest speed at which the CPU will run for light- and medium-intensity computing tasks. The boost is how much higher it can crank up the speeds when under a heavy load, such as when gaming or video editing is taking place. Going beyond the boost speed is the goal of any overclock.
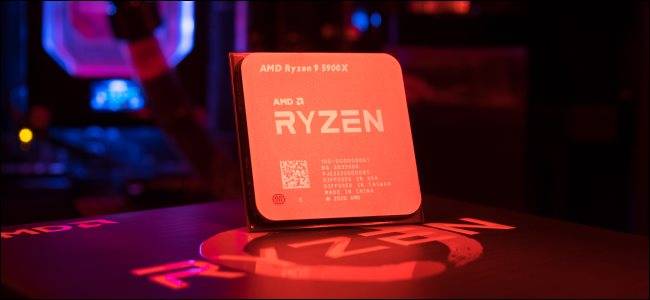
If we look at the Ryzen 5 2600 (the CPU we'll be using as an example in this article), we can see on AMD's site that it has a base clock of 3.4GHz and a maximum boost clock of 3.9GHz. If we were looking at Intel processors, these measures would be called the "processor base frequency" and the "maximum turbo frequency."
What You'll Need

Using Ryzen Master is very different from using a traditional overclock that's set in the BIOS. With Ryzen Master, if you reboot the PC, the overclock is wiped out and the CPU returns to its default settings. Not to fear, however, as activating the overclock again is as simple as a button click. The advantage of this is that you can set your PC to overclock for gaming or other intensive tasks, and then return it to stock settings the rest of the time to avoid wear and tear on your parts.
Even though it's a little easier with Ryzen Master, overclocking still has the potential to damage your system and void your warranty. If you're smart about overclocking, the risk is reasonable, but you can never fully remove the risk. Consider yourself warned. Let's also add that these instructions are for typical desktop PCs. Trying to overclock a laptop or a compact desktop PC is not advisable. It's much harder to keep the components cool.
Before overclocking a Ryzen CPU, there are a few things you'll need. First, a reliable power supply unit (PSU) with more wattage than what you typically need in a non-overclocked state. A Corsair recommends in a blog post that a power supply should meet your power needs while staying somewhere within 50 to 80 percent of the PSU's rated wattage. You can estimate your PC's power consumption using PC Part Picker. Next, you'll need something better than the Wraith cooler that came with your Ryzen processor. Overclocking creates more heat, requiring something beefier, such as an all-in-one liquid cooler with dual fans, or an aftermarket fan with a serious heatsink.
You'll also need a Ryzen processor, of course (as this won't work with Intel CPUs), and the Ryzen Master software, which you can download from AMD's website. Our example overclock uses a standard Ryzen 5 2600 desktop CPU, but this can also work with Ryzen desktop APUs that have integrated GPUs. In fact, Ryzen Master can even let you overclock your integrated GPU, but that's an adventure for another time.
Let's also download a few more useful pieces of free software: Asus Realbench, Cinebench, Core Temp, and OCCT. These are for benchmarking the CPU and monitoring its temperatures.
The last thing you'll need is some patience. Going through an overclock, even an easy one with Ryzen Master, is slow going. The basic idea we're shooting for with this overclock is a moderately faster CPU that's stable and draws as little power as possible.
Getting Acquainted with Ryzen Master
Before we start changing any settings in Ryzen Master, let's open and run the latest version of Cinebench using the multi-core and single-core CPU tests. Each test takes about 10 minutes to run. Be sure to write down your score for each test, as they'll allow you to compare the non-overclocked and overclocked states of your PC. During benchmarking shut down every other running program and any wireless and wired connectivity (Bluetooth, Wi-Fi, Ethernet) to get a more accurate picture of what your system can do.

Once you've run the tests, open Ryzen Master and take a look at the basic interface. You'll see a left rail with menu items. At the bottom, you have several tabs, including Current, Creator Mode, Game Mode, Profile 1, Profile 2, and a few others.
Looking at the default view on the "Current" tab, you'll be greeted with a dashboard showing all the active clock speeds for each core of your processor as well as some stats, including current CPU temperature, peek speeds, total socket power, and so on.
Then, below those two sections, we have what's called "Control Mode," which includes Auto, Precision Boost Overdrive, and Manual options. Those are all the basic controls we're going to deal with in this article. We're not going to touch the "Memory Control" or "Additional Control" sections.
Perform the Overclock
When overclocking, it's wise to slowly increase the clock speed by 25 to 50 megahertz and then test that it's stable and that temperatures are in the right range. If all's well, creep up the speeds a little more and test again. If you find that your CPU isn't getting too hot, but that at a new speed, it's unstable to the point of crashing or freezing, then you probably need to provide more power to the CPU.
To slowly increase the voltage, click the "Up" button once in the "Voltage Control" section, which will move Ryzen Master to the next voltage preset. The general rule of thumb with Ryzen CPUs is to keep your CPU voltage below 1.35 volts, with 1.45 volts being the maximum. Using voltages beyond 1.45 volts can shorten the CPU's lifespan.
Now, let's get going. In Ryzen Master, click on the "Profile 1" tab at the bottom, which is where we'll be making our changes. Then, select "Manual" in the "Control Mode" section. This frees up the controls of voltage and core speeds for overclocking.
Now, unclick the buttons next to "Additional Control" and "Memory Control" (if they are green) so that we don't accidentally change anything in here.

Next, let's go to the "Core Speed (MHz)" section and click "All Cores." This button means that any change to one core changes them all to the same value. You could overclock on a per-core basis since Ryzen Master helpfully puts a star on the core with the best potential for overclocking, but we want a simple, stable overclock across all cores.
To change the clock speed, click the number beneath the first core. Change the number from its base to something higher and hit "Enter" on your keyboard.
Next, lock in that new value by clicking "Apply & Test." This will carry out a very brief test where Ryzen Master will figure out whether these overclock settings will work. The test is not that robust and won't catch many problems---but, if by chance you get a fail on this basic test, you'll know something's not right with your settings.
Assuming it passes AMD's test, let's run a preliminary test to see how the overclock is doing. For that, let's use Cinebench again. At the same time, we'll have Core Temp running to watch our temperatures.
During the test, you want to keep an eye on two things: that your CPU temperature doesn't go above 80 degrees Celsius (sticking around 70 is even better), and that Cinebench doesn't freeze or crash. If your PC can run this 10-minute test without crashing or without the processor getting too hot, we can go back, crank up the clock speeds, and run the test again. Keep doing this until you hit some instability, and then try upping the voltage to stabilize things again.
If your CPU fails the Cinebench test because of temperatures and you have a quality cooler, then decrease the clock speed until you get reasonable temperatures again.
After going through this process, we ended up with an overclock to 4,100 MHz (4.1GHz) in Ryzen Master, with a voltage of 1.34375. We'd strongly advise against using our presets if you have the same CPU. All processors, even the same model, have different overclocking capabilities thanks to the infamous "silicon lottery."
Test the Overclock's Stability
Once you have a stable overclock, it's time for more in-depth testing. First, let's check the thermals one last time using OCCT, one of the aforementioned free benchmarking utilities.

Run OCCT's CPU test with a small data set for about 30 minutes. If your temperatures stay below 80 degrees Celsius (preferably under 70), then we'll move on to stage two. If not, go back to the drawing board to get a more usable overclock by lowering the clock speed.

Assuming that everything is looking good, it's time for the bigger test. Run Asus Realbench's Stress Test for four to eight hours using half of your system's RAM. Do this preferably during the day when you can pop in and make sure that the temps stay below 80 degrees Celsius.
If the test runs successfully and your temperatures are good, then you've probably got a stable overclock. Now, run Cinebench again, this time shutting down as many background programs as possible as well as wireless and wired connections. Then, use that score to compare your official overclock performance with that non-overclocked benchmark we ran earlier. In our test case, we increased our Cinebench multi-core score by nearly 800 points.
Remember, Ryzen Master is not a permanent overclock. After every system reboot, the clock speeds reset to their defaults. However, getting back the overclock is as simple as applying the settings from "Profile 1" once again.
Now, it's time to get out there and start shredding that video edit---or watch the barbarian hordes overrun your burgeoning empire in Civilization VI (only faster this time).