Chromebooks are called Chromebooks because they're usually laptops, and laptops typically have trackpads. If you'd like to use a Bluetooth mouse with your Chromebook instead, it's easy to do. We'll show you how.
As long as your Chromebook has Bluetooth, you can connect a number of wireless peripherals (such as a keyboard and other accessories) to it. A Bluetooth mouse is a popular choice for better navigation. You can easily tuck one in a bag with your Chromebook, too.
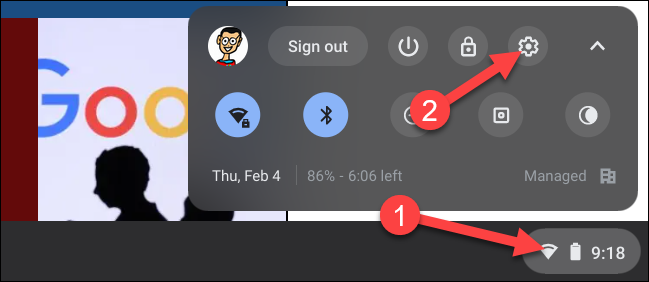
First, click the clock icon on your Chromebook's Shelf to bring up the Quick Settings panel. Then, select the gear icon to open the Settings menu.
In the Settings app, scroll down and select "Bluetooth." If your Chromebook doesn't support Bluetooth, you won't see this option.
First, toggle the switch on (if it isn't already). Your Chromebook will begin scanning for Bluetooth devices. Make sure that your mouse is in pairing mode.
When you see the mouse appear in the "Unpaired Devices" section, select it.
A pop-up will appear briefly while it connects, and then you're done! The mouse will say "Connected" in green text.
The mouse should now be connected, and you can move the cursor around the screen. From now on, the mouse will automatically connect when you turn it on.


