Quick Links
Apple's iPadOS 14 update for the iPad, iPad Air, iPad Mini, and iPad Pro brings the iPad closer to the Mac without losing what makes the iPad unique. Here are the features you should try out on iPadOS 14.
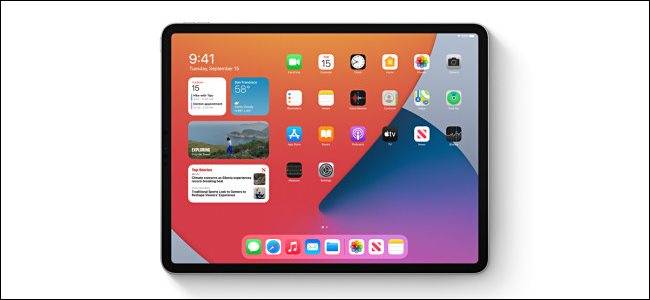
New Widgets

The widget layout on the Home screen is the same on iOS 14, but there are new widgets to check out. To access them, swipe right on the Home screen. You can also pin them to the sidebar.
The process of adding widgets and the different types available are also different. You can now add small, medium, or large versions of the same widgets. To get started, just tap and hold an empty part of the Home screen, and then tap the plus sign (+).
The widgets you use on your iPhone Home screen can be accessed on your iPad, as well. You can get started with these 10 great widgets.
Universal Search
With iPadOS 14, the operating system's design is maturing. With the Spotlight-style universal search, the iPad is behaving more like a Mac and, in this particular case, that's a good thing!
Now, whenever you press Command+Space or swipe down on the Home screen, you'll see the new Universal Search bar.
Here, you can type a search for anything, and it will scour the web too! App results are highlighted instantly---just press Enter to open one. You can do the same for any website you've visited previously.
Write in Any Text Box

iPadOS 14 also brings the Apple Pencil more to the forefront. If you're a fan of it, and you prefer writing over typing, you'll love the new Scribble feature.
With this feature, you can write in any text box. Just tap a text box with the Apple Pencil (not your finger) and a little pencil icon will appear. Write whatever you want, and it will then convert to typed text.
You can select text by circling over it. Deleting something you've written is as simple as scribbling it away. For more on how to customize and use the Scribble feature, check out our guide.
Copy Handwritten Text
After you handwrite text, you can also copy and paste it as typed text via the Apple Notes app.
To give it a try, navigate to a handwritten note, and then double-tap a word to select it. Drag the selection to include all the handwritten text.

In the pop-up, tap "Copy as Text." Now, you can paste it as typed text in any app.

Draw Perfect Shapes in the Notes App
If you ever handwrite notes in the Notes app, you sometimes need to draw shapes. Whether it's a flowchart or a series of squares, iPadOS 14 lets you convert your drawings into perfect shapes.
To try it out, open the Notes app, and then use the Apple Pencil or your finger to select the Pen, Pencil, or Highlighter tool. Draw a shape, and then hold the Apple Pencil or your finger on the end of the shape for a few seconds.

The figure you drew will automatically transform into a perfect shape.

Learn to Use the New Sidebar in Apps
iPadOS 14 also brings a collapsible sidebar and three-pane user interface to the majority of Apple's apps. Many third-party apps are starting to use it, as well.
The new sidebar drastically changes how certain apps behave; a prime example is the Photos app. You'll now have to use the sidebar to navigate between tabs, browse albums, or see different types of media.

You can tap the Sidebar button to collapse or expand the sidebar. You can also edit the sidebar, and add or remove features.
The best example of a customizable sidebar is in the Files app. Tap the Menu button, and then tap "Edit Sidebar."

Here, you can remove and rearrange your "Favorites" and "Tags" all in one simple interface.

Set Default Mail and Browser Apps
Another way in which the iPad is becoming more like a Mac is that you can now set default apps for mail and browser clients. You can set Google Chrome, Microsoft Edge, Firefox, and more as your default browser. You can also change your default email client to a third-party option, like Spark, Gmail, Outlook, and more.
After you change your default browser, any links you tap in any app will open directly in that browser instead of Safari.
To change your default browser or mail client, open the Settings app, and head to the respective app you want to change
Tap either "Default Browser App" or "Default Mail App," depending on which app you want to change.

Select the app you want to use from the list.

That's it! You've now set a third-party app as your default mail or browser app.
Open Universal Search From Anywhere with AssistiveTouch
What if you want to access Universal Search from within an app, but you don't have a keyboard attached? You can solve this by using the AssistiveTouch feature.
AssistiveTouch adds a floating software Home button to the iPad screen. You can then assign single-, double-, or triple-tap shortcuts to the AssistiveTouch button. We recommend adding Spotlight as a double-tap gesture. Then, you can simply double-tap the AssistiveTouch button any time to open Universal Search.
To set this up, open the Settings app on your iPad, and head to Accessibility > Touch > AssistiveTouch. Toggle-On "AssistiveTouch" at the top of the menu, and then select "Double-Tap."

Here, tap "Spotlight."

Now, whenever you double-tap the AssistiveTouch button, a floating Universal Search menu will appear over any app you're using.

Quickly Open Apps in Split View with Universal Search
In addition to convenience, the floating Universal Search feature offers yet another benefit. Because it opens on top of any app you're using, you can also use Universal Search to search for and add an app to Split View.
You don't have to use the Dock or go to the Home screen to add apps to Split View. This works best if you use your iPad with a keyboard. However, as we covered above, you can also use AssistiveTouch to open Universal Search with a touch gesture.
To get started, open the first app you want to add to Split View. Press Command+Space or use AssistiveTouch to open Universal Search, and then type the name of the second app you want to add to Split View.

When the app appears in the search results, tap and hold its icon to pick it up.
Then, simply drag it to the right edge of the iPad screen and let go to add the app to Split View.
Just like that, you now have two apps open in Split View. When you're done, just exit Split View as you normally would.

Disable Private Address for Wi-Fi Networks
iPadOS 14 has a new security feature called Private Access for Wi-Fi networks. It creates a random MAC address every time you connect to a Wi-Fi network. Usually, a MAC address is bound to a device. Companies and websites also use it to track you on the internet.
A randomized MAC address boosts your privacy whenever you connect to public Wi-Fi networks, but it might be a problem for some folks. For example, if your home or work network uses MAC address filtering, you might be asked to disable this feature. This can be done on a per-network basis.
To enable or disable this option, open Settings on your iPad and head to the Wi-Fi section. Tap the Info button (i) next to the Wi-Fi network to which you're currently connected.

Toggle the "Private Address" option On or Off. Tap "Rejoin" in the pop-up to complete the process.

While it's not a new feature on iPadOS 14, the mouse and trackpad support now available on all iPads offers a powerful way to get more done on your iPad. Check out what all you can do with it here.