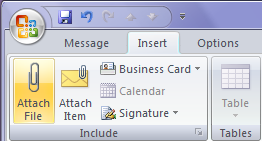
Those who are familiar with resizing picture attachments in Outlook 2003 might wonder where on earth they hid this feature in Outlook 2007 - at first glance, it seems like they removed it completely, when in reality they buried it in the Ribbon. Resizing picture attachments before they go out is one way to be nice to the people you are sending files to... there's really no reason to send emails with gigantic picture files when the other person just wants to see the picture. It's also easier than resizing them before sending. On the Ribbon select the Insert tab and click Attach File. Windows Explorer opens up. Select and double click the picture you want to send in your email. *Note: You can also drag and drop the picture into your email message.

Now that you have the picture attached in your message click the Include Dialog Box Launcher (Yes really is the official name for this little icon). Look where the mouse is in the following screenshot... yes, you have to click that tiny little icon.

Once you click that icon, the "Attachment Options" panel will pop up on the right hand side of your window. In the Picture Options section, you can resize the attached picture automatically to one of the pre-set sizes.

Notice especially the checkbox for "Show when attaching files". If you check this, then the next time you attach a file, this side panel will show up the next time without having to do anything extra. This comes in extremely useful when sending pictures that have not been resized, cropped, or scaled down from the original size. As picture files can get quite large this allows you to send them as a reasonable sized attachment.