Quick Links
The difference between a good photo and a great one might be the few minutes you spend editing it before you share it. These techniques can quickly boost the quality of your photos.
You can make all of these edits on a smartphone using built-in tools, like Apple's Photos app or Google Photos. There are, of course, more in-depth apps available for both hobbyists and professionals.
Recover Details From Shadows and Highlights
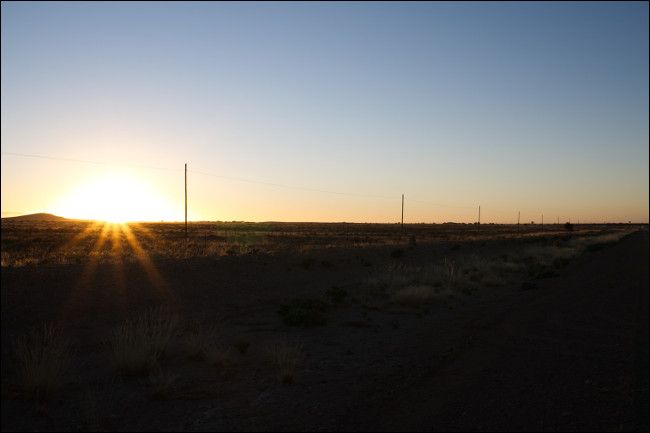
Highlights are the lightest areas of your image, while shadows are the darkest. If either of these are pure white or pure black, these areas are over- or underexposed. Fortunately, you can try and claw back some detail from these areas using the "Highlights" and "Shadows" sliders.
The format you used to capture your image will affect how much detail you can recover. If you shot an image in RAW on a digital SLR or mirrorless camera, or you have a smartphone app that can capture RAW photographs, you'll have a lot more to work with.
However, if you're using a compressed image format, like JPEG, much of the detail in the highlights and shadows is discarded during the compression process. A RAW file is much larger because it retains all of the data captured when you press the shutter, including portions that are invisible to the human eye without some editing.
Even if you're shooting in JPEG on a smartphone, you should be able to recover some detail. The aim here is to create a "flat" image, in which there are no over- or underexposed areas. By doing this, you'll lose contrast, but that's okay because you can add it back afterward.
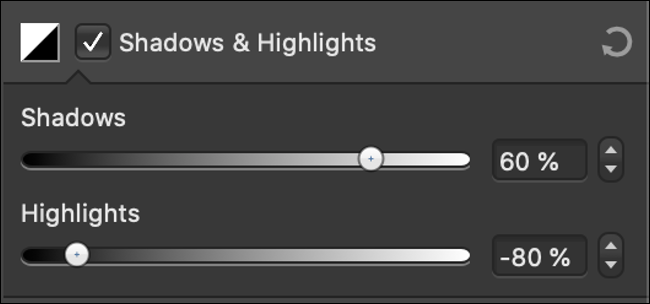
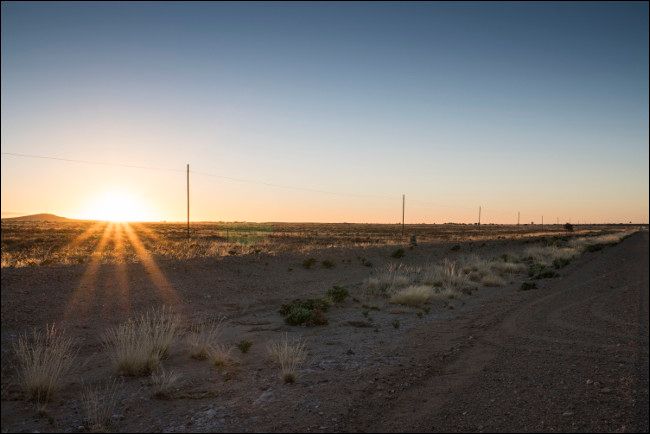
First, reduce the "Highlights" slider until you see some detail return to the lightest areas of your image. Then, increase the "Shadows" slider to recover some detail in the darkest areas.
How far you go with either of these settings depends on your image, its format, and the look you're trying to achieve.
You now have a flat image with more dynamic range. You can now gradually add some contrast back into the image using the contrast slider. Go slow, though---you don't want to lose any of the detail you just recovered. The key is to find the right balance between the dynamic range and contrast.
You can use this technique to fix over- or underexposed images by focusing primarily on the highlights or shadows, respectively.
Straighten Your Photos (or Find Other Straight Lines)
If you don't already straighten your images, it's possible you've never noticed they're uneven. Unfortunately, when you do start to notice this, it can quickly become an obsession. You can save your sanity by always correcting your images in postproduction before you share them.
The easiest way to straighten an image is to look for the horizon. If your image is of a landscape or features the horizon in any prominent way (like a group portrait taken outside), adhere to the horizon whenever possible.
Of course, there's more to straightening images than simply matching the horizon.
Not all images feature the horizon. In those cases, it's important to look for other straight lines you can use. For example, in indoor shots, you might look for beams or pillars. Sometimes, though, you might have an image with lines that weren't straight to begin with, such as beams in an old building or a toppled fence post.
In these instances, you'll need to use your best judgment to pick a prominent straight line and adhere to it. There are lots of factors at play here, including focal length and your perspective when you took the shot. For example, an image of a skyscraper shot upward will likely feature two converging lines that get closer near the top.
You can get a lot more hands-on by playing around with perspective distortion tools. These allow you to manually distort an image on both axes to get a perfect result.
You can also just choose your lines wisely and run with it!
Crop Your Images for Better Composition
Most digital cameras now shoot in the range of around 20 megapixels. This is enough to print a pristine photo at about 18 x 12 inches at 300 dpi. You can even usually print a larger version at 200 dpi or lower. This means even if you're printing images, you have a large area to play with to make crops and enhance your composition in post.
It's always preferable to nail down the composition before you press the shutter. Thinking twice before you fire a shot will certainly improve your photography. However, photography also involves understanding which changes you can make to improve your images after you take them, and cropping is a powerful tool.
What you leave out of a photo can be just as important as what you leave in. Zooming with your feet isn't always possible, and not everyone can carry a 400mm lens in their back pocket. Don't be afraid to lose any distracting elements that draw attention away from the subject of your image.
Remember, there are no strict rules when it comes to photography. Experiment until you're happy with the results. Forget the rule of thirds, or at least try not to lean on it too much during your workflow. Focus instead on creating a composition that feels organic, regardless of where the grid lines fall.
Removing any distracting foreground objects or extraneous details around the edge of a frame will draw the eye toward the subject in the middle. However, you should also resist the urge to aggressively center your subjects. Much of the time, an off-center portrait is more visually pleasing than a perfectly centered one. This is why documentary filmmakers often position their subjects at the edge of the frame.
This is why leading lines---the lines in your image that naturally lead the eye in a certain direction---are important when cropping.
Correct White Balance for Better Colors
Most cameras and smartphones do a good job of nailing white balance the first time. Of course, no device is perfect. It's easy to use a manual white balance and forget to change it. Sometimes, conditions change quickly, or competing light sources throw off the white balance.
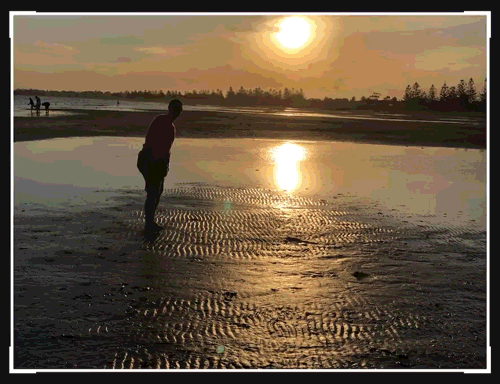
Different sources of light create different temperatures of light, and this is reflected in the white balance. A golden sunset casts a warm glow, whereas an overcast shot of a snowy mountain might appear cold and blue. Tubular fluorescent lights cast a cold white glow, while incandescent lights in table lamps are usually warmer.
If the white balance is off, skin tones won't look right, nor will any white or gray areas in your image. You can use this to your advantage to create warmer or colder scenes, but here, we'll be focusing on getting as close to neutral white as possible.
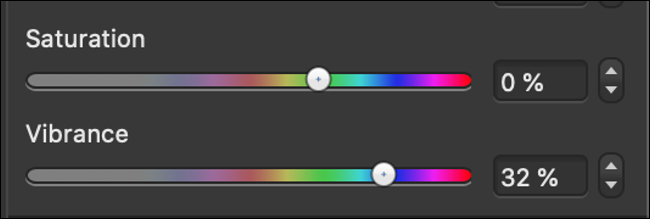
The easiest way to do this is to increase the "Vibrance" slider. This should make even the dullest colors in your image stand out. You should also be able to tell from this whether your image is too warm or cold.
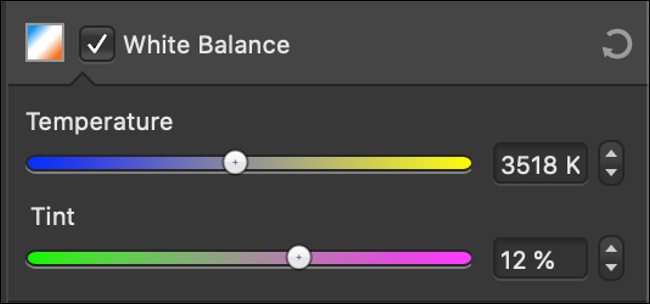
Try to strike a balance between cold (blue) and warm (yellow) by adjusting the "Temperature" (or "Warmth" in some editors) slider.
Once you've struck a balance between yellow and blue, turn your attention to green and magenta (pink). Most image editors also have a "Tint" slider you can use to strike the right balance between green and magenta. It's a lot easier to get this right with the "Vibrance" increased.
When you've achieved a good white balance, your image should look neutral. Whites should be white, and skin tones, hopefully, will be as close to normal as possible. It can be hard to get skin tones right, even after you've adjusted, particularly if there's any colored lighting in the scene.
Just remember to reduce the "Vibrance" setting to something more reasonable when you're done.
Boost Colors with Vibrance to Preserve Skin Tones
The "Vibrance" slider targets the dullest colors in your image without overdoing the tones that are already saturated. You can use the "Saturation" slider to increase the overall amount of color, but this affects the entire image.
It's very easy to overdo color saturation and create a radioactive mess of an image. Skin tones that are too saturated can make a subject look jaundiced. Blemishes, like freckles or moles, can become way too exaggerated.
Everything in an image will start to fight for attention. You can use color to lead the eye, but you have to do so carefully.
This is where the "Vibrance" setting comes in. It's like the "Saturation" slider, but with training wheels. It's particularly good for salvaging colors in shadows, which tend to be dull as a result of underexposure.
Don't Spend Big on Photo Editors
Again, you can perform all of these edits right on your smartphone in even the simplest of photo editors, including the built-in tools on Android or iPhone
While Adobe Photoshop is still the undisputed desktop photo-editing king, there are plenty of alternatives you can use that don't require a monthly fee.


