Quick Links
Modern iPhones can take stunning photos in low light. Even if you don't have the latest, greatest model, these photography tips will help you take better photos after the sun goes down.
Use Night Mode (If You Have It)
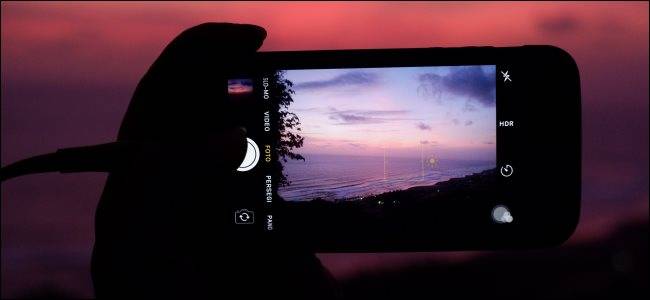
Night Mode is available via the built-in iPhone Camera app. You can access it by tapping the icon on the Home screen, via the Control Center shortcut, or from the Lock screen.
The feature automatically activates on supported models whenever a scene is dark enough. Currently, only the iPhone 11, 11 Pro, and 11 Pro Max support Night mode. You'll know it's active when you see the yellow Moon icon and the number of seconds it will take for an exposure.
Technically, Night mode only works using the standard 1x wide-angle lens; the ultrawide 0.5x lens doesn't support it at all. On the iPhone 11 Pro, you can shoot in Night mode using the 2x telephoto lens, but it still uses the standard 1x camera with digital zoom.
For the best results on any iPhone 11 model, you'll want to take Night mode photos with the 1x wide-angle lens.
You can't force your iPhone to shoot in Night mode, but you can adjust the exposure once the icon appears. Tap it to see a slider at the bottom of the scene. Drag the slider to the left to increase the duration of the exposure---this will allow more light into your scene.
In the images below, you can see how much better Night mode is for shooting in dark conditions. The cropped image on the left was taken with an iPhone X, while the image on the right was shot with an iPhone 11.

Apple designed Night mode to work while you're holding your iPhone, so a small amount of movement won't ruin your shots. However, you will get far better results if you can keep your iPhone as still as possible. Distant highlights, like stars, will look even better if your iPhone remains completely stationary during a shot.
With this in mind, iOS 14 added guides in Night mode. They're just like the guides that appear if you try to take a photo with your iPhone pointed facedown. When you shoot in Night mode, two plus signs (+) will appear on-screen. Keep these overlapped to reduce blurriness in your images.

You can also mount your iPhone to a tripod to get the best possible results. You can then use your Apple Watch as a remote trigger, or set the built-in timer to fire so you won't have to touch your iPhone and risk moving it.
No Night Mode? No Problem!
Whether you have the latest iPhone or not, keeping your device as still as possible when shooting in low light will give you better results. Because the iPhone has to slow down the shutter speed to allow more light into a scene, any movement will result in a blurry image. Because of this, we highly recommend you use a tripod.
It's also helpful to work within the limitations of your device. Smartphone cameras have notoriously small sensors, which also massively limit their abilities in low-light settings. The larger sensors on mirrorless and digital SLR cameras can capture a lot more light.
Knowing all of this, though, will allow you to shoot using your device's advantages.

First, pick well-lit subjects and use light wisely in your images. Stand your subjects under spotlights or use the glow of a candle to subtly illuminate parts of a scene if the rest is obscured in darkness.
In the Camera app, fine-tune the final exposure by tapping and holding to lock focus and expose a particular part of a scene. You can then slide your finger up and down the screen to increase or decrease the amount of light in the scene.
You won't get results that rival Night mode in terms of visual fidelity, but that doesn't mean your photos won't still look good.
Add Night Mode to Any iPhone with NeuralCam
NeuralCam NightMode ($4.99) uses machine learning and computational photography just like the Night mode on iPhone 11. The app takes a few frames from a still scene, and then blends them together to increase the exposure value and overall fidelity. The result is usable photos shot in very low light.
Apple's technology is closely tied to the hardware found in the latest iPhones, so don't expect identical results. The process can also take a bit longer than it does on an iPhone 11, depending on the age of your device. Older iPhones also have less advanced sensors and image signal processing, all of which will affect the final outcome.
However, there's still plenty here to justify the $5 price tag if you intend to keep your current iPhone for another year or two. The app even boosts low-light photos taken with the front-facing camera.
Go Fully Manual with Long Exposures
If you're prepared to put a bit more work into your shots, you can capture photos in the dark by shooting long exposures of 30 seconds or more. To do so, you'll need an app like Slow Shutter Cam ($1.99), which allows you to shoot long exposures.
We tested some of the more prominent manual camera apps, including Manual ($3.99), 645 PRO Mk III ($3.99), and ProCam 7 ($13.99). However, they only allowed for long exposures of 1/4 second or shorter. This is likely a limitation in the Camera API provided by Apple.
How Slow Shutter Cam shoots such long exposures remains a bit of a mystery. It's possible the app is shooting multiple 1/4-second exposures, and then blending them while boosting exposure. While this isn't a true long exposure, the results speak for themselves.
In testing, we found we had to make sure the scene wasn't exposed for so long that the highlights were blown out.
To use Slow Shutter Cam, just download and launch it, and then tap the Settings icon. Here, you can choose the capture mode (tap "Low Light" for night shots) and overall exposure time. Experiment for the best results. A tripod is also absolutely necessary.
Tap the Menu button to see some of the app's other features. The customizable timer comes in handy to avoid touching the screen while shooting, and the intervalometer allows you to shoot long-exposure time-lapse sequences.
Flash Is a Last Resort
Your iPhone camera does have a flash. You can enable it by tapping the lightning bolt icon in the Camera app. While flash will illuminate your scene to an extent, the results can be hit-or-miss. It's best to use it only for portraits, and only when no other light source is available.

Because the flash faces front, it won't capture a scene in a particularly flattering light. If you have to use the flash on your iPhone, stick to the selfie front-facing flash. This uses your iPhone's screen to quickly blast a bright light on your face.
Since the screen is a bit larger than the camera's flash, the light is diffused in a more flattering way. It fills in some of the less desirable facial features, like wrinkles and blemishes.
iPhone Low-Light Performance Is Improving
Night mode is a huge leap forward for Apple. The iPhone 11 wasn't the first device to include it, but its implementation is now among the best for producing natural-looking images.
However, if you really want to explore night photography, like shooting cityscapes or even astrophotography, a smartphone is still a poor choice. The iPhone can shoot the night sky, but it lacks manual controls and a big enough sensor to capture enough light.
That doesn't mean you can't still take amazing photos with your iPhone. The Camera app can definitely help you with that.