Quick Links
Photoshop is a big, complex application. When you’re just starting out, it can feel like it takes forever to get things done. There are, however, a few ways you can speed up both Photoshop’s performance and your own workflow.
Optimize Photoshop’s Performance
Out of the box, Photoshop does a pretty great job of optimizing itself to the computer on which you’re working. It was first released in 1990, so the developers have some experience with getting it to run on low-spec machines. Even the latest version of Photoshop CC runs fine on a mid-2012 MacBook Air. Still, there are some tweaks you can make.
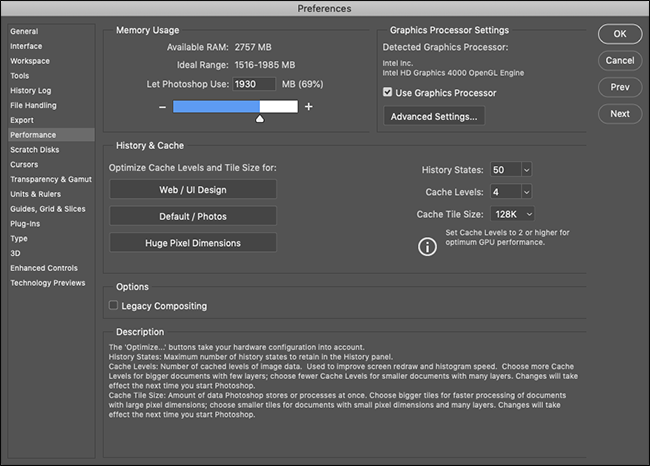
On a PC, go to Edit > Preferences > Performance; on a Mac, go to Photoshop > Preferences > Performance.
Under "Memory Usage," you can control the amount of RAM Photoshop uses. Generally, more RAM means better performance so you can crank the upper limit a bit.
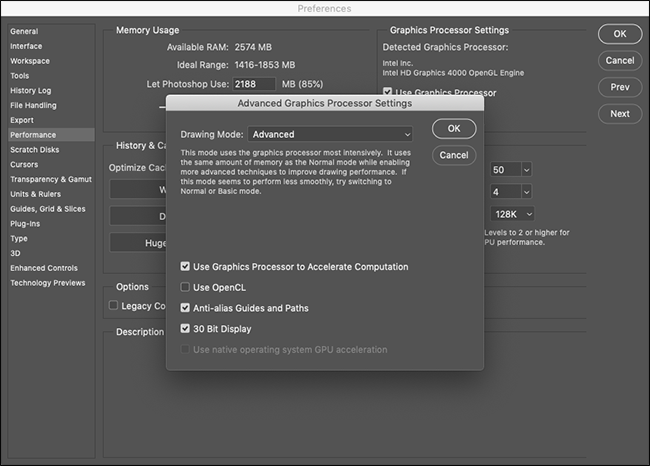
Most of what Photoshop does is CPU intensive, but your graphics processor can speed up certain tasks. Check "Use Graphics Processor" and, under "Advanced Graphics Processor Settings," select "Advanced" from the "Drawing Mode" menu to allow Photoshop to use it as much as possible.
Also, if Photoshop offers OpenCL support here for your graphics processor, check "Use OpenCL" to speed up some features, like the Blur Gallery.
The "History and Cache" settings control how much information Photoshop keeps in RAM. The three Optimize buttons take into account your system configuration, so the simplest thing to do is pick the one that best matches your work.
If you like to tinker, you can also manually set the "History State" (how many times you can "Undo" something), "Cache Levels," and "Cache Tile Size." Upping the "Cache Levels" and choosing smaller cache tiles makes moving and zooming faster, but it’ll be slower to open.
After making any changes, you'll have to restart Photoshop for them to take effect.
Learn the Keyboard Shortcuts
Photoshop has roughly a million menus and a billion submenus. Combined with all its tools, panels, and sliders, you can spend 90 percent of your time just clicking different items on the screen.
The easiest way to work faster in Photoshop is to learn some of the keyboard shortcuts for the things you do all the time. Let’s look at an example.
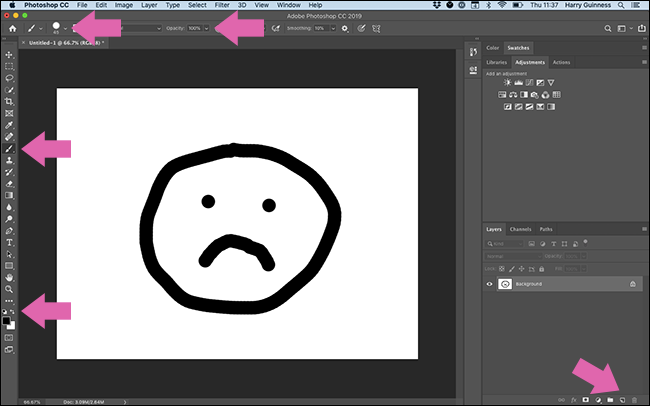
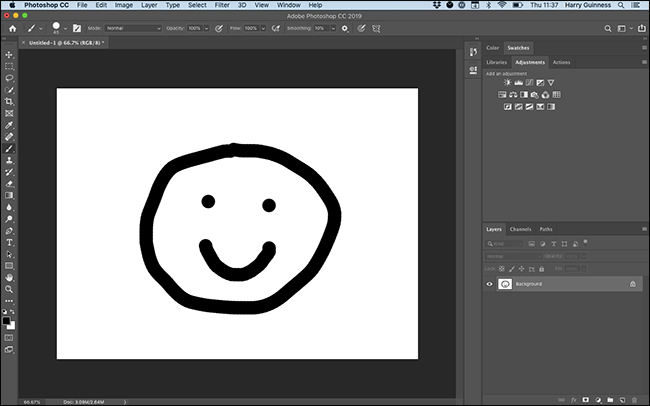
Say you want to paint a black circle on a new layer. If you’re using your mouse, you’ve got to go down to the bottom-right corner and click the New Layer icon. Then, you have to click the Brush icon, configure how soft and opaque you want your brush. Finally, you have to click the Default Colors button (which will set your brush color to black), before you can even start painting.
That’s a lot of clicking around in the interface.
On the other hand, you can use the following keyboard shortcuts:
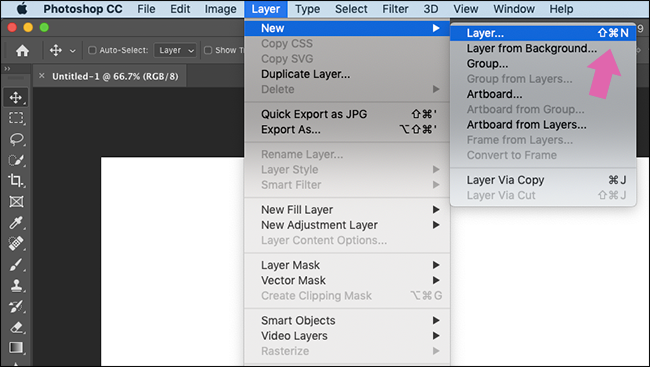
- Control+Shift+N on a PC, Command+Shift+N on a Mac: Create a new layer.
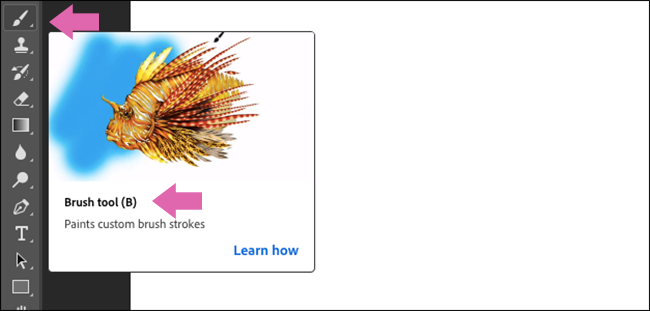
- B: Select the brush tool.
- 0: Set opacity to 100 percent.
- Shift+]: Set hardness to 100 percent.
- D: Set the default brush colors.
What takes at least 30 seconds of clicking around with your mouse or trackpad takes just a few taps on your keyboard.
The only way to learn Photoshop’s keyboard shortcuts is by making an effort to use them whenever you can. Adobe has a full list on its website, so jot down those you’ll need most and keep them near your computer. The keyboard shortcuts are also shown in the menus in Photoshop.
You can also hover over any tool to see its keyboard shortcut.
It takes a bit of work to memorize them, but it’s worth it.
Set Up Your Workspace
A lot of people use Photoshop for different reasons. If you're a photographer, there are probably hundreds of tools and features you haven’t even glanced at. If you’re a designer, you probably don’t use any of the tools a photographer relies on every day.
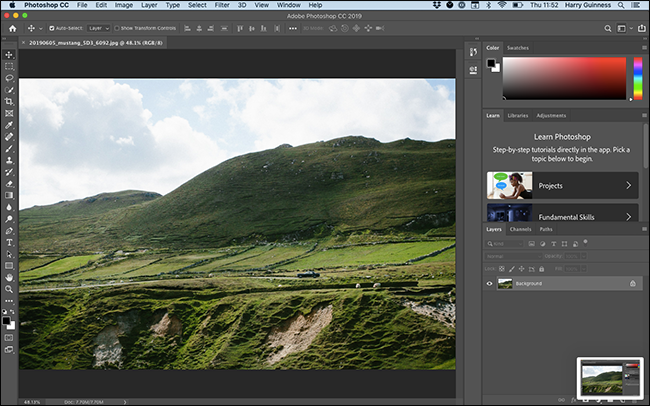
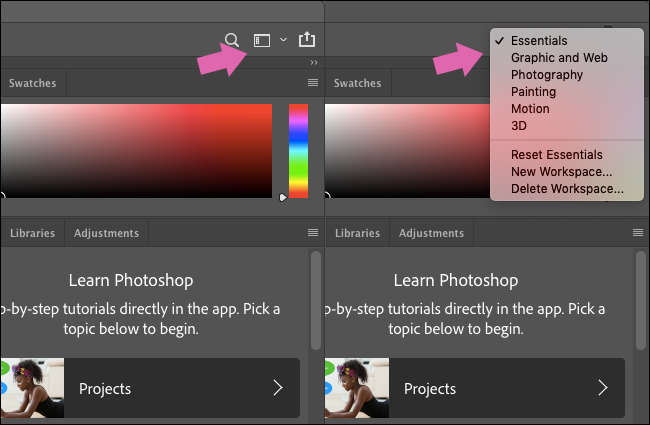
By default, Photoshop is set up so that the most popular tools are on display; this is the "Essentials" workspace.
If you click on the Workspace icon in the top-right corner, you can select a "Graphic and Web," "Photography," "Painting," "Motion," or "3D" Workspace, as well. These configure the panels to better suit your needs.
While these are a good place to start, if you really want to take control, you need to create your own Workspace.
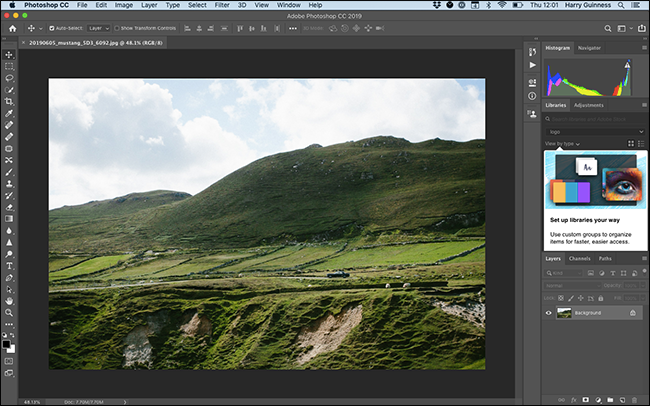
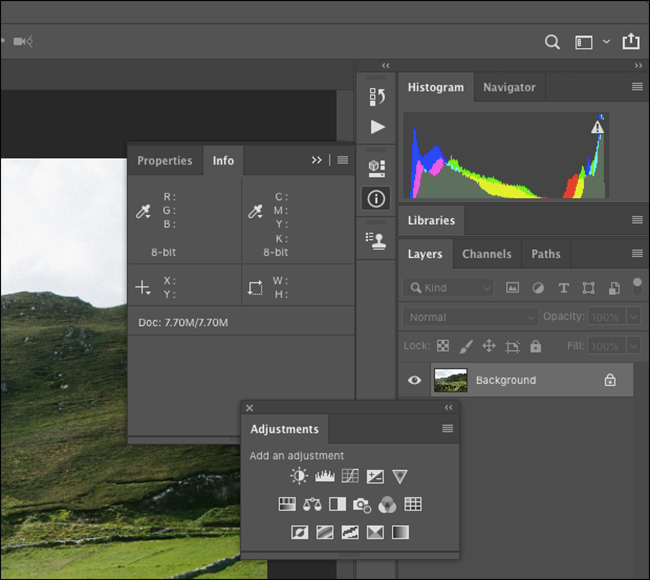
Start with the default option that best suits your work. You can then click and drag panels around.
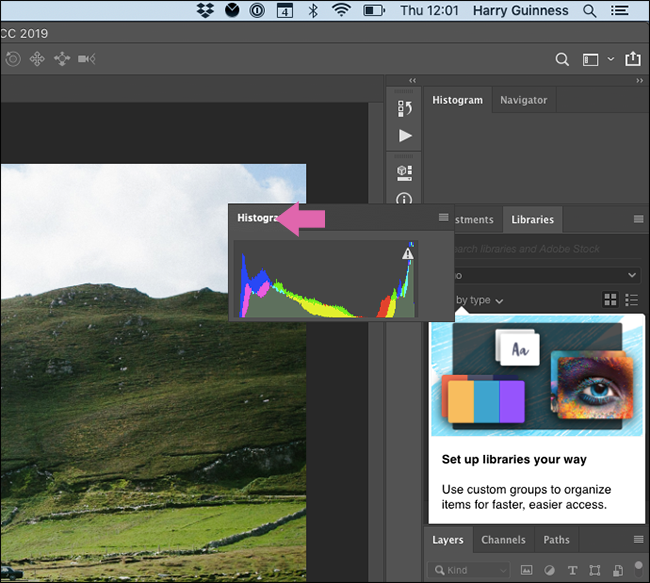
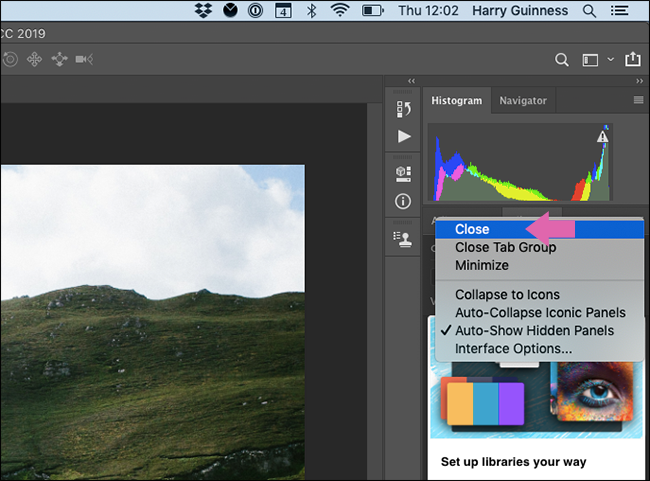
To remove a panel, right-click its name, and then select "Close" ("Close Tab Group" closes all the panels in that group.)
Panels can also be docked to the sidebar and only revealed when you click them, or left free-floating.
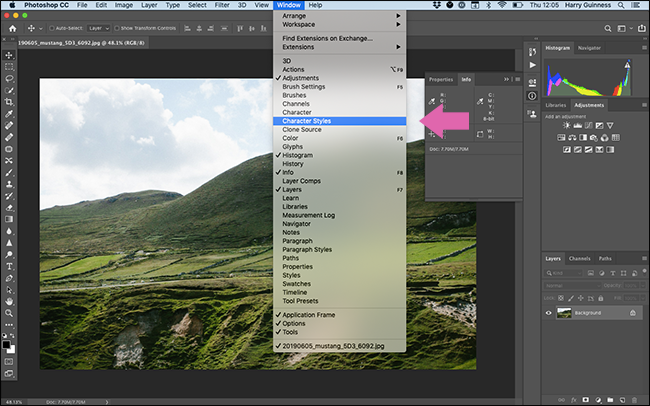
To add new panels, click "Window," and then select the panel you want to add.
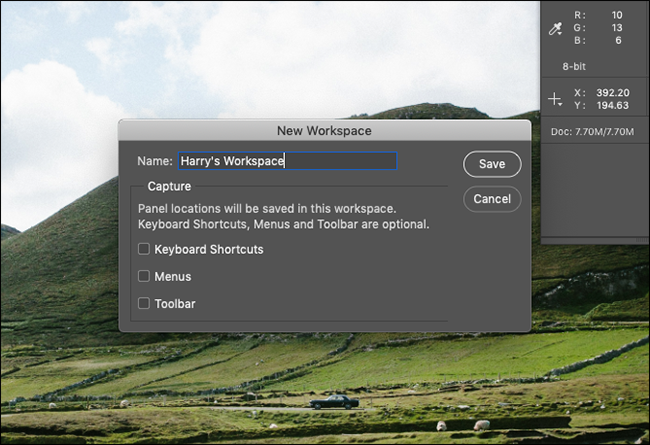
After you’re done setting things up, click the Workspace icon, and then select "New Workspace."
Name your workspace and click "Save."
Now, you can set up all the panels any way you want for different tasks. We recommend creating your own Workspaces for the different tasks you have to do.
Make Your Own Actions
Photoshop also has some powerful built-in automation tools that can make performing routine tasks really easy.
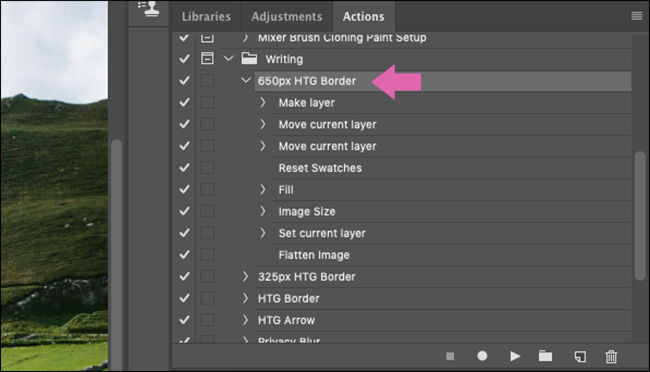
For example, almost every image on How-To Geek requires the same format: 650 pixels wide with a 1 pixel black border. Doing this for every single image would be time-consuming, so it's a good thing you can build an Action for it.
We created one and called it "650px HTG Border." It resizes an image to 650-pixels wide and adds a 1-pixel black border as a new layer on top of everything, so the file will then be ready to save. Something like this can save you tons of time!
Of course, you won’t be able to automate every part of your workflow with Actions. They’re blunt tools with very limited contextual options. However, they’re great for speeding up groups of steps you always perform, like setting up the same layers before you begin an edit, or saving different sizes at the end.
Here are some of the things you can do with Photoshop Actions:
- Create new and adjustment layers.
- Resize, save, flatten, or crop images.
- Add, reposition, or move different elements.
- Combine multiple images into a collage.
- Add specific effects, like a high-contrast, black-and-white look.
There’s a knack to creating Actions; you have to think carefully about how to break your workflow down into different steps that can be automated. Just like learning the keyboard shortcuts, creating Actions can save you a lot of time in the long run.
Get a Graphics Tablet
If you have to paint, select, or otherwise directly interact with whatever you’re working on in Photoshop, you know how awkward it is to use a mouse (or even worse, a trackpad). A pointer is great for clicking different interface elements, but it’s horrific when you want to trace a smooth line around something.
A graphics tablet is a peripheral that replaces your mouse with a pen and touch-sensitive tablet. They give you a lot more control when you’re painting or editing photos. It’s just a much more natural way to work on digital graphics.
If your workflow is slowed down because it takes you forever to mask out or select something, pick up a good graphics tablet---it’ll change your life!
Practice
Working faster in Photoshop is mostly a matter of optimizing your workflow. Clicking around the interface and diving into every submenu takes forever. Put some effort into learning the keyboard shortcuts, building Actions, and configuring a Workspace to save yourself tons of time!

