Quick Links
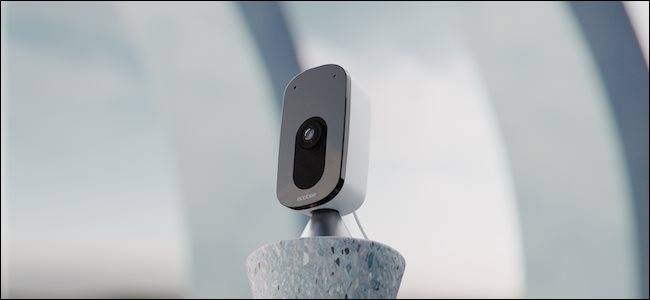
You might know ecobee best for its remarkable smart thermostats, but the company has now entered the home security space with the ecobee SmartCamera. This compact security camera provides a 1080p resolution and a 180-degree field of view with digital pan and zoom capabilities.
The camera has Alexa built-in, which means you can use it as an Echo to activate your lights, check the weather, and access any of the Alexa Skills. Ecobee designed the SmartCamera for easy setup and installation, but you might still run into a few issues along the way.
First, Ensure the Camera Is Using Factory Default Settings
If you have already tried to install the SmartCamera but were not successful, you will need to reset the device before another attempt. To do this, press and hold the "Mute" button and the "Microphone" button on top of the SmartCamera. After a few seconds, a voice will alert you that the reset process has begun.
The assistant will go through each reset option individually. When the assistant asks if you would like to reset the SmartCamera to factory settings, tap the "Microphone" button. If your input is received, you’ll hear a chime. It may take a few attempts, as the camera did not read the button tap each time during testing.
Once you have reset the device to factory settings, you can begin setup.
How to Set Up an ecobee SmartCamera
To start the setup process, open the ecobee app, and tap the green "+" symbol in the top right of the screen.

The next screen will ask what product you are adding to your home. Tap "Camera."

You will then be asked to ensure your camera is ready to connect. If the lights on the front of the ecobee SmartCamera glow amber, great. If they are a different color, don’t worry. The camera will likely complete the setup process despite this. Tap "Good to go!" at the bottom.
It may take several seconds for your device to appear. Once it does, select it from the list.

When you tap your camera name, you will be given the option to set it up via HomeKit or another method. If you set up via HomeKit, you will need to scan the code on the back of the camera itself. However, during testing, the HomeKit setup did not work. The second method was used instead.

In this case, choose the Wi-Fi network you want to use to set up the device. Enter the Wi-Fi's password when prompted.
Once the setup has completed, you will be prompted to give your camera a name from a list. This is so you can easily identify it as well as give voice commands. The list includes all standard rooms and locations in a home.

When this step is complete, your camera will be up and operational---but you will be prompted to activate a few more settings to provide more overall functionality. The first of these is Window Mode, a feature that digitally reduces glare and reflections so your camera can see more clearly through glass. Of course, this feature is only necessary if the camera is pointed through a window.

Next is Autopilot, a feature that automatically disables the recording when you are home and reactivates it when you leave. If you are concerned about privacy and do not want your camera recording you, this feature is worth enabling.

After this is Wi-Fi presence, which helps make the Autopilot feature more accurate. Enabling Wi-Fi presence improves the reliability of automations set up through the ecobee SmartCamera.
You will also be prompted to turn on notifications. If you are using the SmartCamera as a home security system, activate notifications or you won't be informed of any motion the device picks up.
Depending on your camera, you might be asked to update the firmware. This process only takes a few minutes and will help the camera operate better.
How to Mount Your ecobee SmartCamera
The ecobee SmartCamera is easy to mount and requires no special equipment. In fact, you can mount it to the wall using only a screwdriver if you are dedicated, but a drill will make the job easier. There are two areas on the back of the camera body where the base attaches: one on the back and one on the bottom.

Both attachment points have a solid adjustment range to tilt the camera. Pick the attachment point that fits your needs and then press the base of the camera into the camera body. It will snap in place.
Next, pick the area you want to mount it. The bottom of the base has a keyhole mount. Give yourself enough space on the wall to sink in a screw until roughly 1/8 of an inch sticks out of the wall. You can then mount the base of the camera securely on the wall, using the screw and the keyhole mount.

Once you've mounted your camera, open ecobee's app and make sure everything works correctly. The app allows you to digitally pan and zoom the camera, so that it monitors exactly where you want.
If you subscribe to ecobee's subscription service ($5 per month for a single camera), you'll receive more features than you might otherwise, including the ability to take snapshots and record footage at will.