A whiteboard is a great tool for collaborating with others. If you're working remotely and can't physically gather around one, though, you'll need a virtual solution---like Microsoft Whiteboard.
Although Whiteboard is available for anyone with a free Microsoft account or any paid Microsoft 365/Office 365 (M365/O365) subscription, the collaboration features currently only work with members of the same organization.
So, if you're using a personal M365/O365 subscription, you can't collaborate yet; however, Microsoft has said this will change in the future.
Sharing a whiteboard is simple, and the process is the same whether you're using the Whiteboard client or web app.
We'll be using the Windows 10 client, as it has more features and is our recommended method.
How to Share a Board with Someone
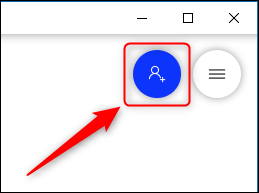
To share a board with an individual, open it in the Whiteboard client, and then click the blue Invite Someone button.
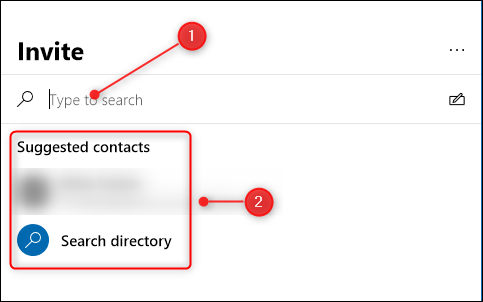
In the "Invite" panel that appears, type name of the person with whom you want to share, or select their name from the "Suggested Contacts" list.
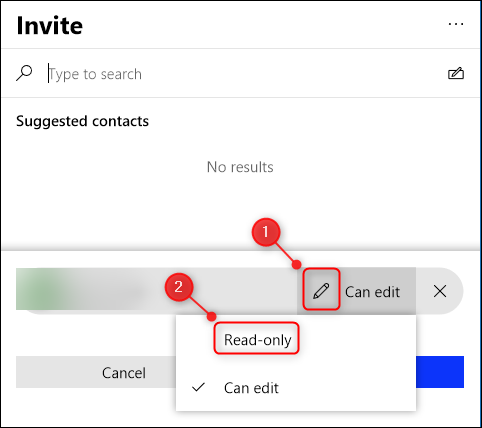
When you select someone, she is granted edit rights to the board by default. This means she can edit the board's contents, share it with someone else, or rename it. If you don't want that person to have those rights, click the Pen icon next to "Can Edit," and change the permissions to "Read-Only."
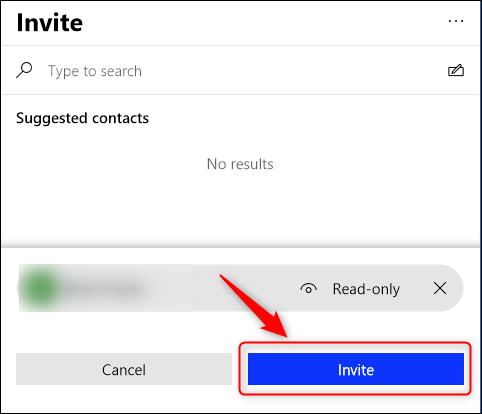
Next, click "Invite."
The person with whom you've shared your whiteboard will receive an invitation via email with a link. When she clicks it, it takes her to the whiteboard. The whiteboard will appear on the front page of the Whiteboard app, so she can access it without returning to the email that contains the link.
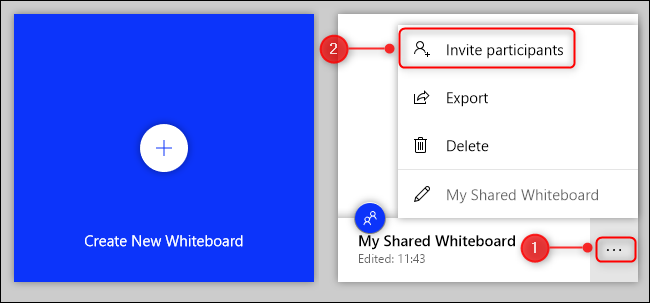
To stop sharing a board with someone, go to the front page of the Whiteboard client. Click the ellipsis (. . .) next to the board you want to stop sharing, and then click "Invite Participants."
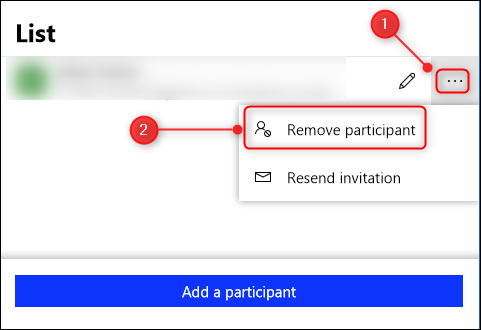
Click the ellipsis (. . .) next to the name of the person with whom you want to stop sharing, and then click "Remove Participant."
The board will be removed from her Whiteboard app, and the link she received will no longer work.
How to Share a Board with Multiple People
To share a board with multiple people, open it in the Whiteboard client, and then click the blue Invite Someone button.
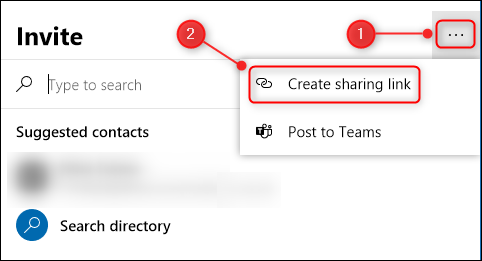
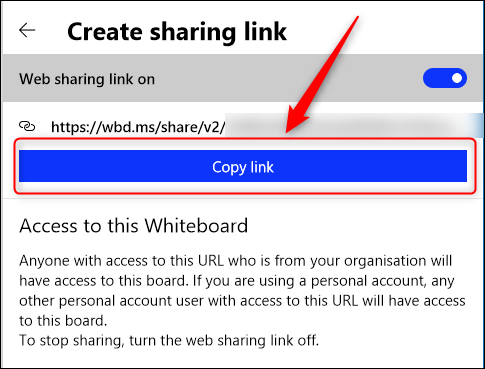
In the "Invite" panel that opens, click the ellipsis (. . .), and then select "Create Sharing Link."
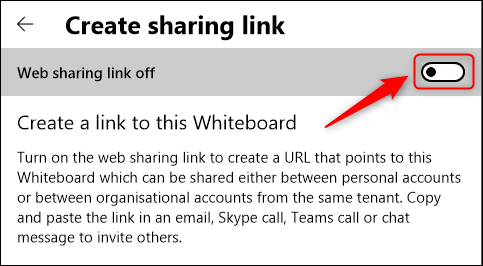
Toggle-On the "Web Sharing Link Off" option.
A unique sharing link will be created.
Despite the text that says the link can be shared between personal accounts, Microsoft's documentation says it only works with others in your organization. We were unable to share a board from a personal account with another personal account during our testing.
This will almost certainly change in the future, but, at this writing, you can only share a board with someone in your company.
Click "Copy Link" to copy it to your clipboard.
You can now send this link to anyone in your organization. When they click it, the board will open. It'll also show up on the front page of the Whiteboard app, so they can access it without returning to the link.
To prevent people from accessing a board, toggle-Off the "Web Sharing Link On" button to delete the link. Anyone who clicks it afterward will see an error message telling them they don't have access to that board.

