Don't like how your Facebook Group is doing? You can leave it, but the group will still be there. If you want to hide the Facebook Group from new members, or if you want to delete it, follow our guide.
How to Archive a Facebook Group
When you archive a Facebook Group, you won't be able to create posts or like or add comments. You won't be able to add more members, but existing members will be able to view the group. You can restore the group to its former glory at any time.
You can archive a Facebook group from the group's page from either the Facebook website or the Facebook app on iPhone or Android.
We'll be using the new Facebook Desktop interface to guide you through the process. (Here's how to get the new Facebook interface.)
First, open the Facebook website in your browser of choice, and navigate to the Facebook Group you want to archive or delete. Click the "Menu" button from the top toolbar, and select the "Archive" option.

From the pop-up, click the "Confirm" button.

Your group will be archived.
You can go back to the group at any time and click the "Unarchive Group" button to resume group activities.

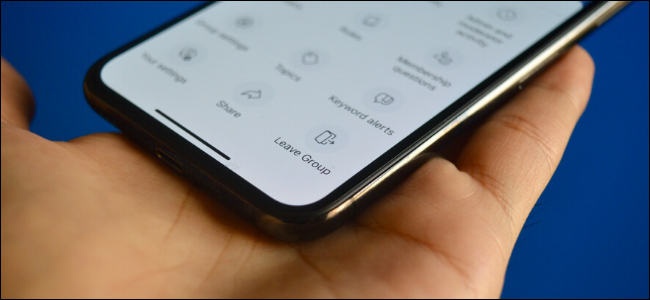
The process is slightly different on the iPhone or Android app. Open the group and select the "Tools" icon from the top-right corner.
Now, select the "Group Settings" option.

Here, scroll all the way down to the bottom of the page and tap the "Archive" button.

From the next screen, select a reason for archiving, and tap the "Continue" button.

Here, tap the "Archive" button. Your group will be archived.

You can come back to the group at any time and tap the "Unarchive" button to resume activity.

How to Delete a Facebook Group
The process of deleting a Facebook Group is not as transparent, though. You first have to remove all members and then leave the Facebook Group yourself to actually delete it.
Only the group's creator (who is the same as the admin) can delete the group. If the creator is no longer part of the group, then any admin can delete the group.
On the Facebook website, open the Facebook Group that you want to delete. Click the "Members" button on the top toolbar.

You'll now see a list of all the members. Click the "Menu" button next to a member, and choose the "Remove Member" option.

From the pop-up, click the "Confirm" button.

Now repeat the process for all the members in your group. When you're the only one who's left (you have to be the creator and admin of the group), click the "Menu" button from the top toolbar, and select the "Leave Group" option.

Facebook will ask you if you're sure you want to leave and delete the group. Click the "Leave Group" button to confirm. Your group will now be deleted.

To delete a Facebook group on the Facebook app on your iPhone or Android smartphone, navigate to the Facebook Group, and tap the "Tools" icon from the top-right corner.
Here, tap the "Members" button.

Now, select a member's name, and from the options, select the "Remove (Member) From Group" option.

From the pop-up, tap the "Confirm" button.

Repeat this process for all members until you're' the only person who's left in the group.
Again, tap the "Tools" button from the top-right corner, and from the "Admin Tools" menu, tap the "Leave Group" option.

Tap the "Leave and Delete" button to delete the group once and for all.

You can also deactivate or delete your personal Facebook account.