Quick Links
Spotify allows you to change the streaming quality of the music or playlists you listen to, but you'll need a Spotify Premium subscription to be able to do so. If you want to improve your Spotify sound quality, here's how.
Setting Spotify Streaming Quality
While Spotify will generally try to set the right streaming quality automatically, it's possible for you to manually set this yourself. This forces Spotify to use a higher quality for certain devices, especially if you're using Spotify with good audio equipment.
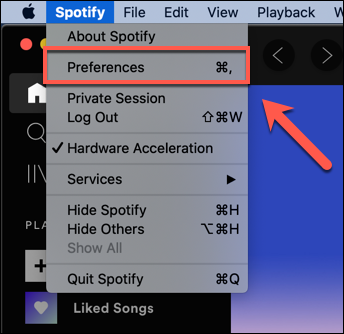
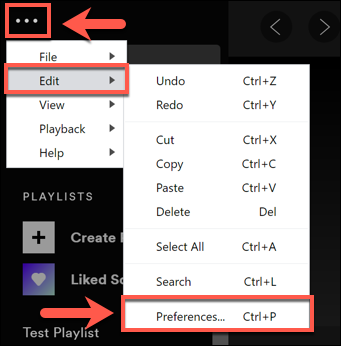
To do this in the Spotify app on Windows or Mac, you'll need to open the "Preferences" menu.
To do this on Mac, click Spotify > Preferences from the menu bar.
On Windows, you'll need to click the three-dot menu button in the Spotify application and then select Edit > Preferences to access the menu.
For iPhone, iPad, and Android devices, tap the settings gear icon in the top-right corner of the "Home" tab to access the "Preferences" menu.
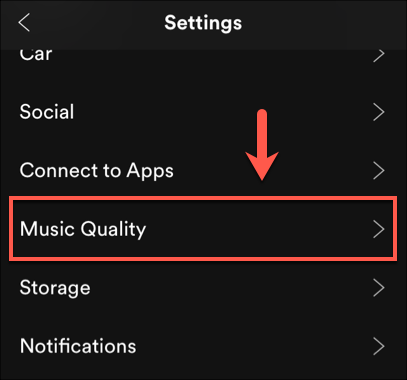
iPhone and iPad users will need to tap "Music Quality" at the next stage.
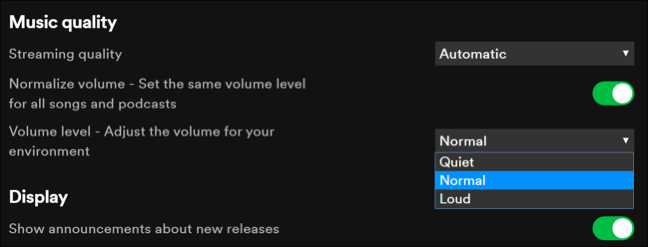
In the "Preferences" menu, you can change the streaming quality under the "Music Quality" section. iPhone and iPad users will be able to do this under the "Music Quality" menu instead.
Click or tap the "Streaming Quality" drop-down menu and select one of the available options on Mac or Windows. Android, iPhone, and iPad users can select one of the options listed under "Streaming" instead.
These range from low to very high on Android, iPhone, iPad, and Mac, or from normal to very high on Windows. Select one of these options to change the quality---the setting will be applied automatically.
You can test each quality setting to determine the best option for your device or return it to the "Automatic" setting to allow Spotify to make the decision.
How to Enable or Disable Spotify Volume Normalization
Volume is just another way for artists and other music creators to determine the impact of their music. A louder song generally has a different impact on listeners than a softer, quieter song.
To help even this out, Spotify uses something called volume normalization. This helps to ensure that the volume levels for any song or audio file you play using Spotify remains at the same level.
You may prefer to disable this setting if you find that the music you enjoy is underwhelming in Spotify's audio player. To do this, head to the "Preferences" menu.
On Windows, click Edit > Preferences. Mac users will need to head to the menu bar and press Spotify > Preferences instead. For Android users, press the settings gear icon on the "Home" tab.
By default, Spotify's volume normalization setting is enabled. To disable it, select the slider next to the "Normalize Volume" setting.
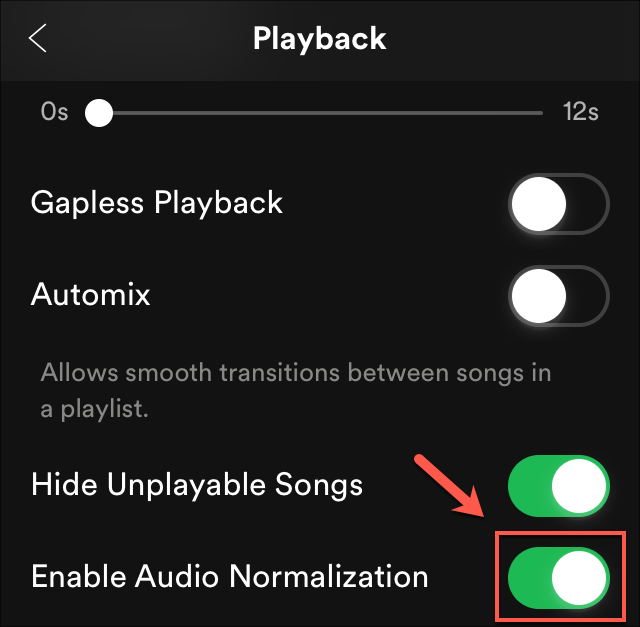
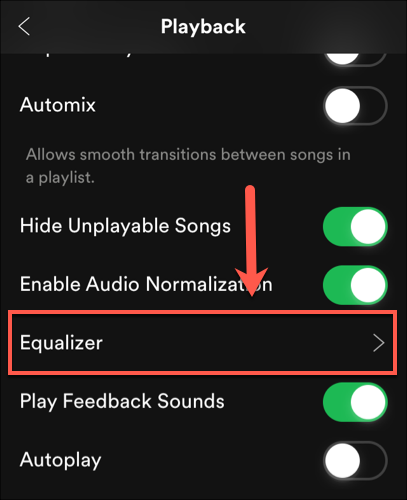
On iPhone and iPad, you'll need to tap the settings gear to access the "Preferences" menu and then tap Playback > Enable Audio Normalization instead.
A green slider means the setting is on, while a gray slider is off. This should mean that, for certain types of audio, you'll be able to listen to the music as the artist intended---in full, unrestricted volume.
If you'd prefer to leave volume normalization on, you can change the impact of the setting. Click or tap the "Volume Level" drop-down menu, underneath the "Normalize Volume" slider.
By default, this is set to "Normal" as a middle-ground option for all types of audio. You can change this to either "Quiet" or "Loud," depending on your preference.
As before, these settings will be applied automatically as soon as they've been applied and can be quickly changed, should you wish to alter or revert the changes you've made.
Using the Spotify Equalizer on Android, iPhone, and iPad
A music equalizer is used to allow you to adjust the volume levels for different types of audio. These help you to adjust how audio may sound in different environments---an echo is a good example of how a sound may change in a cave, compared to an open field.
You can use Spotify's built-in equalizer to achieve the same effect, while also changing Spotify's preset sound settings to make different types of music sound better with your audio equipment.
This is only available as an option for Android, iPhone, and iPad users, but you may be able to do this with third-party software on Mac and Windows PCs.
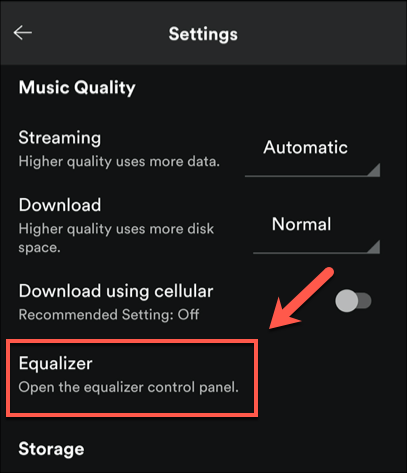
On iPhone, iPad, and Android devices, select the settings gear icon under the "Home" tab. For Android devices, tap the "Equalizer" option under the "Music Quality" section to enter the equalizer options menu.
For iPhone and iPad users, tap "Playback" first and then select "Equalizer" under the "Playback" menu.
The setting menu will look different, depending on the platform you're using.
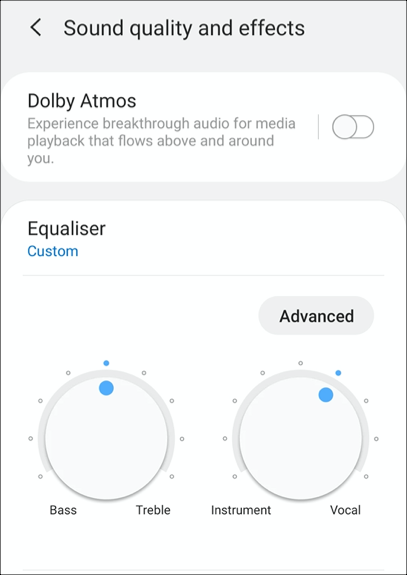
For Android users, you'll be taken to the Android settings menu (this will vary, depending on your device). From here, you can use apply different, preset frequency levels to your audio.
These settings include normal, pop, classic, jazz, rock, as well as a custom level to set your own equalizer settings.
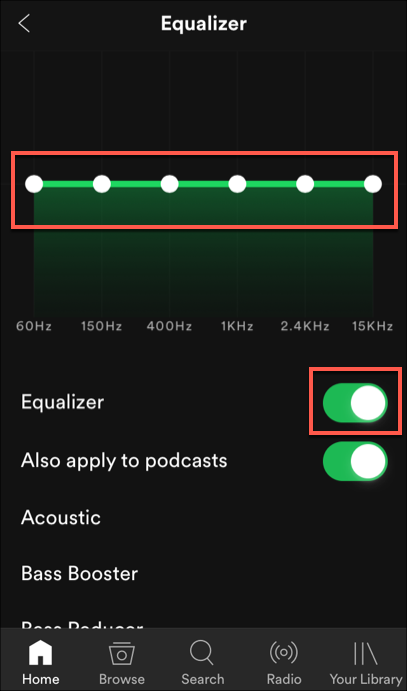
On iPhone and iPad, you can use Spotify's built-in equalizer menu to set preset levels. Like the Android settings menu, you can set a preset option, or change the audio frequencies manually by moving the dots shown on-screen.
You can also disable the equalizer entirely by pressing the "Equalizer" slider.
Any changes you make on either platform will be applied automatically.


