Quick Links
Not every photo you take is the perfect snap---a slight jolt is all it takes for your picture to become blurry. Thankfully, image editing tools like Adobe Photoshop allow you to quickly sharpen images. Here's how to do it.
These instructions were made using Photoshop 2020, but they should work for older versions of Photoshop, too. Before you begin, however, you should be aware that this isn't a miracle cure for bad photography, and can result in some unwelcome image distortion.
Using the Smart Sharpen Filter in Photoshop
Photoshop has various image filters that you can use to modify your images. Two filters are particularly useful for image sharpening: the Smart Sharpen and Unsharp Mask filters.
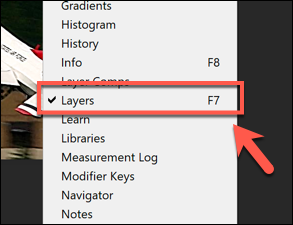
To use the Smart Sharpen filter, you'll need to open a suitable image in Photoshop. Make sure you can see the Layers panel on the right. If you can't, click Window > Layers.
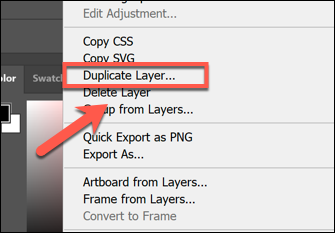
In the Layers panel, right-click on a layer and then select the "Duplicate Layers" option.
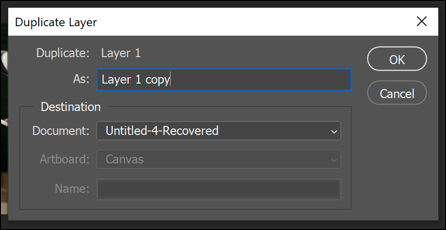
Press "OK" in the "Duplicate Layer" box to confirm.
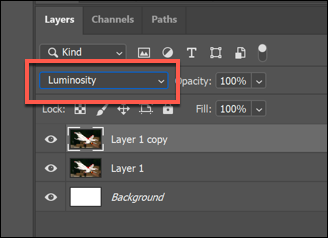
With the duplicate layer selected and using the drop-down menu in the Layers panel, change the blend option from "Normal" to the "Luminosity" option.
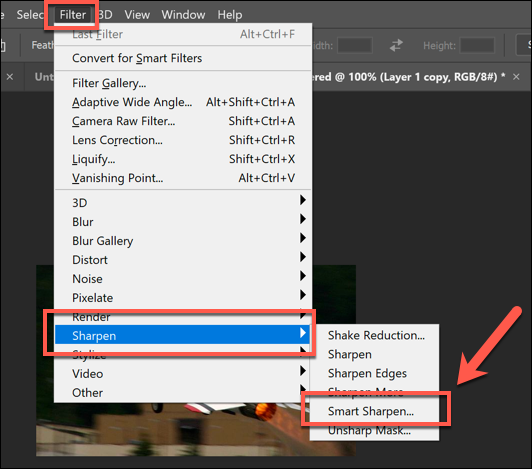
To apply the Smart Sharpen filter, click Filter > Sharpen > Smart Sharpen.
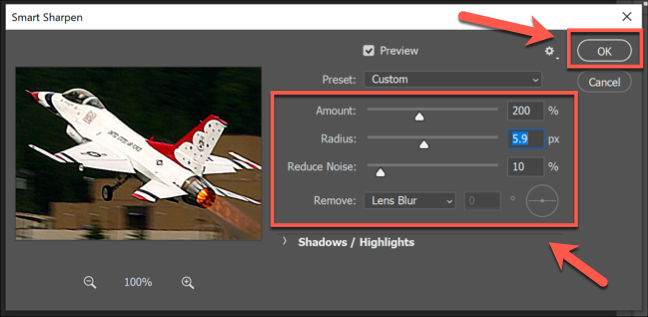
In the "Smart Sharpen" options box, click to enable the "Preview" checkbox. You'll then need to change the various options to suit your own image.
Set the "Amount" figure to between 100 and 200 percent. For the "Radius" and "Reduce Noise" options, slowly increase the amounts using the sliders provided, taking notice of the sharpness of the image in the preview as you go.
Once you're happy with the preview, press "OK" to apply the filter.
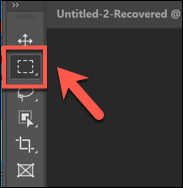
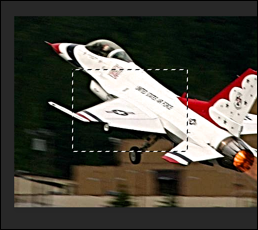
The filter will be applied to the duplicate layer. If you'd prefer, you can use the marquee tool to select parts of your duplicate layer to delete the filter effect.
With parts of your image selected, pressing the Delete key on your keyboard to remove parts of it to expose parts of the original image layer. This will allow you to focus the sharpness on part of your image, leaving some of it as the original.
Using the Unsharp Mask Filter in Photoshop
You can use the Unsharp Mask filter as an alternative to the Smart Sharpen filter. This works similarly to Smart Sharpen but, unlike that filter, your image will have less noise appear on the image.
Start with a fresh image in Photoshop, make sure the Layers panel is visible (Window > Layers), then duplicate your existing image layer by right-clicking the layer in the Layers panel and pressing the "Duplicate Layers" option.
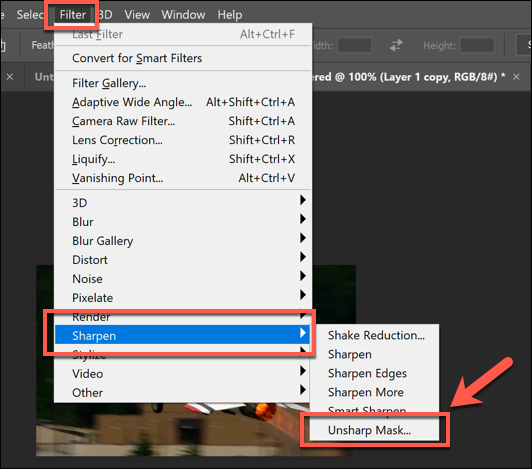
Once the layer is duplicated, click Filter > Sharpen > Unsharp Mask....
In the "Unsharp Mask..." box, make sure that the "Preview" checkbox is enabled. Modify the sliders as required, watching the image preview to see the impact on the image as you go.
Start with an "Amount" figure around 50 percent and a "Radius" figure between one to two, increasing as you go. You can probably leave the "Threshold" figure at zero, but you can increase this if your image requires a lot of sharpening.
When you're happy with the preview, select the "OK" button to apply the filter to your image.
As before, you can make further changes to your overall image by using the marquee tool to select parts of your duplicate layer.
Once those layers are selected, press the Delete key on your keyboard to remove sharpened sections, exposing the original layer underneath.
Sharpening Images Using the Camera Raw Editor
You can use the Photoshop Camera Raw editor to apply image processing to unedited image data captured by a high-resolution digital camera saved in a Camera Raw file format like RAW, NEF, or SRW.
This allows you to apply sharpening to an image before you save it to another format like JPG or PNG.
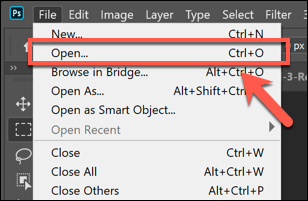
RAW files are only created by certain digital cameras and smartphones when images are taken and the images are left uncompressed. If you have an image in the RAW, NEF, or other uncompressed image file format, open it in Photoshop by selecting File > Open.
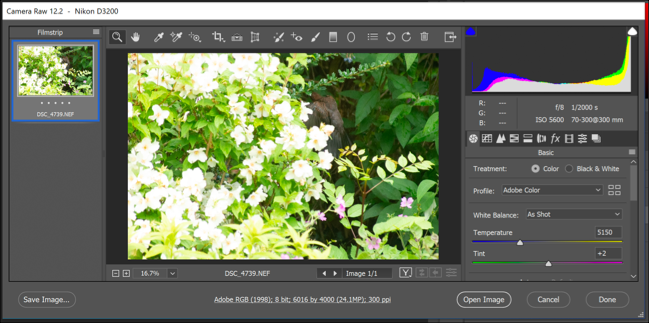
Photoshop will automatically open the Camera Raw editing menu when you open a suitable Camera Raw file. This allows you to make many of the levels and filter adjustments to your image---including image sharpening.
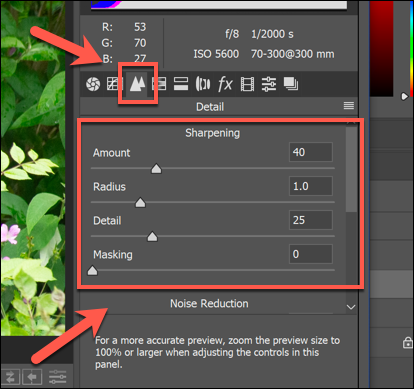
To sharpen an image, press the "Detail" icon in the left-hand menu. Alter the "Amount" figure to set the amount of image sharpening---a good figure to start with is around 50 percent, moving upwards.
Use the "Radius" slider to alter the impact of the sharpening across your image, with a lower amount better for photos with much finer detail. Leave the "Detail" slider low if you want detailed edges to remain sharp.
For the "Masking" slider, leave the setting at zero to apply the same level of sharpening to your image as a whole, or increase it to tweak the setting to target the more "vibrant" sections of your image with more colors or textures.
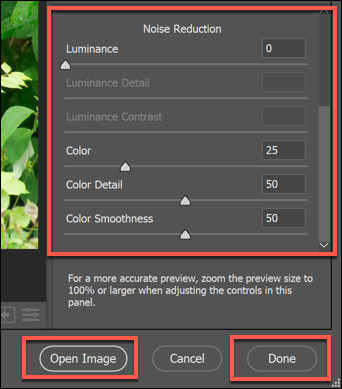
You can also alter the level of noise created by your image sharpening changes---more image noise usually means less detail. Increase the "Luminance" slider above zero, then move the "Luminance Detail" slider to reduce the level of noise.
Finally, click either the "Open Image" or "Done" options to finish.
Your changes will be saved to the file once you've finished editing. If you choose the "Open Image" option, you'll be able to make further changes to the image in the main Photoshop editing window.


