Quick Links
In Windows 10, sometimes thumbnail icons have a white or black border behind them, appear blank, or just display improperly. You can often quickly fix the issue by deleting the Windows thumbnail cache. Here's how.
What Are Thumbnails Anyway?
By default, instead of using generic icons for documents, Windows 10 creates small pictures of image or document contents called thumbnails. These tiny images are stored in a special database file called the thumbnail cache. Thanks to this file, Windows does not have to recreate thumbnail images every time you open a folder.
If you are seeing garbled or incorrect thumbnails, it's likely that the thumbnails stored in the cache for those particular files have been corrupted or are missing. This could be due to a bug in Windows or perhaps an intermittent hardware problem.
In that case, the best immediate course of action is to delete your thumbnail cache---which does not harm your personal data---and allow Windows to recreate the faulty thumbnails from scratch the next time you restart your machine. Here's how to do it.
How to Clear the Thumbnail Cache in Windows 10
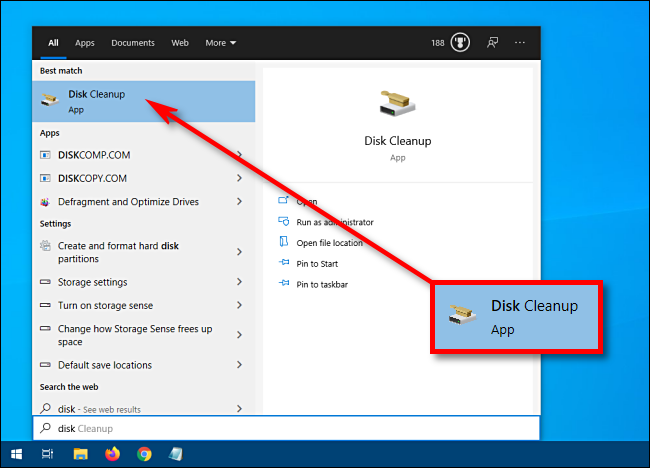
First, open the "Start" menu and type "Disk Cleanup." Click on the "Disk Cleanup" app that appears.
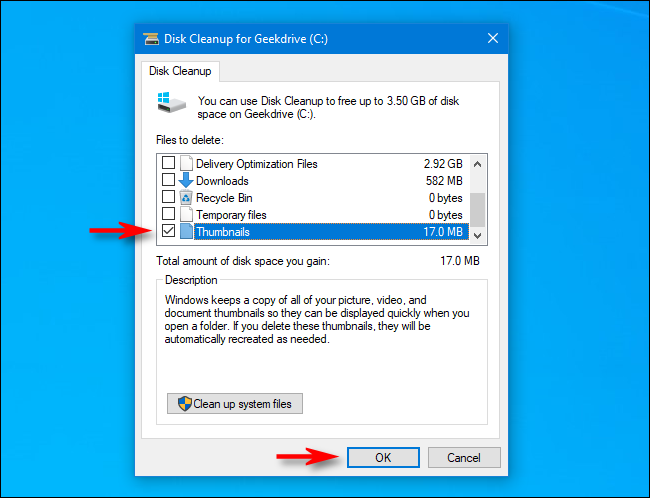
In the Disk Cleanup window, locate the "Files To Delete" list. This list includes different types of stored data that Windows can safely delete to clean up space.
If you don't want to delete anything but thumbnails, uncheck any items (such as "Downloaded Program Files" and "Temporary Internet Files" at the top of the list).
Scroll down the "Files To Delete" list and check the box beside "Thumbnails." (It may already be checked by default. In that case, leave it how it is.) Click "OK" to remove all the selected data from your system.
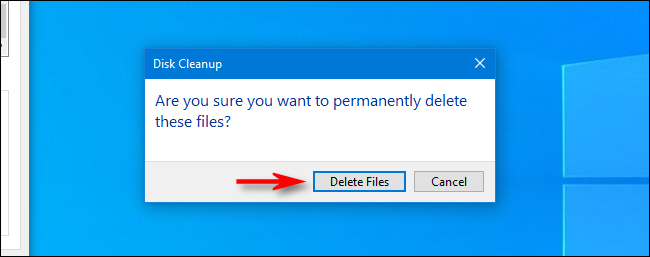
A pop-up dialog box will ask, "Are you sure you want to permanently delete these files?" Click "Delete Files."
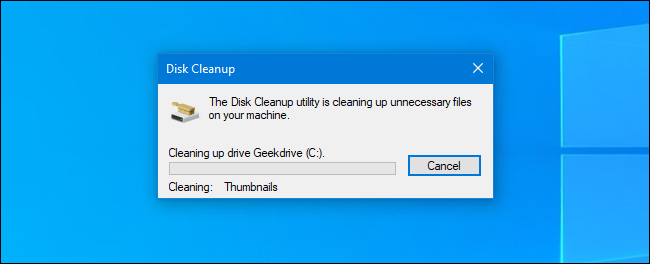
Another pop-up will appear, this time showing you the progress of deleting your Windows thumbnails.
After the thumbnail cache files have been deleted, restart your computer.
Now, open File Explorer or look at the Desktop to see if this has fixed your problem. Hopefully, the thumbnails have been recreated and are now correct. If not, there may be a problem with the file itself. Open the file in the associated program and see if it actually matches the apparently faulty thumbnail Windows created. If they match, then you've found your problem.
How to Disable Thumbnails Completely
Alternately, if you find that Windows 10 thumbnails never work properly or have become a nuisance, you can turn them off completely. Here's how.
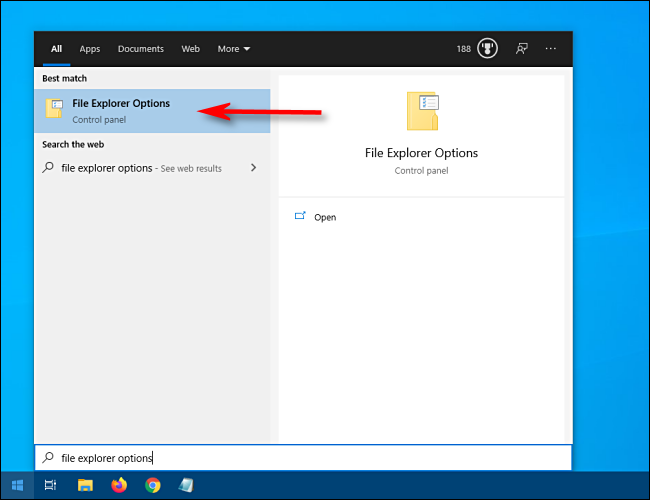
Open the "Start" menu and type "File Explorer Options." Click on the first result. (You can also launch these options in File Explorer by clicking on View > Options in the menu bar.)
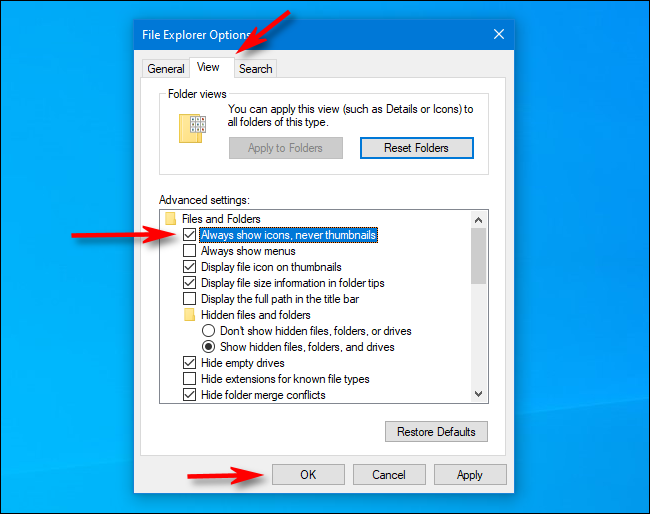
In the File Explorer Options window, click on the "View" tab. In the "Advanced Settings" list, put a checkmark beside "Always show icons, never thumbnails." Then, click "OK."
After that, Windows will only display standard icons for documents instead of thumbnails. Sit back and enjoy your streamlined computing experience.


