Quick Links
Adding a watermark to your document can be a good way to personalize or label it as your own. Unfortunately, Google Docs doesn't offer a built-in way to do this, but there is a workaround you can try instead.
If you want a built-in way to add watermarks to your documents, you can use Microsoft Word and add watermarks to Word documents instead.
Create a Watermark Image using Google Drawings
Because Google Docs doesn't allow you to create or add a watermark directly, you'll need to create one. You can do this by creating a background image containing your watermark and then placing it behind your text.
You can then apply the watermark image to each page of your Google Docs document by adding it to your document header or footer.
While it is possible to create a watermark image using any available image editing tool, but the easiest method is to use Google Drawings.
You can usually access a limited version of this tool by pressing Insert > Drawing > New Drawing in Google Docs, but this won't allow you to change the transparency of your image. Instead, you'll need to create it using the full Google Drawings tool.
Insert a Watermark Image
The Google Drawings tool allows you to create charts, diagrams, and basic images that you can use inside other Google apps. Create a new Google Drawings drawing to begin.
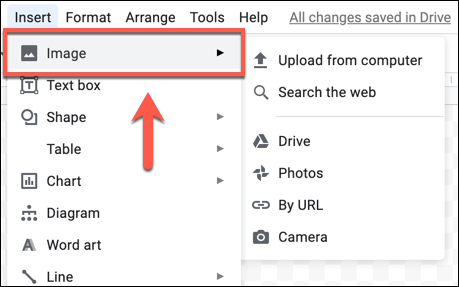
If you have a logo or other image that you'd like to use as your watermark, click on the "Image" icon in the menu bar or press Insert > Image instead.
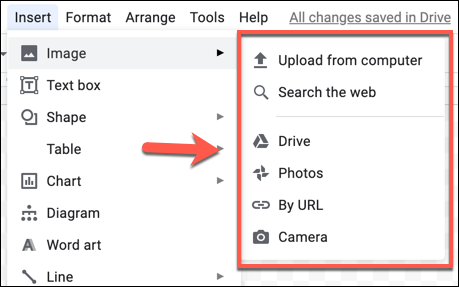
Choose the "Upload From Computer" option to upload an image from your PC.
You can also insert images from your Google Drive or Google Photos storage, from the web, or by searching for it using the built-in Google images search. Select one of these options to proceed.
Insert Watermark Text
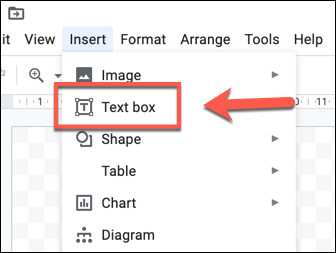
Alternatively, if you want to add text to your background image, click on the "Text Box" icon in the menu bar or press Insert > Text Box.
Using your mouse, drag and drop to create a text box on the drawing canvas. Once released, the blinking cursor will appear, allowing you to type or paste in text.
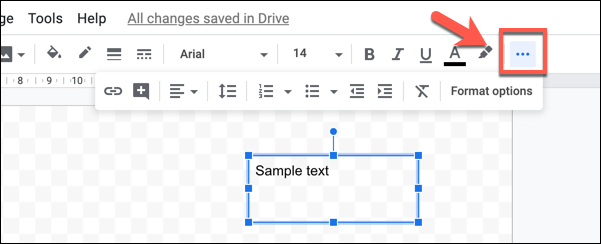
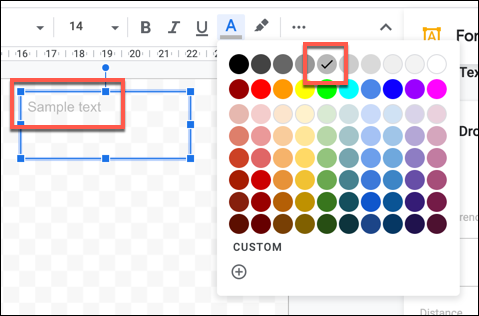
Once you've added your watermark text, select it, then format it using the options in the menu bar. You may need to click on the three-dotted More button to view all of your options.
You can change the font, text size, text emphasis, spacing, alignment, and more---all the typical text formatting options are available.
As there are no transparency options for text in Google Drawings, you'll need to choose a lighter text color (for instance, gray) to apply a similar effect.
Change Watermark Transparency in Google Drawings
Before you save your Google Drawings image, you'll need to alter the transparency. A watermark image typically has reduced transparency to allow for it to sit behind text on a document without blocking it.
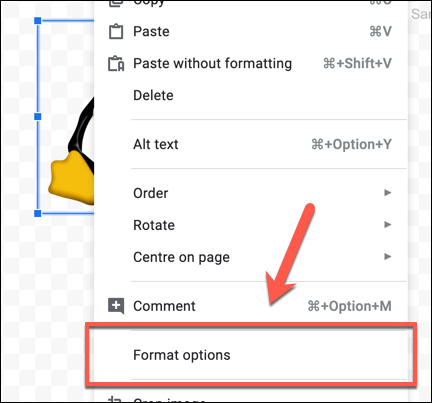
You can only do this for images or objects you insert into a Google Drawings drawing, however. For images and objects, right-click and select the "Format Options" button.
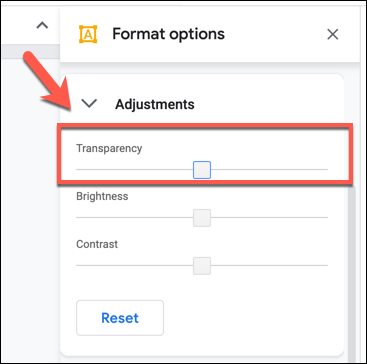
This will bring up the Format Options side menu on the right. In the Adjustments tab, move the "Transparency" slider up to reduce the transparency.
A level of 50 percent or higher should be acceptable.
Once you're done, add a name to your drawing in the "Untitled Drawings" box in the top-left.
Your drawing will be saved automatically to your Google Drive storage, so return to your Google Docs document at this point.
Insert a Watermark Image in Google Docs
Unfortunately, Google Docs doesn't allow you to place the drawing behind any text. If you want the text to overlay your drawing, you'll need to add this to your drawing using a text box directly before you insert it.
If you want your watermark drawing to apply to all of your pages without disrupting your text, you'll need to add it to your header or footer.
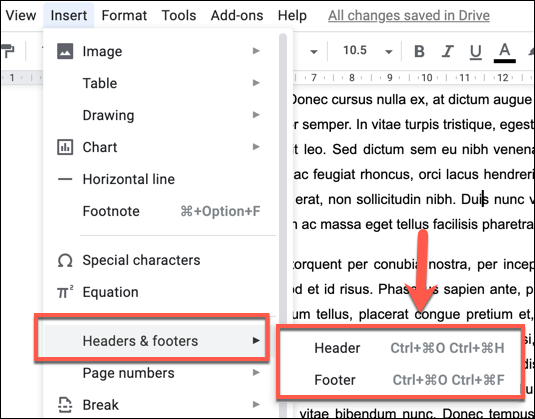
To do this, open your Google Docs document and press Insert > Headers & Footers, choosing either the "Header" or "Footer" options.
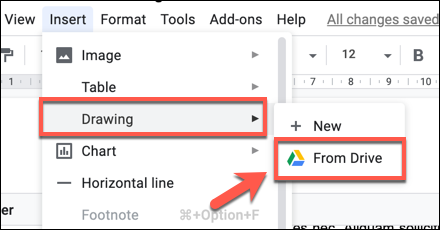
With your header or footer option, press Insert > Drawing > From Drive to add your drawing.
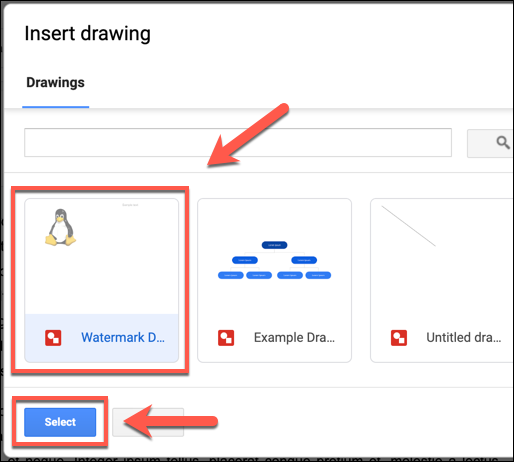
In the "Insert Drawing" box, select your saved Google Drawings image and then press the "Select" button to add it to your document.
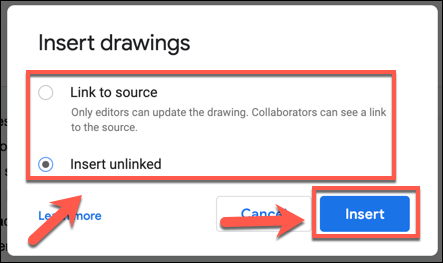
You can choose to "Link To Source" to allow a link to the image to be saved with your document, or "Link Unsourced" to add the image without a link.
Either option is fine, but if you plan on sharing your document without linking back to your drawing, choose the "Link Unsourced" option. Press "Insert" to insert the drawing once you're ready.
The drawing will be inserted into your header or footer at this point. Resize your image using the border resize options, then move your image using your mouse or trackpad to a suitable position.
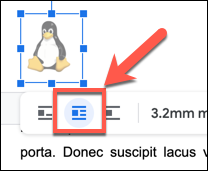
If you can't move the drawing, you'll need to select it and click on the "Wrap Text" option.
Your inserted drawing will now be visible across your document on each of your pages.
You can also insert it to the body of your document, but you'll need to make sure the "Wrap Text" option is selected and place it in areas with no text, otherwise it will disrupt your document layout.


