Quick Links
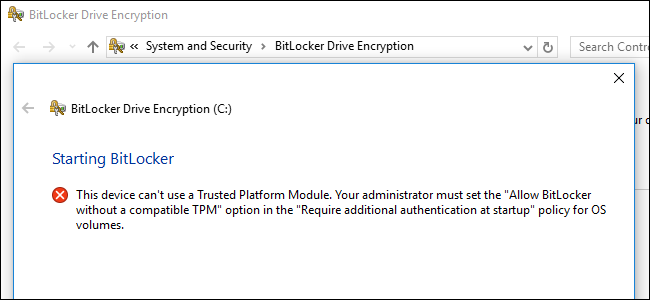
BitLocker's full-disk encryption normally requires a computer with a Trusted Platform Module (TPM). Try to enable BitLocker on a PC without a TPM, and you'll be told your administrator must set a system policy option.
BitLocker is available only on Professional, Enterprise, and Education editions of Windows. It's also included with Windows 7 Ultimate, but isn't available on any Home editions of Windows.
Why Does BitLocker Require a TPM?
BitLocker normally requires a Trusted Platform Module, or TPM, on your computer's motherboard. This chip generates and stores the actual encryption keys. It can automatically unlock your PC's drive when it boots so you can sign in just by typing your Windows login password. It's simple, but the TPM is doing the hard work under the hood.
If someone tampers with the PC or removes the drive from the computer and attempts to decrypt it, it can't be accessed without the key stored in the TPM. The TPM won't work if it's moved to another PC's motherboard, either.
You can buy and add a TPM chip to some motherboards, but if your motherboard (or laptop) doesn't support doing so, you may want to use BitLocker without a TPM. It's less secure, but better than nothing.
How to Use BitLocker Without a TPM
You can bypass this limitation through a Group Policy change. If your PC is joined to a business or school domain, you can't change the Group Policy setting yourself. Group policy is configured centrally by your network administrator.
If you're just doing this on your own PC and it isn't joined to a domain, you can use the Local Group Policy Editor to change the setting for your own PC.
To open the Local Group Policy Editor, press Windows+R on your keyboard, type "gpedit.msc" into the Run dialog box, and press Enter.

Navigate to Local Computer Policy > Computer Configuration > Administrative Templates > Windows Components > BitLocker Drive Encryption > Operating System Drives in the left pane.

Double-click the "Require additional authentication at startup" option in the right pane.

Select "Enabled" at the top of the window, and ensure the "Allow BitLocker without a compatible TPM (requires a password or a startup key on a USB flash drive)" checkbox is enabled here.

Click "OK" to save your changes. You can now close the Group Policy Editor window. Your change takes effect immediately---you don't even need to reboot.
How to Set Up BitLocker
You can now enable, configure, and use BitLocker normally. Head to Control Panel > System and Security > BitLocker Drive Encryption and click "Turn on BitLocker" to enable it for a drive.

You'll first be asked how you want to unlock your drive when your PC boots up. If your PC had a TPM, you could have the computer automatically unlock the drive or use a short PIN that requires the TPM present.
Because you don't have a TPM, you must choose to either enter a password each time your PC boots, or provide a USB flash drive. If you provide a USB flash drive here, you'll need that flash drive connected to your PC each time you boot up your PC to access the files.

Continue through the BitLocker setup process to enable BitLocker drive encryption, save a recovery key, and encrypt your drive. The rest of the process is the same as the normal BitLocker setup process.
When your PC boots, you'll have to either enter the password or insert the USB flash drive you provided. If you can't provide the password or USB drive, BitLocker won't be able to decrypt your drive and you won't be able to boot into your Windows system and access your files.
