Have you ever noticed that you normally can not enable Aero in a Windows 7 or Vista virtual machine? The latest VMware Player beta lets you do just that, and we have a full walk-through on how to accomplish it.
Note: VMware Player is available for Windows and Linux. Keep in mind that this is Beta Software and will occasionally be temperamental.
Installing VMware Player
The install process is not complicated, but relevant install windows are shown here. Also keep in mind that the entire process will take more than a few minutes to finish while everything is being installed.
Note: During the install process you will not see the EULA for VMware Player.
During the install process you will most likely be presented with the following message window asking confirmation to install driver software. Click “Install”.

Once the install process has finished you will be asked to restart your computer.

After you have restarted your computer and started VMware Player for the first time, then you will be presented with the EULA. You will need to accept in order to use the software.

This is the “Main Window”. Since it is still in beta it did display a little oddly on our system as shown in the following screenshot. But it functioned without any problems whatsoever for us.

These are the menus for VMware Player…easy access to everything that you need to get started. Notice the link for the Guest Operating System Installation Guide in the “Help Menu”.

These are the “Preferences”. If for some reason it is not selected, then make certain that “Suspend the virtual machine” is activated so that your virtual O.S. can be preserved when you are finished with it for the day (or night).

If there is a newer beta version available you will be presented with the following message window each time you start the program (unless you have update checks disabled in the “Preferences”). If you click on “Go to the Update Site” you will have to register for an account in order to download the newest version. At this point it is much simpler to wait for the latest release to become available on one of the software download websites such as Softpedia…

Installing a System in VMware Player
When you get ready to install an operating system, there are two ways to start the process: 1.) Go to the “File Menu” and select “Create a New Virtual Machine…” or 2.) Click on “Create a New Virtual” in the “Main Window Sidebar”.
This is the process that you will need to go through to set up your new system. In the first window you will need to select the install source (i.e. DVD or ISO file). Notice that you can also create a blank hard disk if desired… Click “Next” once you have chosen your source.

We chose to install directly from an ISO file. As you can see VMware Player automatically detected the type of install and provided the opportunity to enter the “Windows Product Key” now instead of having to do it later. Click “Next” once you have entered the necessary information.

Choose the name for your new virtual O.S. and the location for the new “hard disk”. Click “Next” to proceed.

Determine the disk size and what form you would like to have your new O.S. stored in. Click “Next”.

At this point you are nearly ready to begin installation…but first you should click on “Customize Hardware…” to make any desired changes to the settings.

There are eight areas to sort through in the “Settings Window” but none of it is complicated. In the first area determine if you would like to use the recommended Memory or change it to a higher/lower setting. We chose 1500 MB for our O.S. install…
Note: The only change from the defaults that we made was for the Memory size…everything else was already set up very well for our purposes.

Make any desired changes for the number of processor cores or the preferred mode for the virtualization engine.

Make changes for the CD/DVD access if needed.

You should not need to do anything regarding the Floppy settings…

Modify the Network settings (if desired) to best suit your needs.

Enable or disable USB capability.

Change the access to the host Sound Card and/or choose a specific one if you need to do so.

Make any necessary changes for the Display… Click “OK” when you have finished with the settings to return to the virtual O.S. creation wizard screen

At this point you are ready to click “Finish” and get things started.

As the setup is proceeding you may or may not see a message window letting you know how to access any external storage devices…it will depend on what is hooked up to your host computer.
You will also see the following window asking to download and install VMware Tools. Click “Download”.

This same window will display as the VMware Tools are downloading and installing/updating…

While the VMware Tools are downloading/installing, you will notice that your new O.S. will also be installing at the same time. Here you can see our Windows 7 system getting settled in. There will be the “traditional” restarts for your new system to complete the installation and a restart for new VMware Drivers that need to be added in to help your new O.S. run smoothly. Let all of the VMware Drivers install…there were four for our particular installation.
Note: If you are installing Windows 7, it will start up with the Basic theme and you will need to turn Aero on.

Windows 7 in VMware Player
Here is our new Windows 7 installation set at full screen with Aero enabled. Although it did not show up in our screenshot, there will be a short (approximately one-third screen width) and thin VMware Toolbar at the top of the screen.
Note: It is very easy to move between your virtual and actual operating systems…simply drop out of full-screen mode using the “Minimize/Maximize Button” in the upper right corner to gain access to your regular system. There are also hotkey combinations available…

A close-up look at the “Start Menu & Taskbar Area”…

Shut Down Process & Extra Settings
Here is our virtual O.S. “popped out” of full-screen mode. To save the current state of your O.S. when you shut down go to the “VM Menu”, then “Power”, and select “Suspend”.
Note: A “Snapshot Function” is not available at this time.

We enabled the closing messages in the “Preferences”, so the following message window appeared when we selected “Suspend”. Click “Yes” to start the shut down process…

Here you can see the “Save Process” in action…

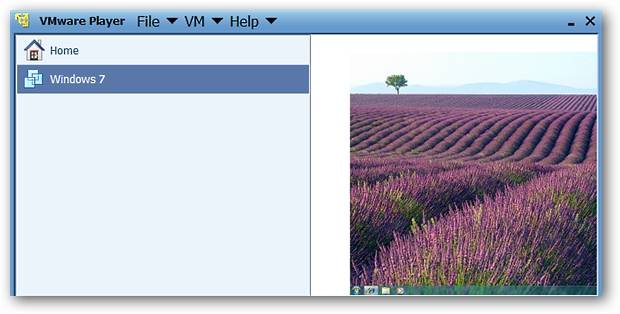
Once your O.S has finished shutting down you will be returned to the “Main Window”. Notice that there is a small screenshot of the desktop along with some basic information about that particular system…

Once you have closed a freshly installed O.S. you will find access to a whole new set of “Options” for the system in the “Settings Window”.
There is not really a lot to change or modify in the first area outside of the virtual O.S. name and home directory. You can enable a virtual keyboard if desired…

Decide if you want to automatically enter full-screen mode or not when you power up your virtual systems.

Set up Folder Sharing if desired…

Select the update style for VMware Tools that best suits your needs.

Enable or disable window decorations and/or the “Applications Menu”.

Bonus
During our tests we found that we could easily copy and paste items such as links & images back and forth between the virtual and host systems with no problems.
Conclusion
VMware Player provides a very nice way to install and enjoy full-screen Aero goodness in a virtual operating system.
Links
*Download VMware Player without an account*
Download VMware Player (version 3.0.0.197124) - Softpedia
*VMware Player website requires an account*
Download VMware Player (version 3.0.203739) - VMware Player Homepage